|
April 2011 - Some of my more recent examples of
work. I shall be working on some Georgian work in April and May.
Typically, if you click on a picture you will be taken to
a full size picture. Some a little too full size but please be patient
as they download.
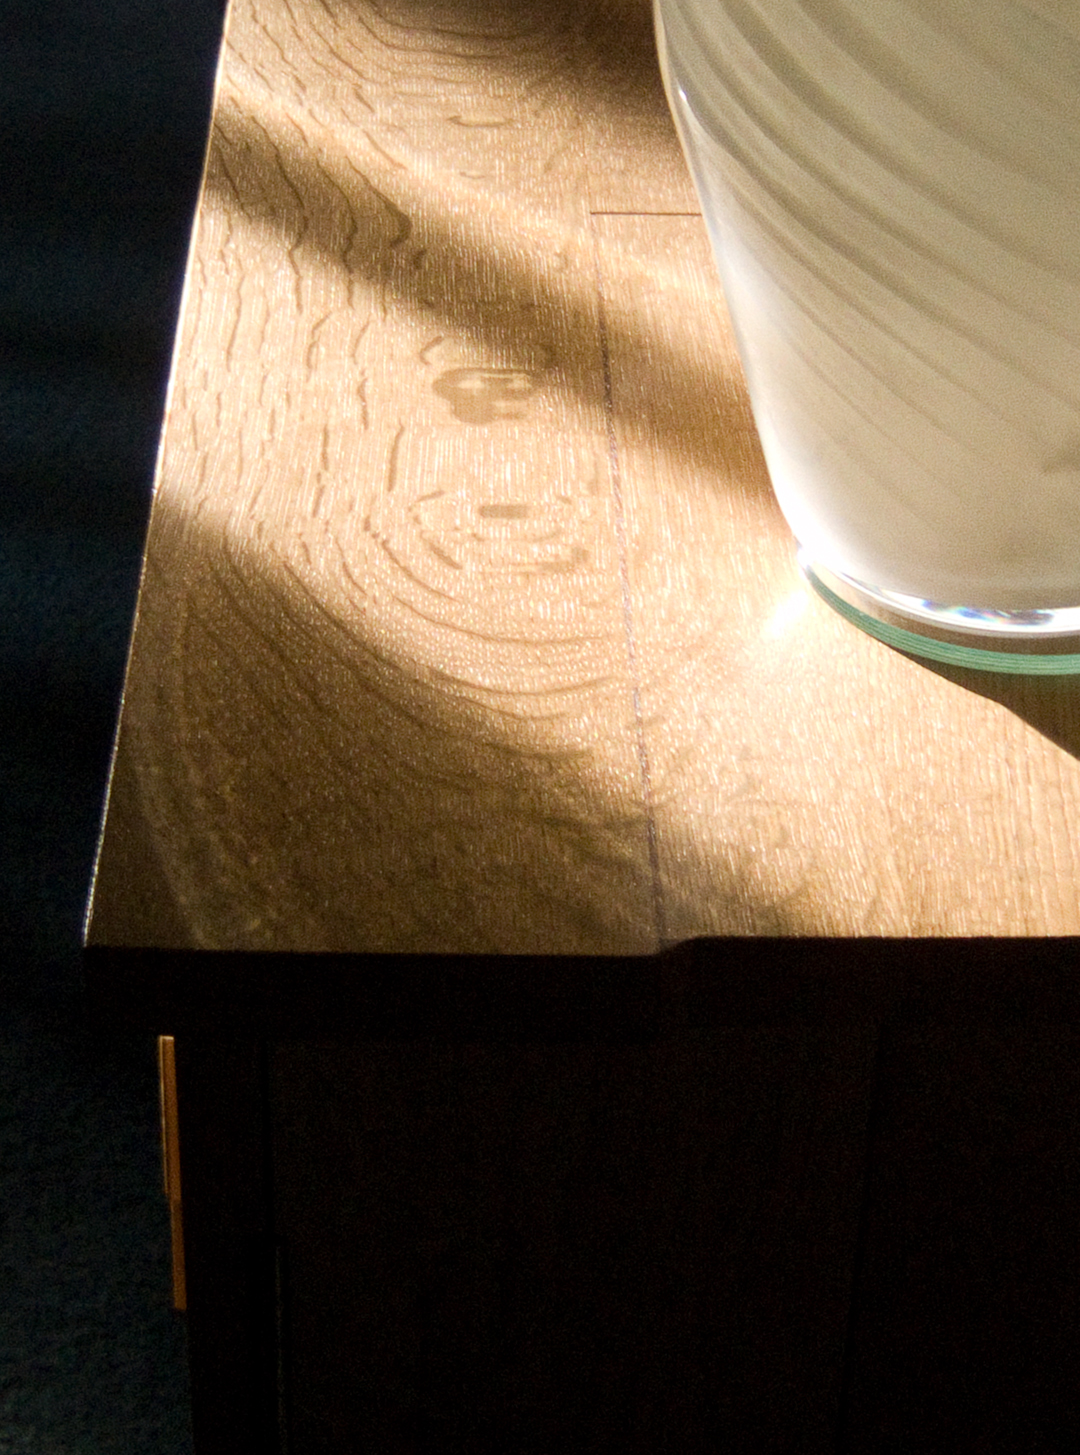
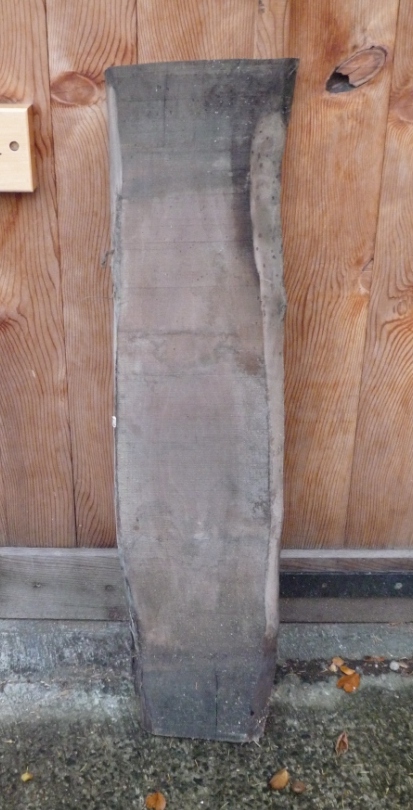
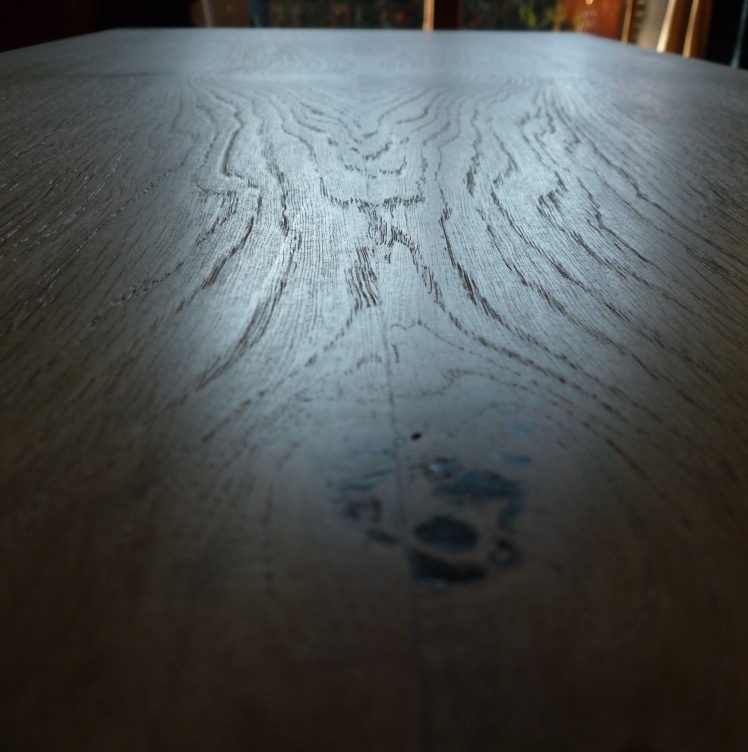
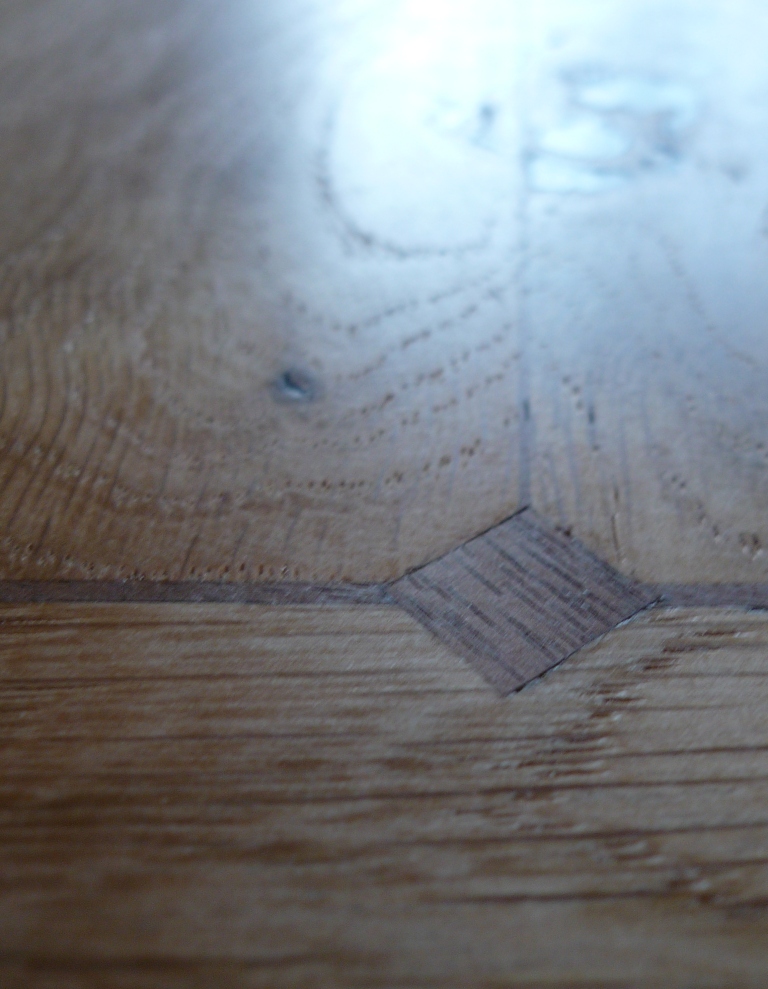
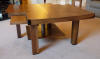
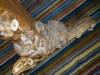
Medullary Rays - This photo was taken
very spontaneously when I realised that the sun was catching, just
perfectly, the top of an Oak sideboard I had made. Too often with flash
photography Oak's rays in quarter sawn boards look gawdy. Not needing to
use flash on this photo meant that it caught much more of a natural
look. More like what you would see in a rich piece of Oak as you passed
it by. The top was inlaid with Walnut banding, the dark, straight lines
that you see in the photo. Please click on the thumbnail for the full
size photo.
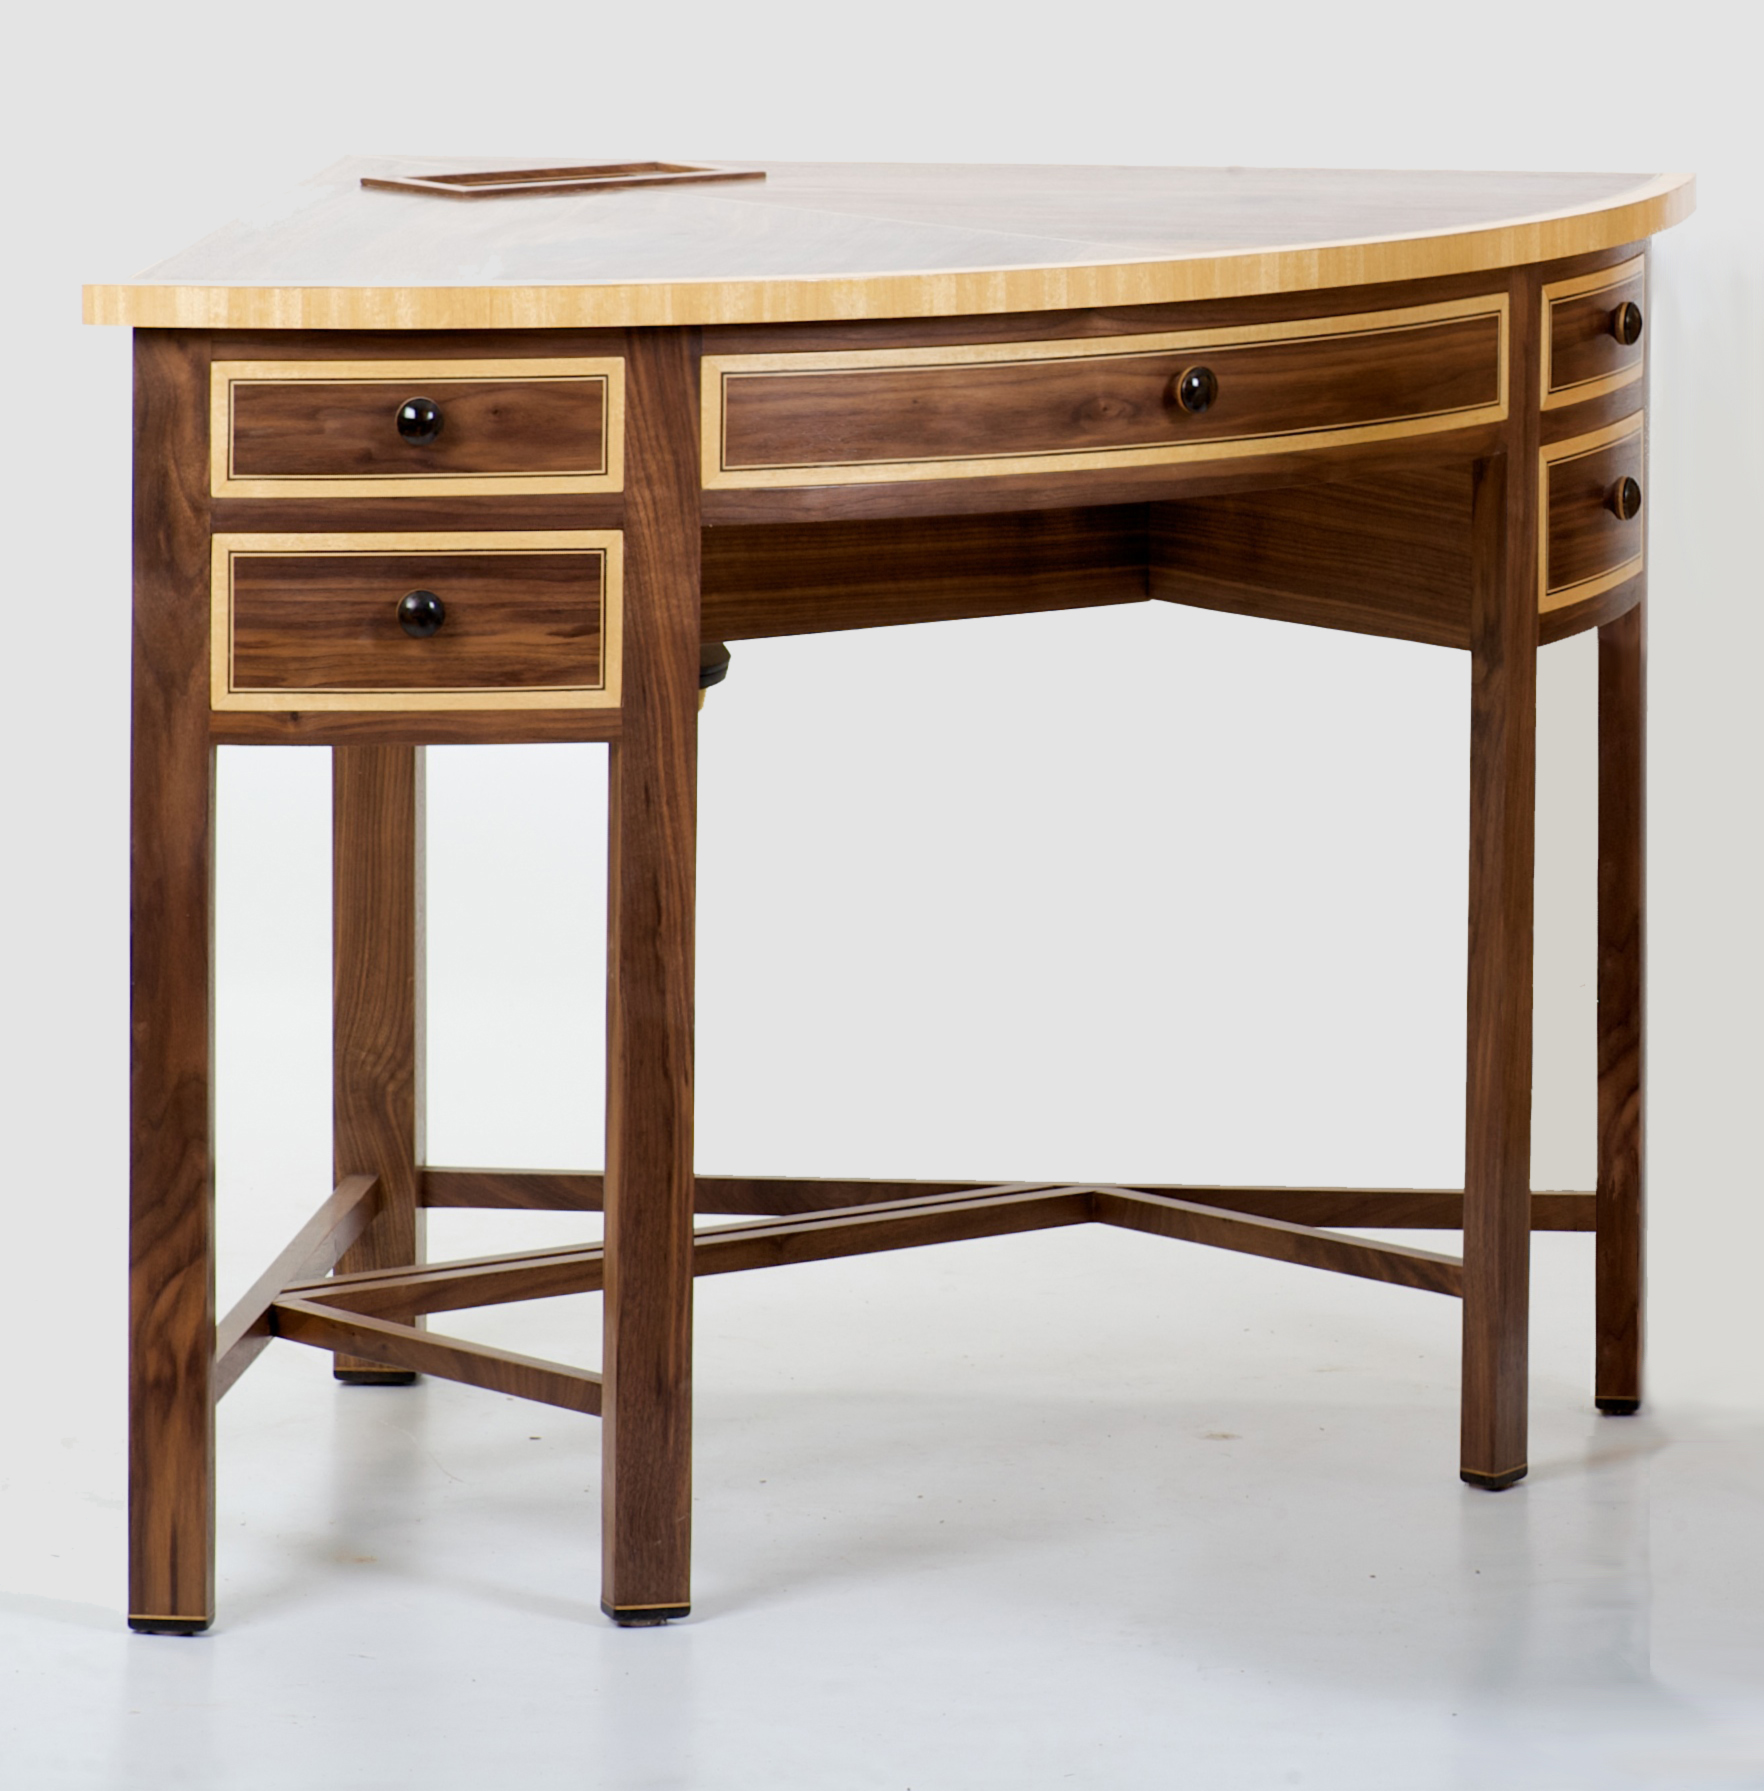
The English Walnut Corner Desk
This was designed and built specifically to
house a laptop and to make use of that much misused corner space. The
desk was built in the Victorian style of veneer on a Pine frame. A lot
of people turn their noses up at veneered pieces but much of the 19th
and 20th century quality furniture was built in such a way. There is no
better way of making the most of fancy hardwoods. Not just from a
commercial point of view but also from an environmental point of view. A
lot of the best stuff has been felled already and it will take a heck of
a long time before more high quality hardwood can be grown.
 The
centre drawer is sized to house a large laptop. The side drawers are
triangular using a simple, yet ingenious, method for ensuring smooth
running. The secret of which I am not likely to reveal here. To the rear
of the top is a faux inkwell which hides the power supply sockets and
houses the laptop's power supply. Very much intended to hide the chaos
of cables. The desk also incorporates two secret compartments. The
centre drawer is sized to house a large laptop. The side drawers are
triangular using a simple, yet ingenious, method for ensuring smooth
running. The secret of which I am not likely to reveal here. To the rear
of the top is a faux inkwell which hides the power supply sockets and
houses the laptop's power supply. Very much intended to hide the chaos
of cables. The desk also incorporates two secret compartments.
The top is edge banded with Satinwood and has
a Boxwood and Ebony inlay splitting the book-matched Walnut. All the
drawers are bow-fronted and have Satinwood banding and inlay as per the
top. The handles are turned from a sandwich of Walnut, Satinwood and
Ebony, as are the feet. The stretchers are solid Walnut and are designed
to reinforce the legs without being in a position where habitual kickers
will destroy them slowly.
If you click on the thumbnail you can see a
more detailed photograph. Please be warned that the lower right of the
photograph has been retouched. This is in no way intended to hide any
flaw of the making but is simply because in the original photograph my
right foot obscured the leg and would have looked a bit silly if I had
kept it in.
This has proved a very popular design. I set
my mind to producing something that had a classical look but was styled
in a more contemporary fashion. I think it might be quite interesting to
make a version in solid but I haven't found the available time.
The Scottish Oak Cabinet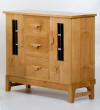
Very much influenced by Greene and Greene,
the cabinet was designed to reside in a hall or dining area. All of the
structure is solid Oak. This is built like a tank. Joints are
dovetailed, morticed and tenoned and half lapped. Very traditional
building techniques were used. Even the back is covered with half lap
Oak panels.
I am not a big fan of arty, high precision
dovetails on drawers but in this case the dovetails were all hand cut.
Being solid Oak this ensured very nice chisel lines could be maintained.
The drawer sides, in my opinion, are, as a result, very pleasing to the
eye. Walnut inlay is used in a number of locations to create design
motifs. All inlay terminates in a Walnut plug or triangle.
Originally designed to have wooden panels in
the doors I changed my mind mid-build and opted to use stained glass. I
chose the colours to work well with the Oak. The panels are removable
and so they can be replaced by any type of panel that is desired. I am
pretty happy with the stained glass panels. I have never been totally
happy with the handles. They were designed to build on the Greene and
Greene motif and are best appreciated from the side. I feel that from
the front they look a bit clumsy. I would probably be happier replacing
them with a simpler design.
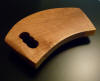
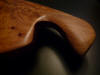
 The base of the cabinet is in solid Oak. The
base is a piece in itself. There are elements of Art Deco and the Arts
and Crafts movement in this piece and the base is no exception. I was
particularly happy with the line, curves and angles that were
incorporated into the base. I really feel that the base does the cabinet
justice. The base of the cabinet is in solid Oak. The
base is a piece in itself. There are elements of Art Deco and the Arts
and Crafts movement in this piece and the base is no exception. I was
particularly happy with the line, curves and angles that were
incorporated into the base. I really feel that the base does the cabinet
justice.
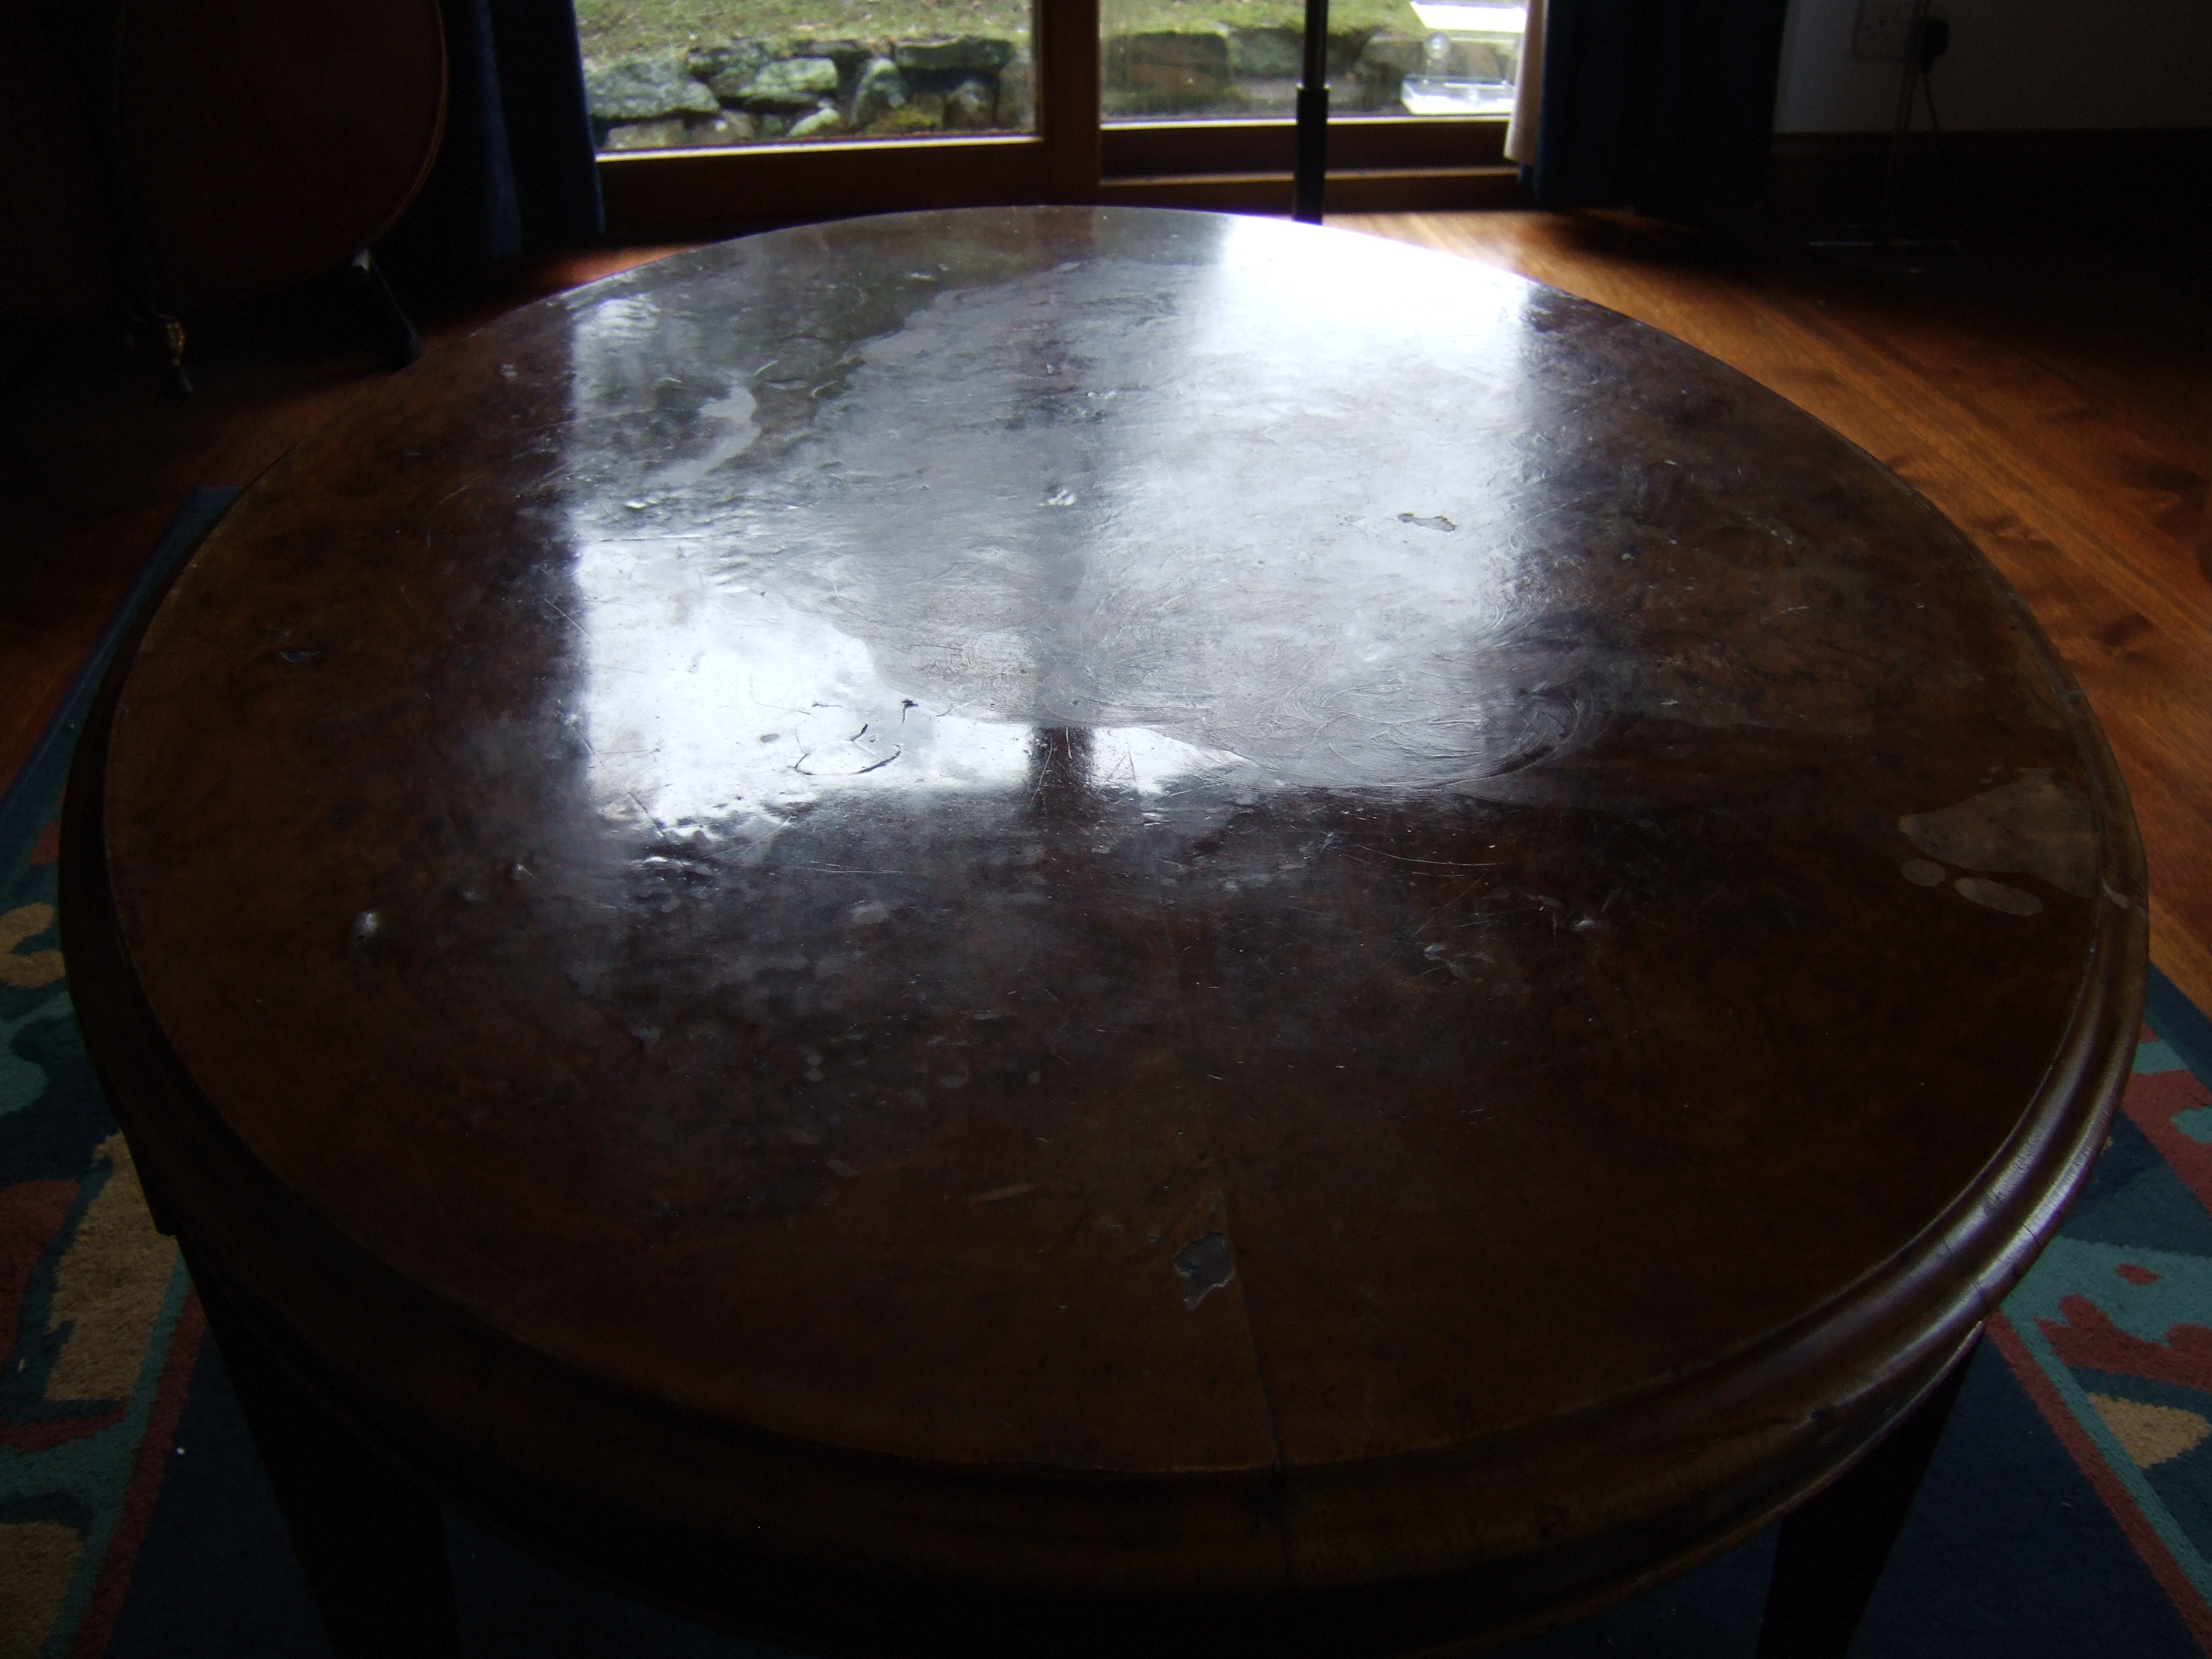
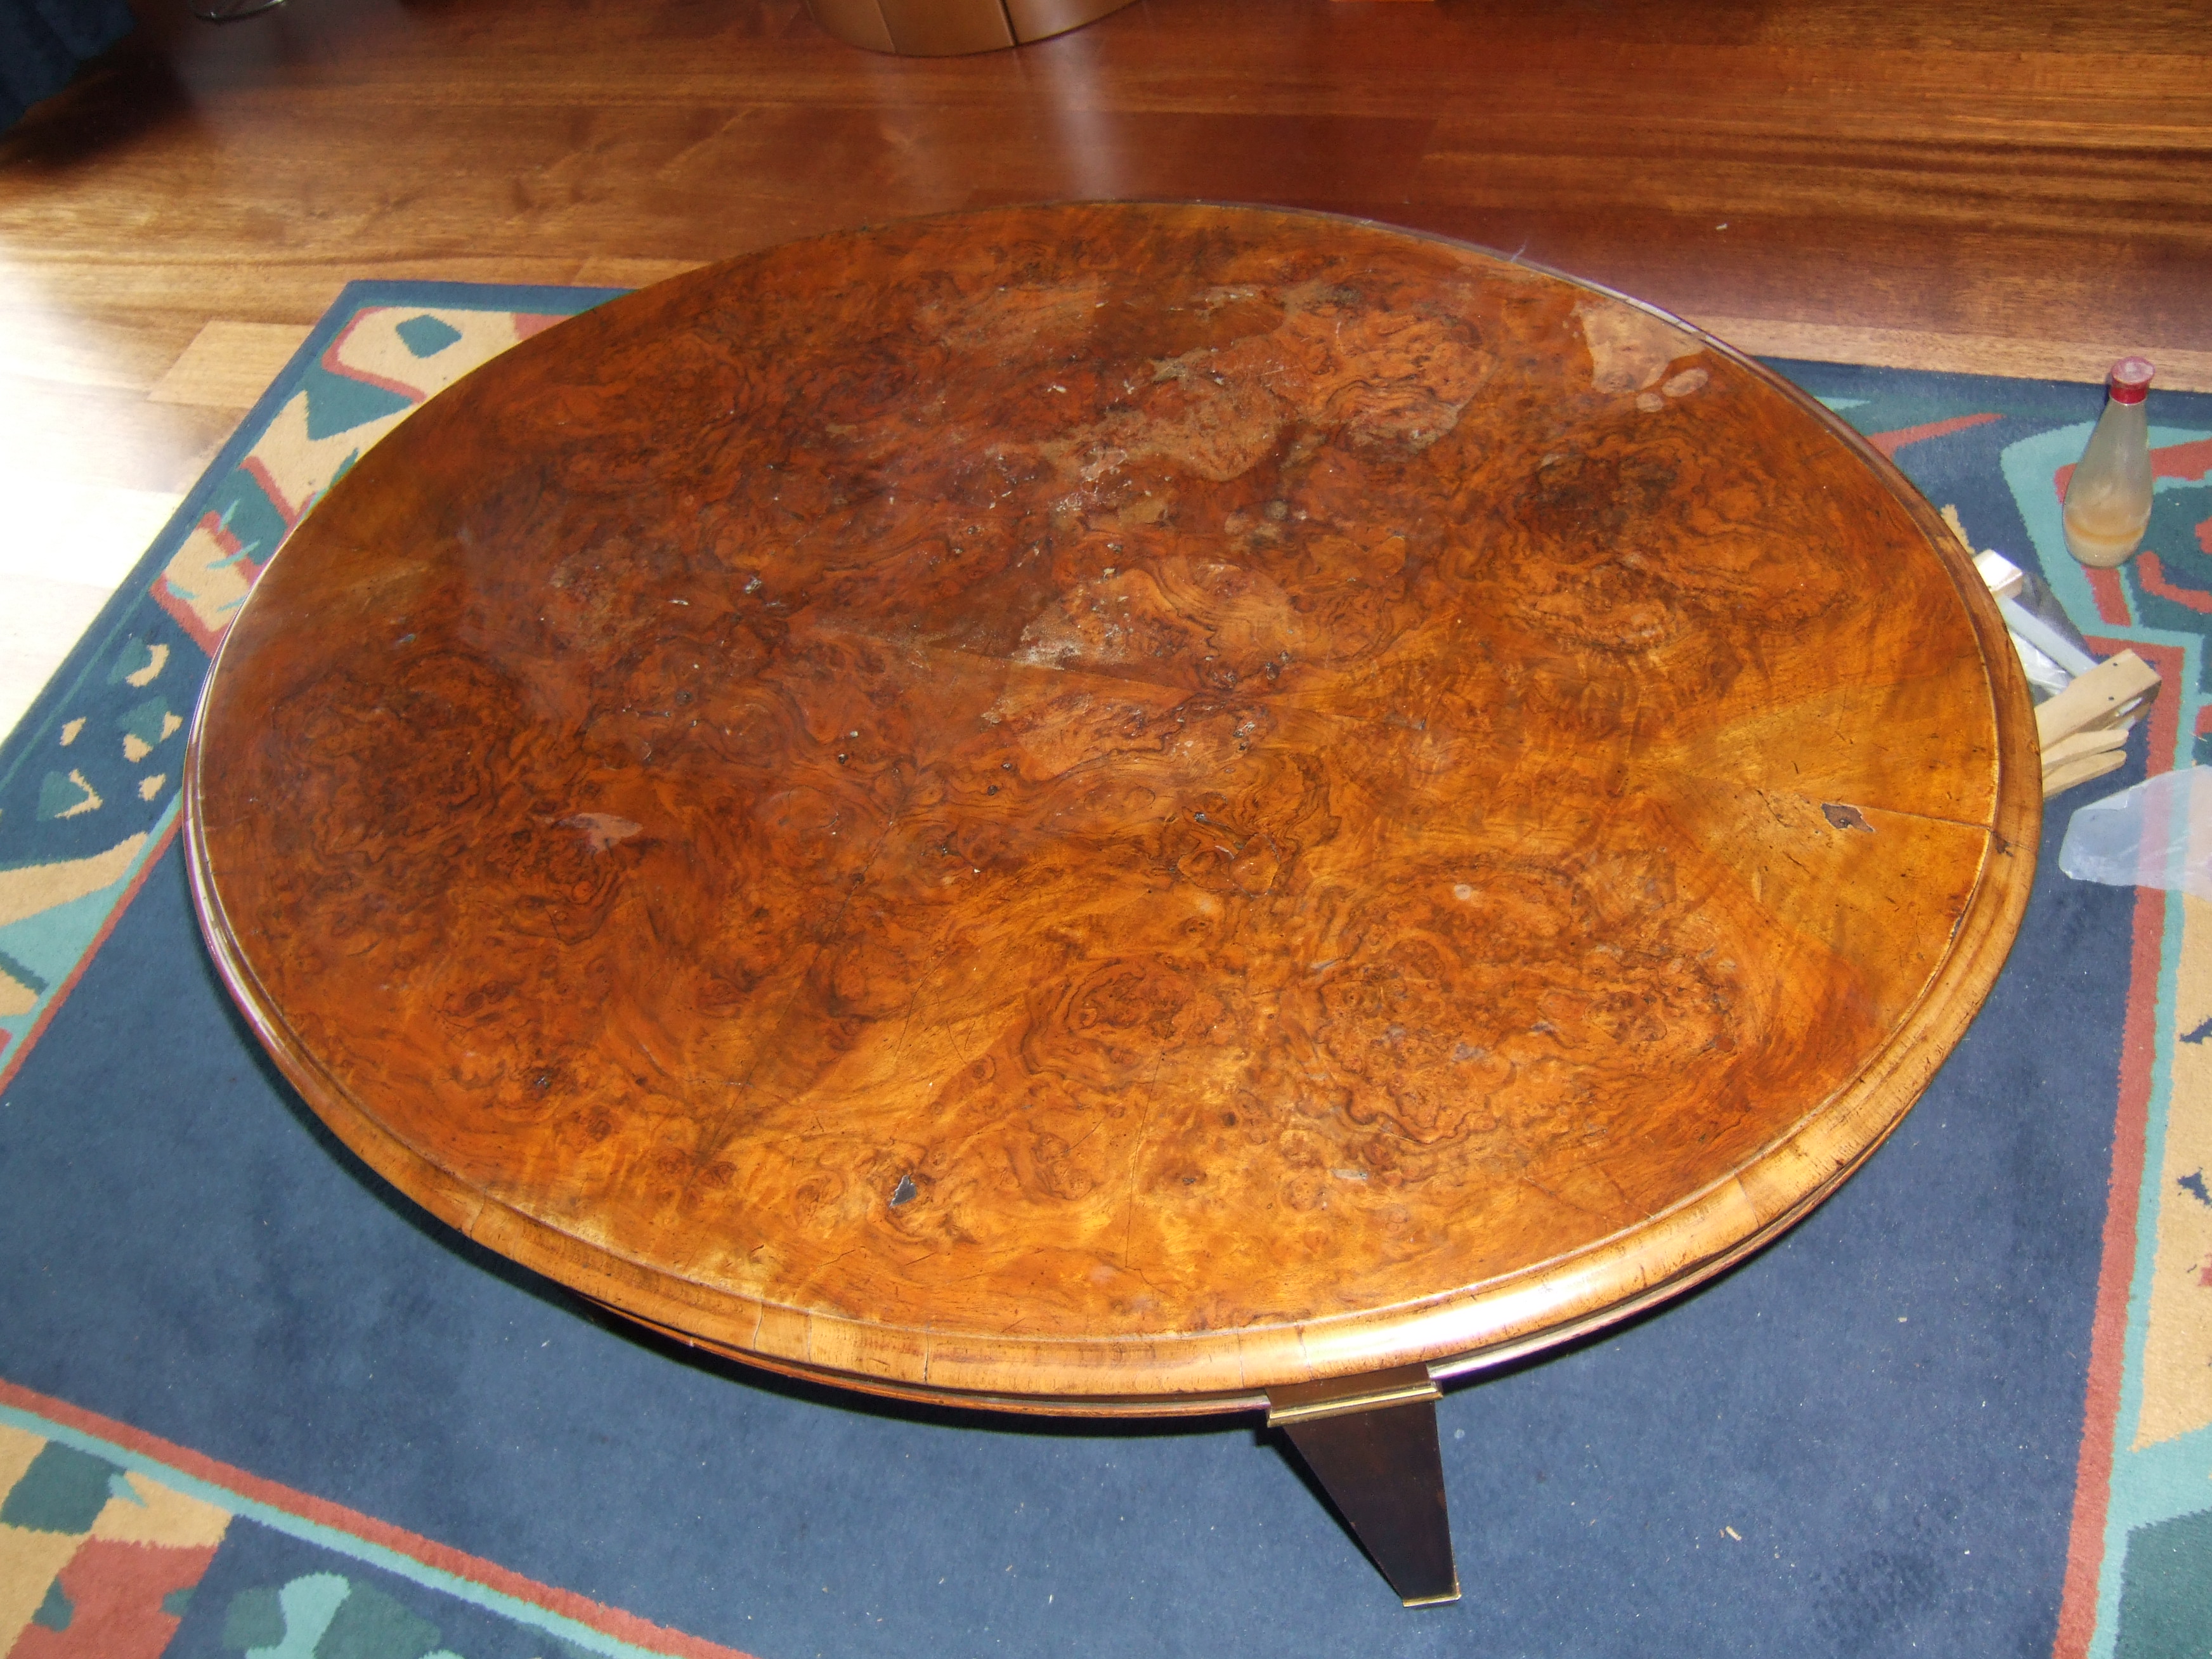
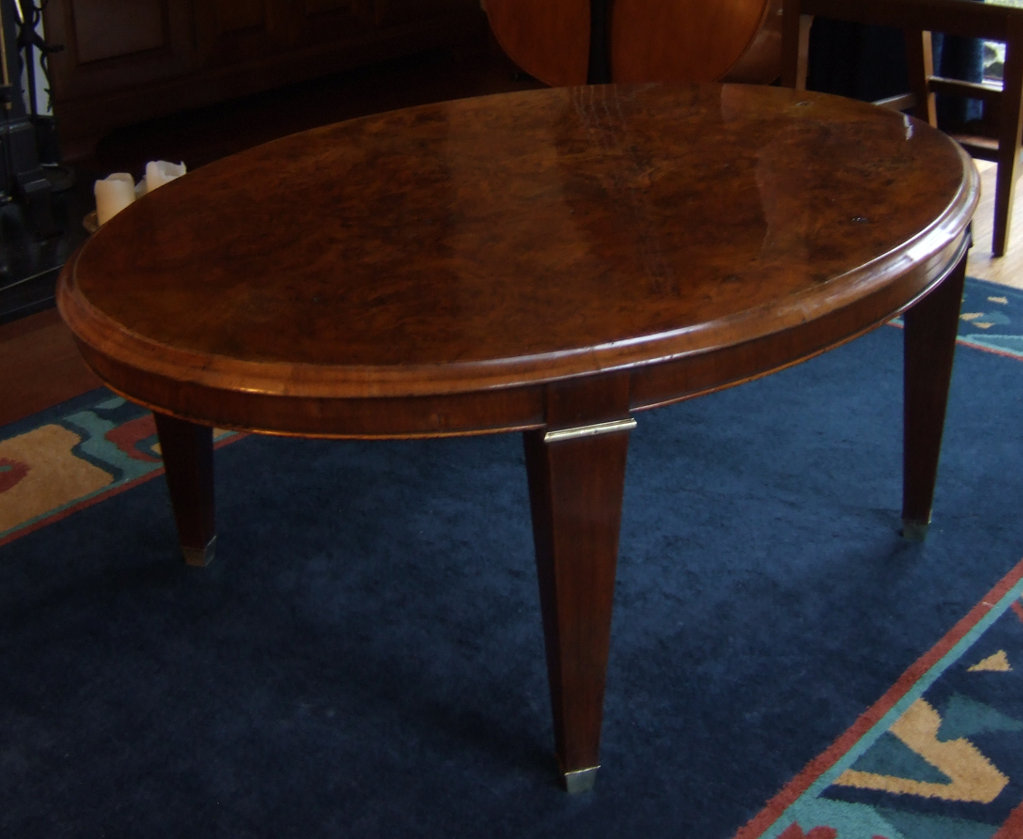
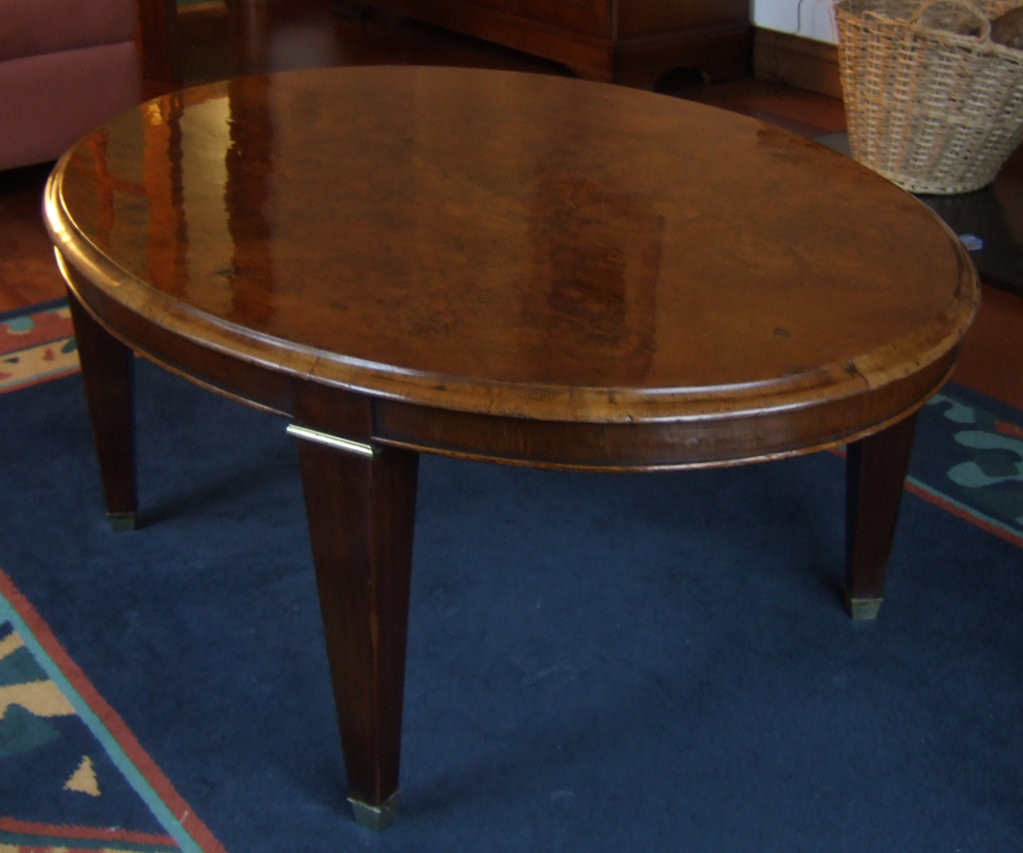
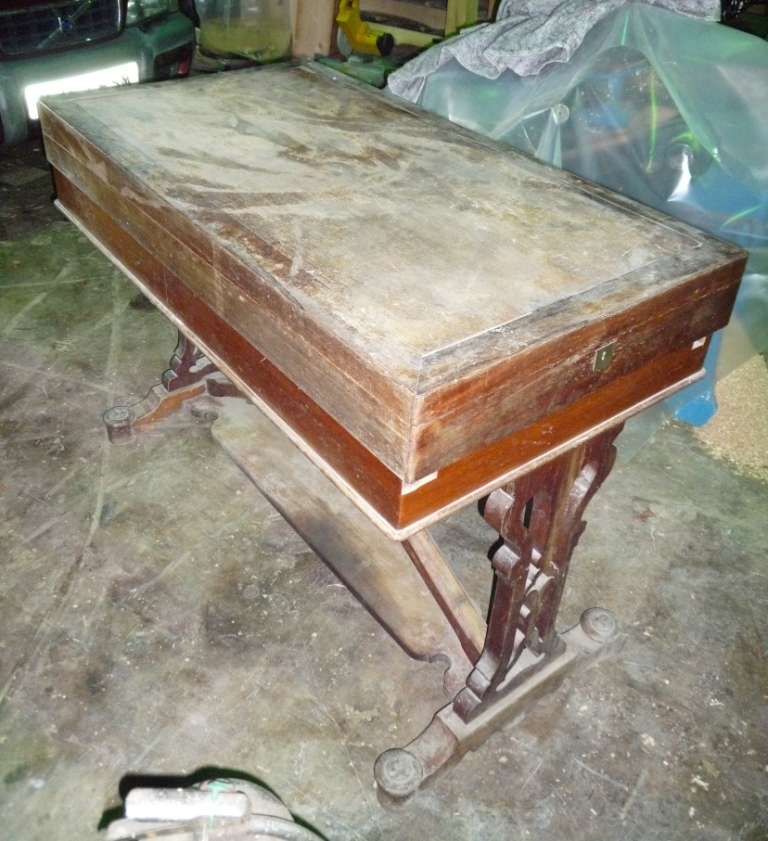
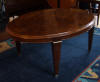
The Walnut-Veneered Low Table
This table had been damaged when an oil
burner had been tipped and its contents streamed across the table. Two
main issues remained once the mess was cleared up. The French Polish on
a significant part of the table ha d
been removed and the oil (waxy) had penetrated the wood and sat as a
layer on the table. You can see the oil effect in the photo on the right
and the area of damage in the photo on the left. There was other, older
damage as well. Probably alcohol spills. d
been removed and the oil (waxy) had penetrated the wood and sat as a
layer on the table. You can see the oil effect in the photo on the right
and the area of damage in the photo on the left. There was other, older
damage as well. Probably alcohol spills.
The table had been restored before. The legs
had been re-polished and the Walnut veneer must have been lifting as it
had been re-laid using traditional animal glue. The veneer was bubbling
in some locations as the glue had lost effect. The glue had been applied
rather thickly in places but I chose not to re-lay the veneer as this
was not part of the spec. The piece was old and needed to stay looking
like it had age.
  The
bubbles were re-glued, the brass high spots were polished as they should
have been and the top was restored and re-polished. The new polish was
blended in to the old polish on the undamaged area and the surface was
aged. The finish is traditional in that the French Polish adds a lustre
to the wood without being mirror-like as it would have been when it was
first made. This approach retains a good degree of the table's original
patina. The
bubbles were re-glued, the brass high spots were polished as they should
have been and the top was restored and re-polished. The new polish was
blended in to the old polish on the undamaged area and the surface was
aged. The finish is traditional in that the French Polish adds a lustre
to the wood without being mirror-like as it would have been when it was
first made. This approach retains a good degree of the table's original
patina.
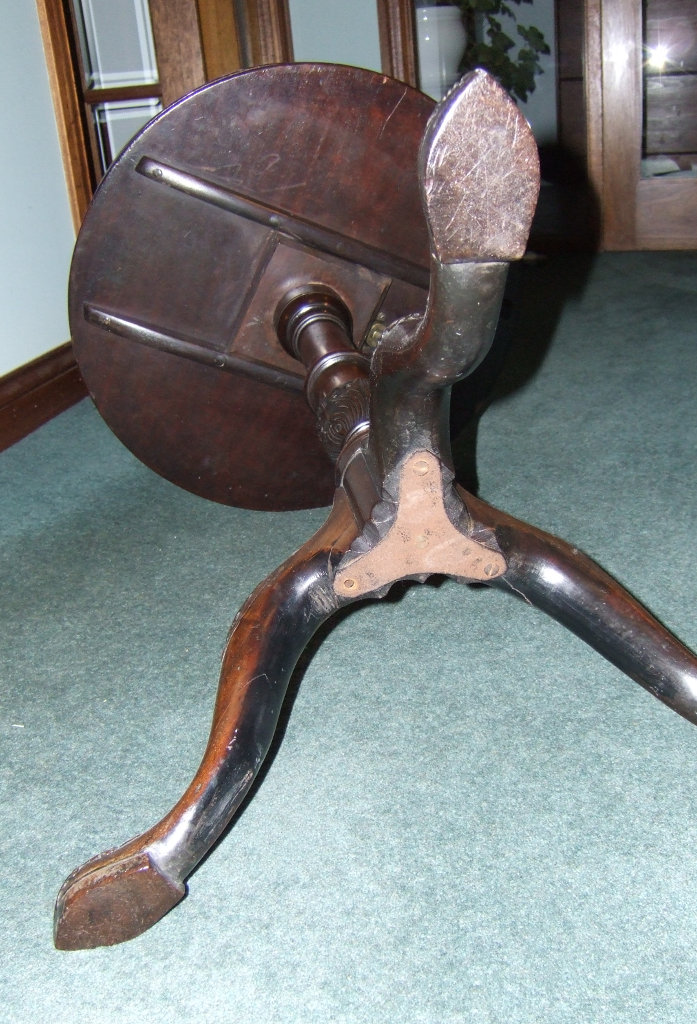
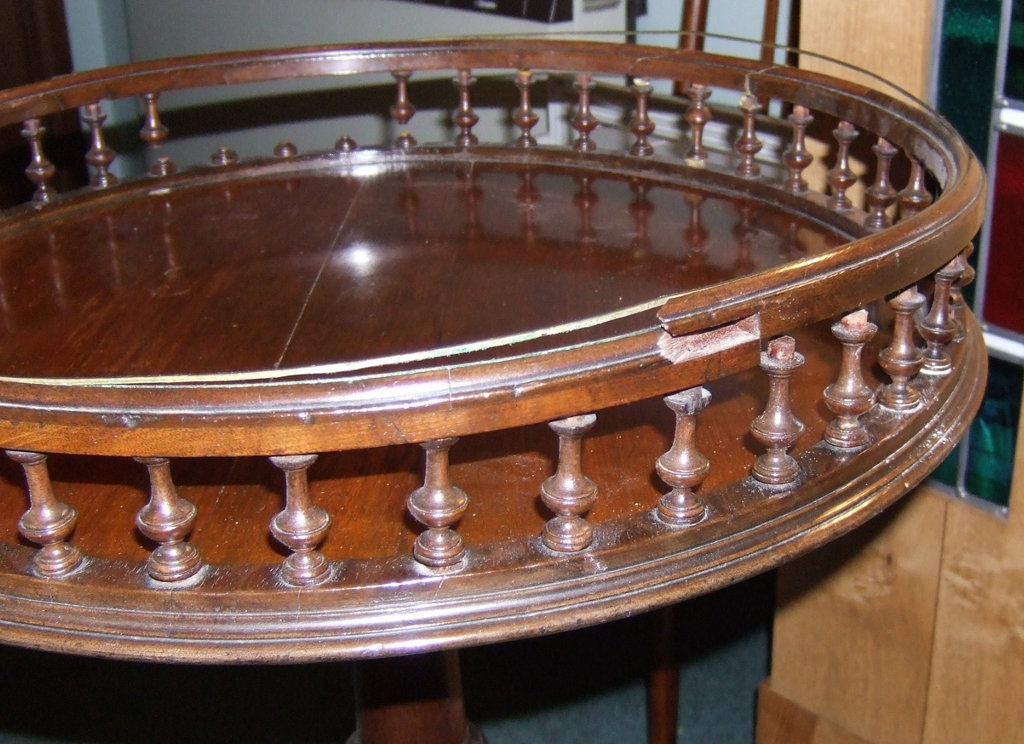
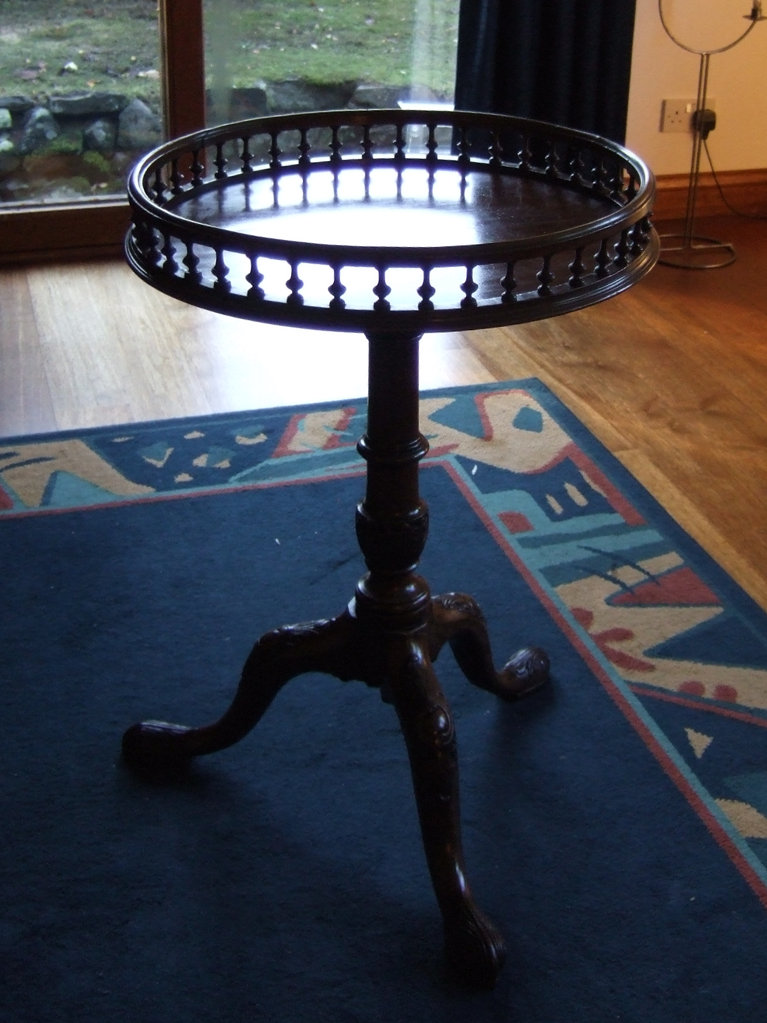
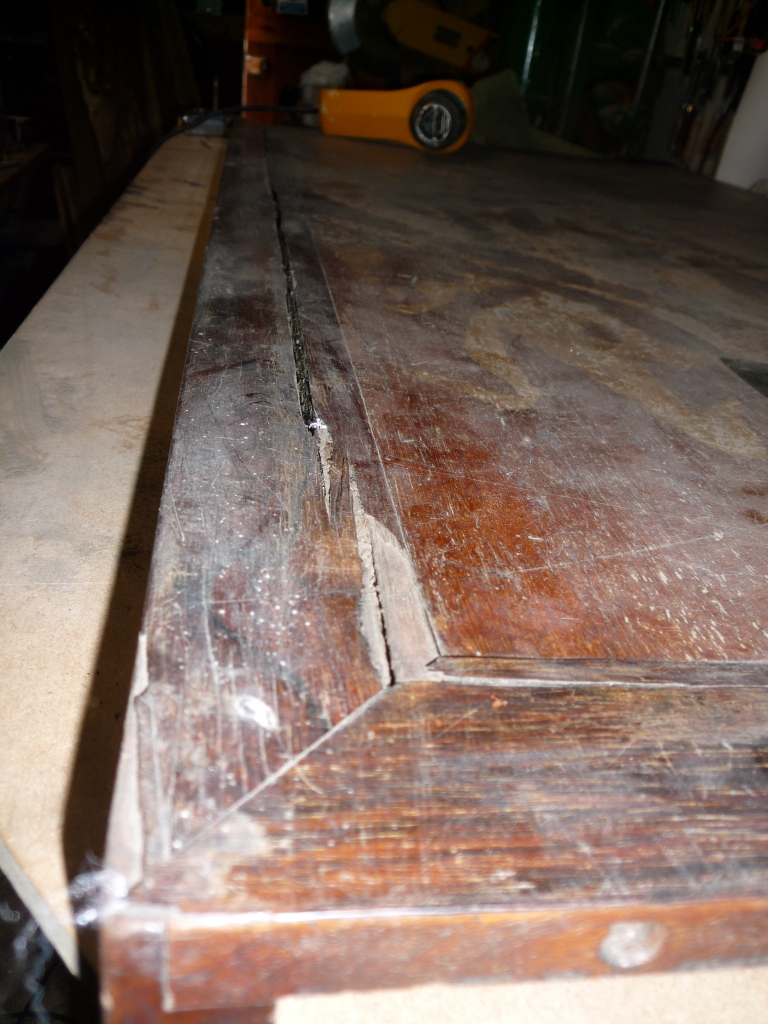
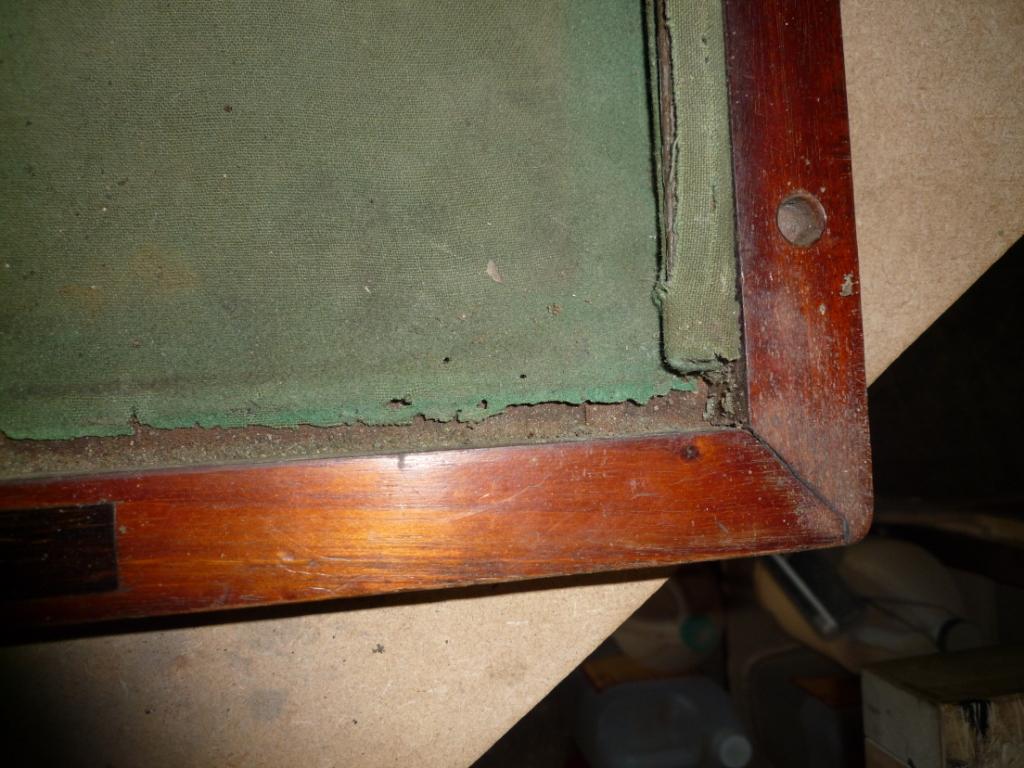
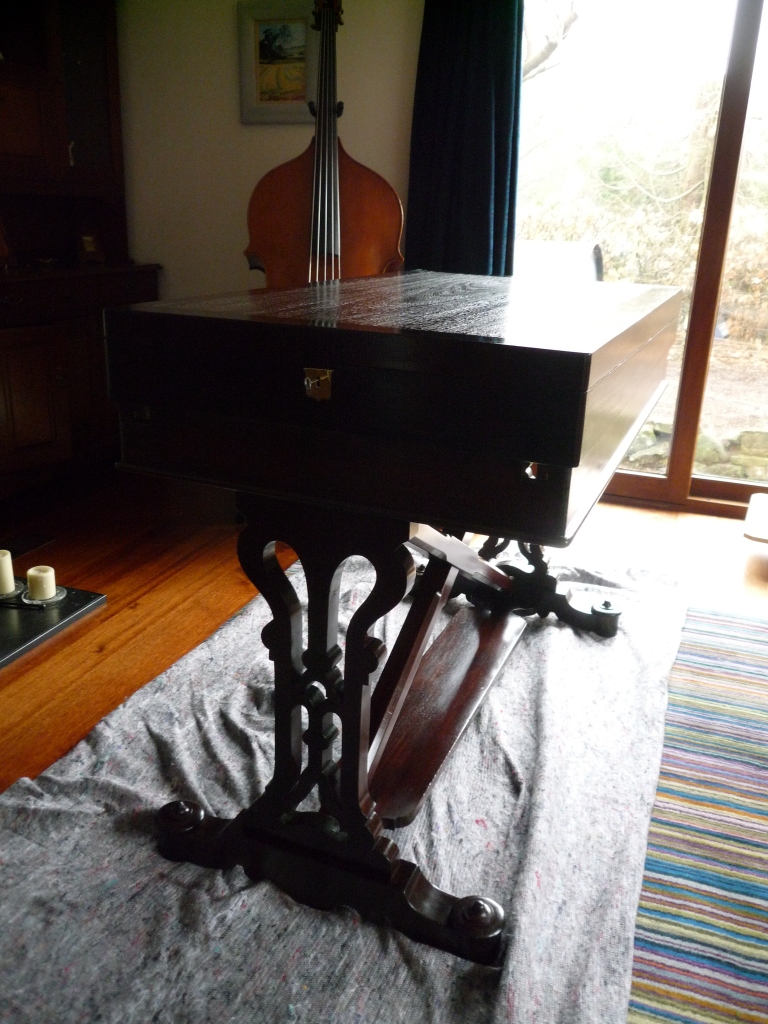
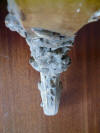
The Tilt-Top Galleried Mahogany Table
This table, circa 1790, had a number of
issues. The catch for the tilt-top did not work anymore. There were
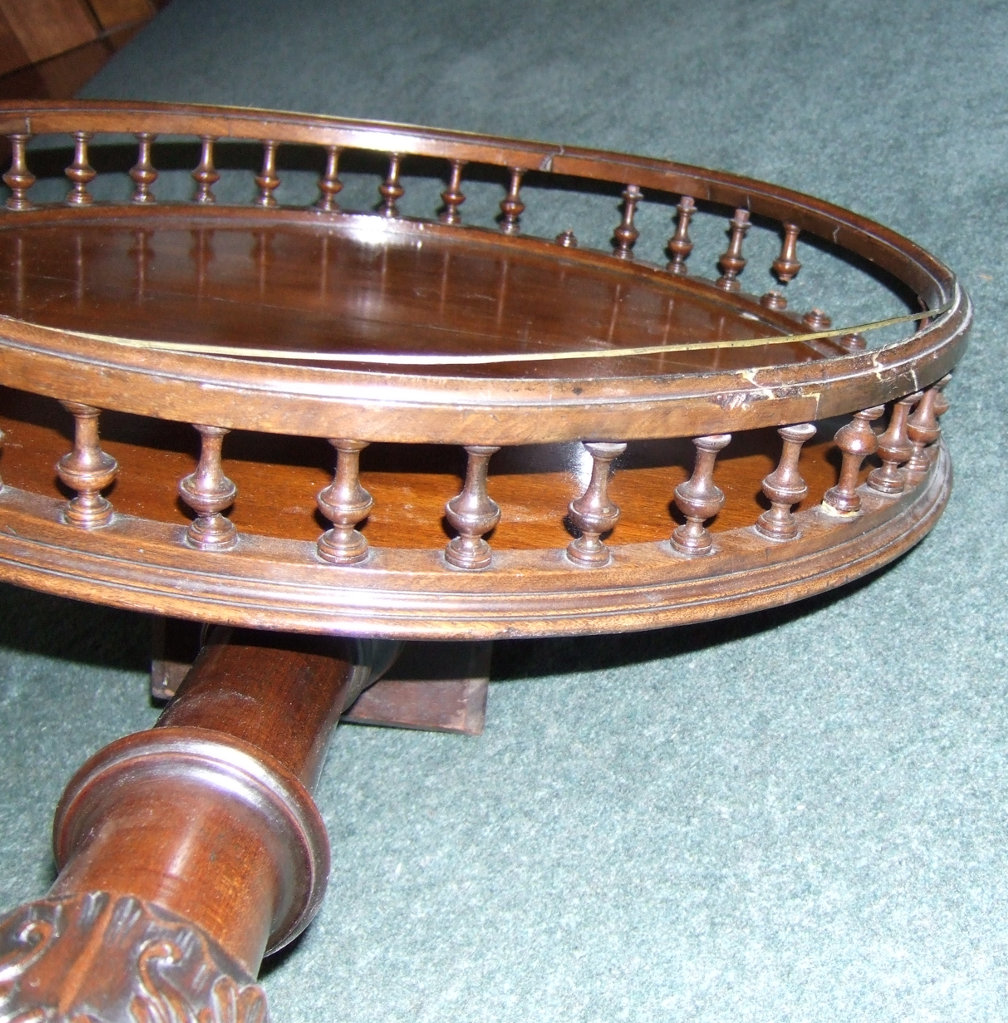
numerous cracks to the tripod legs and, above all else, the gallery had
exploded. The brass inlay had long since popped from its trench. The
circular gallery had numerous previous repairs but was cracked very
badly in two locations. Numerous of the ballusters were missing or
broken.
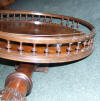  Mother
nature had simply played her traditional prank of making the different
pieces of wood that formed the top, work against each other. Probably
when first introduced to central heating. The result of the swelling,
drying, shrinking and twisting are all too apparent in the photos on the
left. Mother
nature had simply played her traditional prank of making the different
pieces of wood that formed the top, work against each other. Probably
when first introduced to central heating. The result of the swelling,
drying, shrinking and twisting are all too apparent in the photos on the
left.
Getting the catch to work properly was
actually quite difficult and involved dissolving the various compounds
that had made ingress to the catch over the centuries. The tripod cracks
were re-glued. A new brass reinforcement was made. This reinforcement
would reach beyond the original's diameter, beyond the cracks to the
legs. The brass reinforcement will only need to be fitted if the glue in
the cracks is inadequate and the cracks eventually reopen.
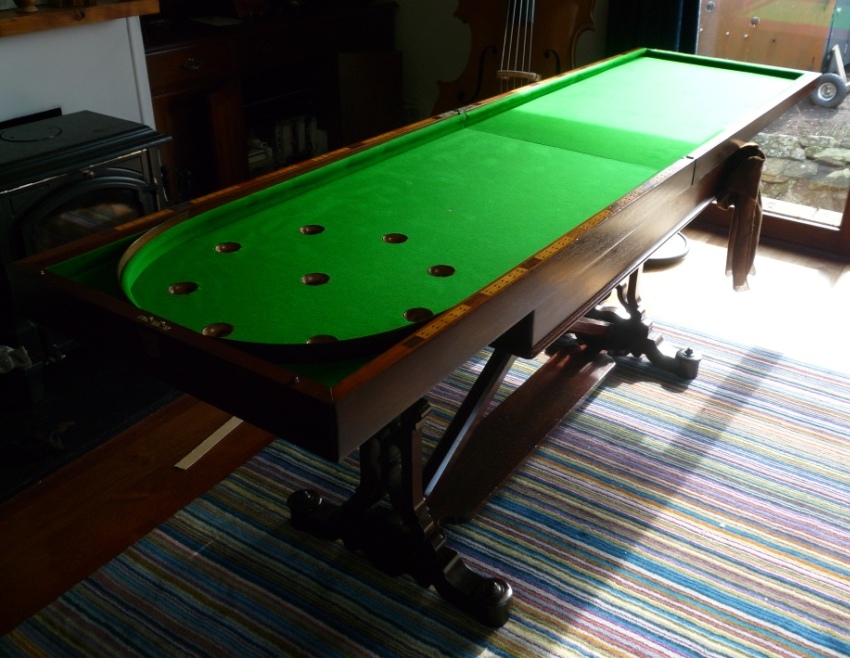
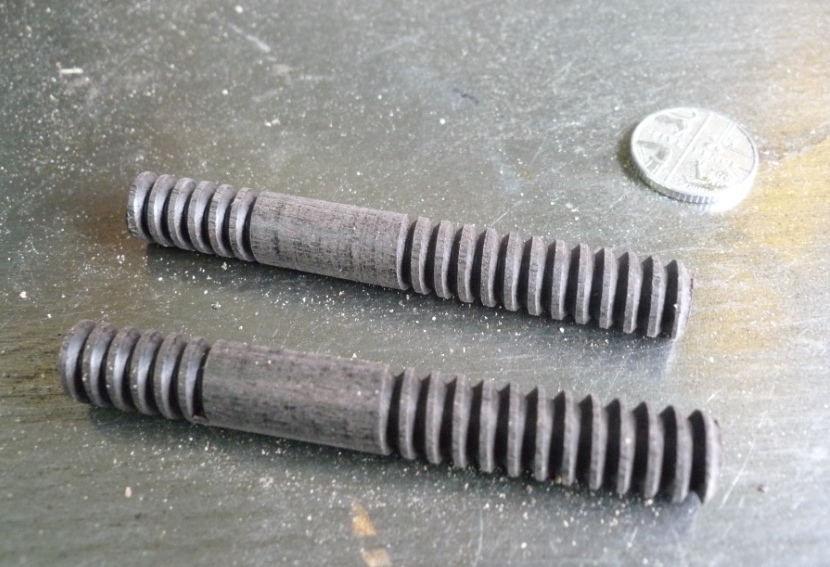
Being such an early piece, the ballusters
were turned and coloured with very little consistency. This is a great
relief to a restorer as it makes the job of turning replacements a whole
lot easier. The reassembly of the top was made more difficult as it
became apparent that the gallery top ring was of a greater circumference
than the base. This is probably what had caused most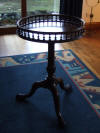 of the explosion effect. I didn't want to remove original wood by
drilling out a whole new series of top ring holes. Instead I adjusted
the tops of 8 of the ballusters to accommodate the larger sized ring.
This modification is barely visible to the eye and keeps most of the
piece original. The net effect is that the gallery looks complete once
more. I did have to use a modern glue, in this instance, as, even with
the adjustments, the tensile forces in the galleried top were pretty
strong and I didn't want the piece returned almost as soon as it was
delivered. I would expect that the top may misbehave in the future but
there is very little I can do about that without major surgery. The top
was re-polished, some of the original polish had lifted, and the piece
was waxed and returned to the delighted customer.
of the explosion effect. I didn't want to remove original wood by
drilling out a whole new series of top ring holes. Instead I adjusted
the tops of 8 of the ballusters to accommodate the larger sized ring.
This modification is barely visible to the eye and keeps most of the
piece original. The net effect is that the gallery looks complete once
more. I did have to use a modern glue, in this instance, as, even with
the adjustments, the tensile forces in the galleried top were pretty
strong and I didn't want the piece returned almost as soon as it was
delivered. I would expect that the top may misbehave in the future but
there is very little I can do about that without major surgery. The top
was re-polished, some of the original polish had lifted, and the piece
was waxed and returned to the delighted customer.
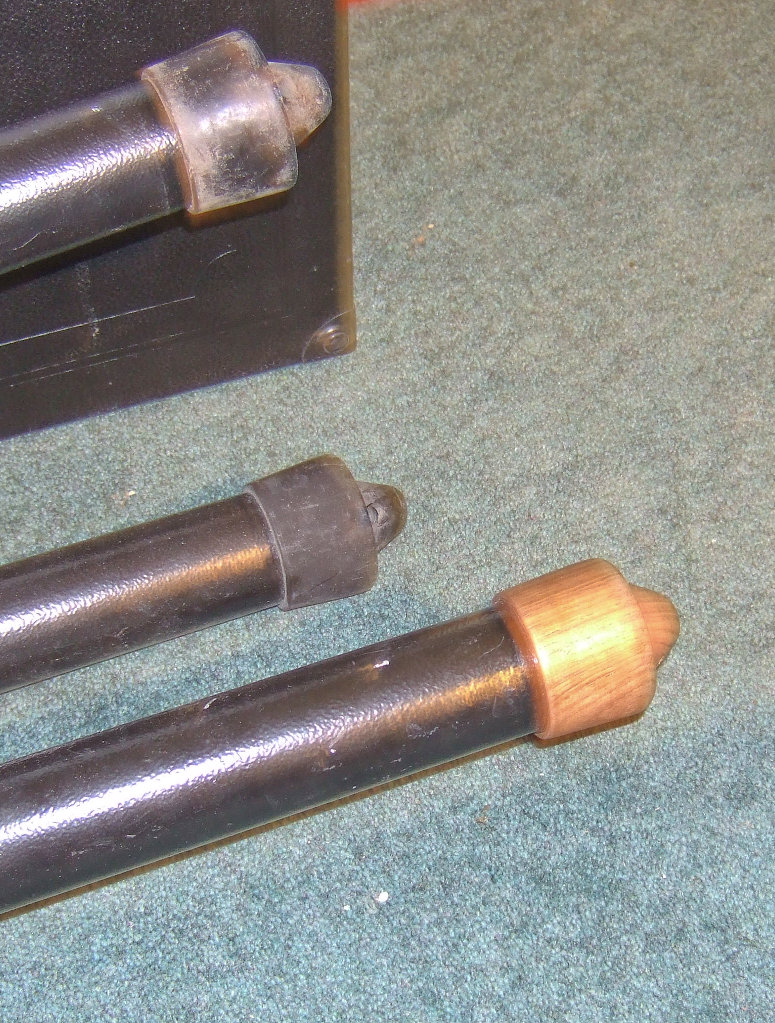
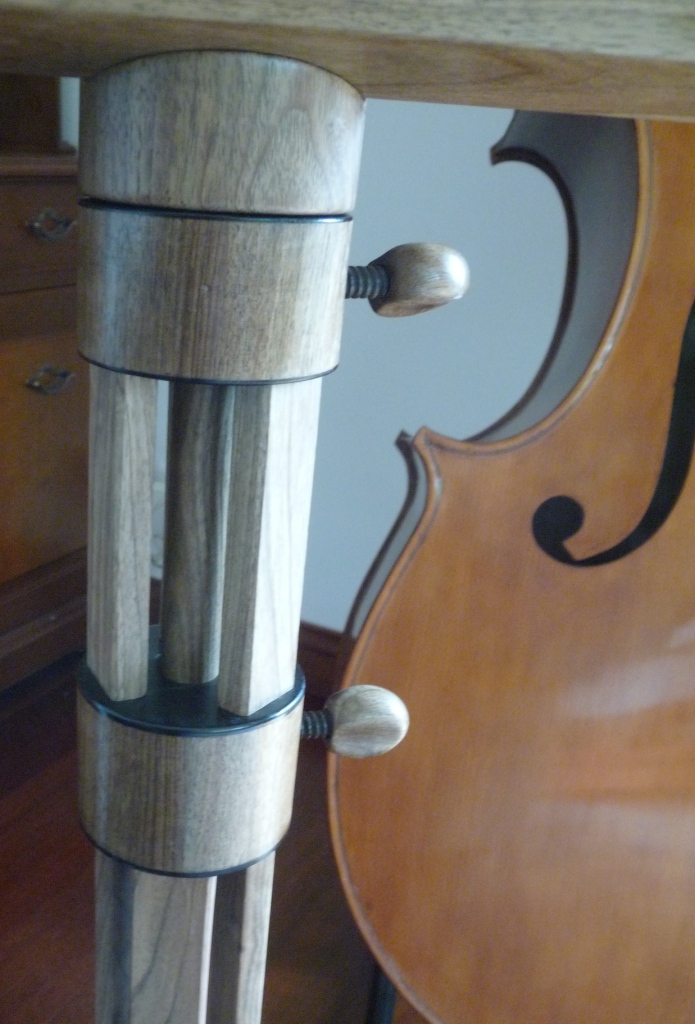
The English Walnut Tripod Foot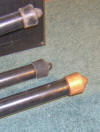
Just for fun this one. Working with wood you
often find yourself executing the most bizarre projects. And if you have
one I am always interested. I was the proud owner of a very large Benbo
photographic tripod. I wanted to sell it but it had one of the plastic
feet missing. I could probably have bought a replacement from the maker
but, what the heck, this is surely the only Benbo tripod in the world
that has a hand-turned English Walnut foot. Polished and waxed to boot.
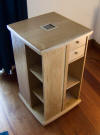
The Oak and Walnut Bathroom Tallboy
I had already made a custom contemporary
Bathroom Unit and this Tallboy was to fit in alongside that unit. The
unit had a quarter sawn Oak top and a sculpted Walnut edge banding. The main body of this
piece was to be straight-grained Oak but the customer had requested
Pippy Oak panels as she liked the visual effect of the Pips. Pippy Oak
can be quite unstable and unpredictable so I persuaded the customer that
the sides should be panelled and not solid. This was especially
important as the piece would reside in a bathroom where there could be
significant changes in heat and humidity. Who knows what twisted grain
wood could do in that environment.
sawn Oak top and a sculpted Walnut edge banding. The main body of this
piece was to be straight-grained Oak but the customer had requested
Pippy Oak panels as she liked the visual effect of the Pips. Pippy Oak
can be quite unstable and unpredictable so I persuaded the customer that
the sides should be panelled and not solid. This was especially
important as the piece would reside in a bathroom where there could be
significant changes in heat and humidity. Who knows what twisted grain
wood could do in that environment.
The Walnut banding theme was continued in
this piece, albeit simpler in style. In order to break up the straight
lines of the piece, Walnut braces were used between the upper and lower
panels. The Walnut braces were smoothed into the Walnut fronts. This
gave a nice shape to the centre of the piece and broke up the upper and
lower parts of the Tallboy quite nicely I think. Two adjustable Oak
shelves were installed, each with a rear ventilation slat to stop those
towels getting musty. The Pippy panels look very attractive and upper
and lower panels are made from one continuous piece of wood. In fact the
sides are book-matched also. The left and right panels came from one
solid plank of Oak, split down the middle to create the effect. The
panels are held in place by swivelling blocks so that they may be
removed should the piece grow or contract significantly in its new home.
The panels will be modified to suit. The back of the piece is Cedar
tongue and groove. This creates a very attractive parallel line finish
to the back. Excuse the slightly ropey photograph but I may manage to
photograph this piece in my new setup very soon.
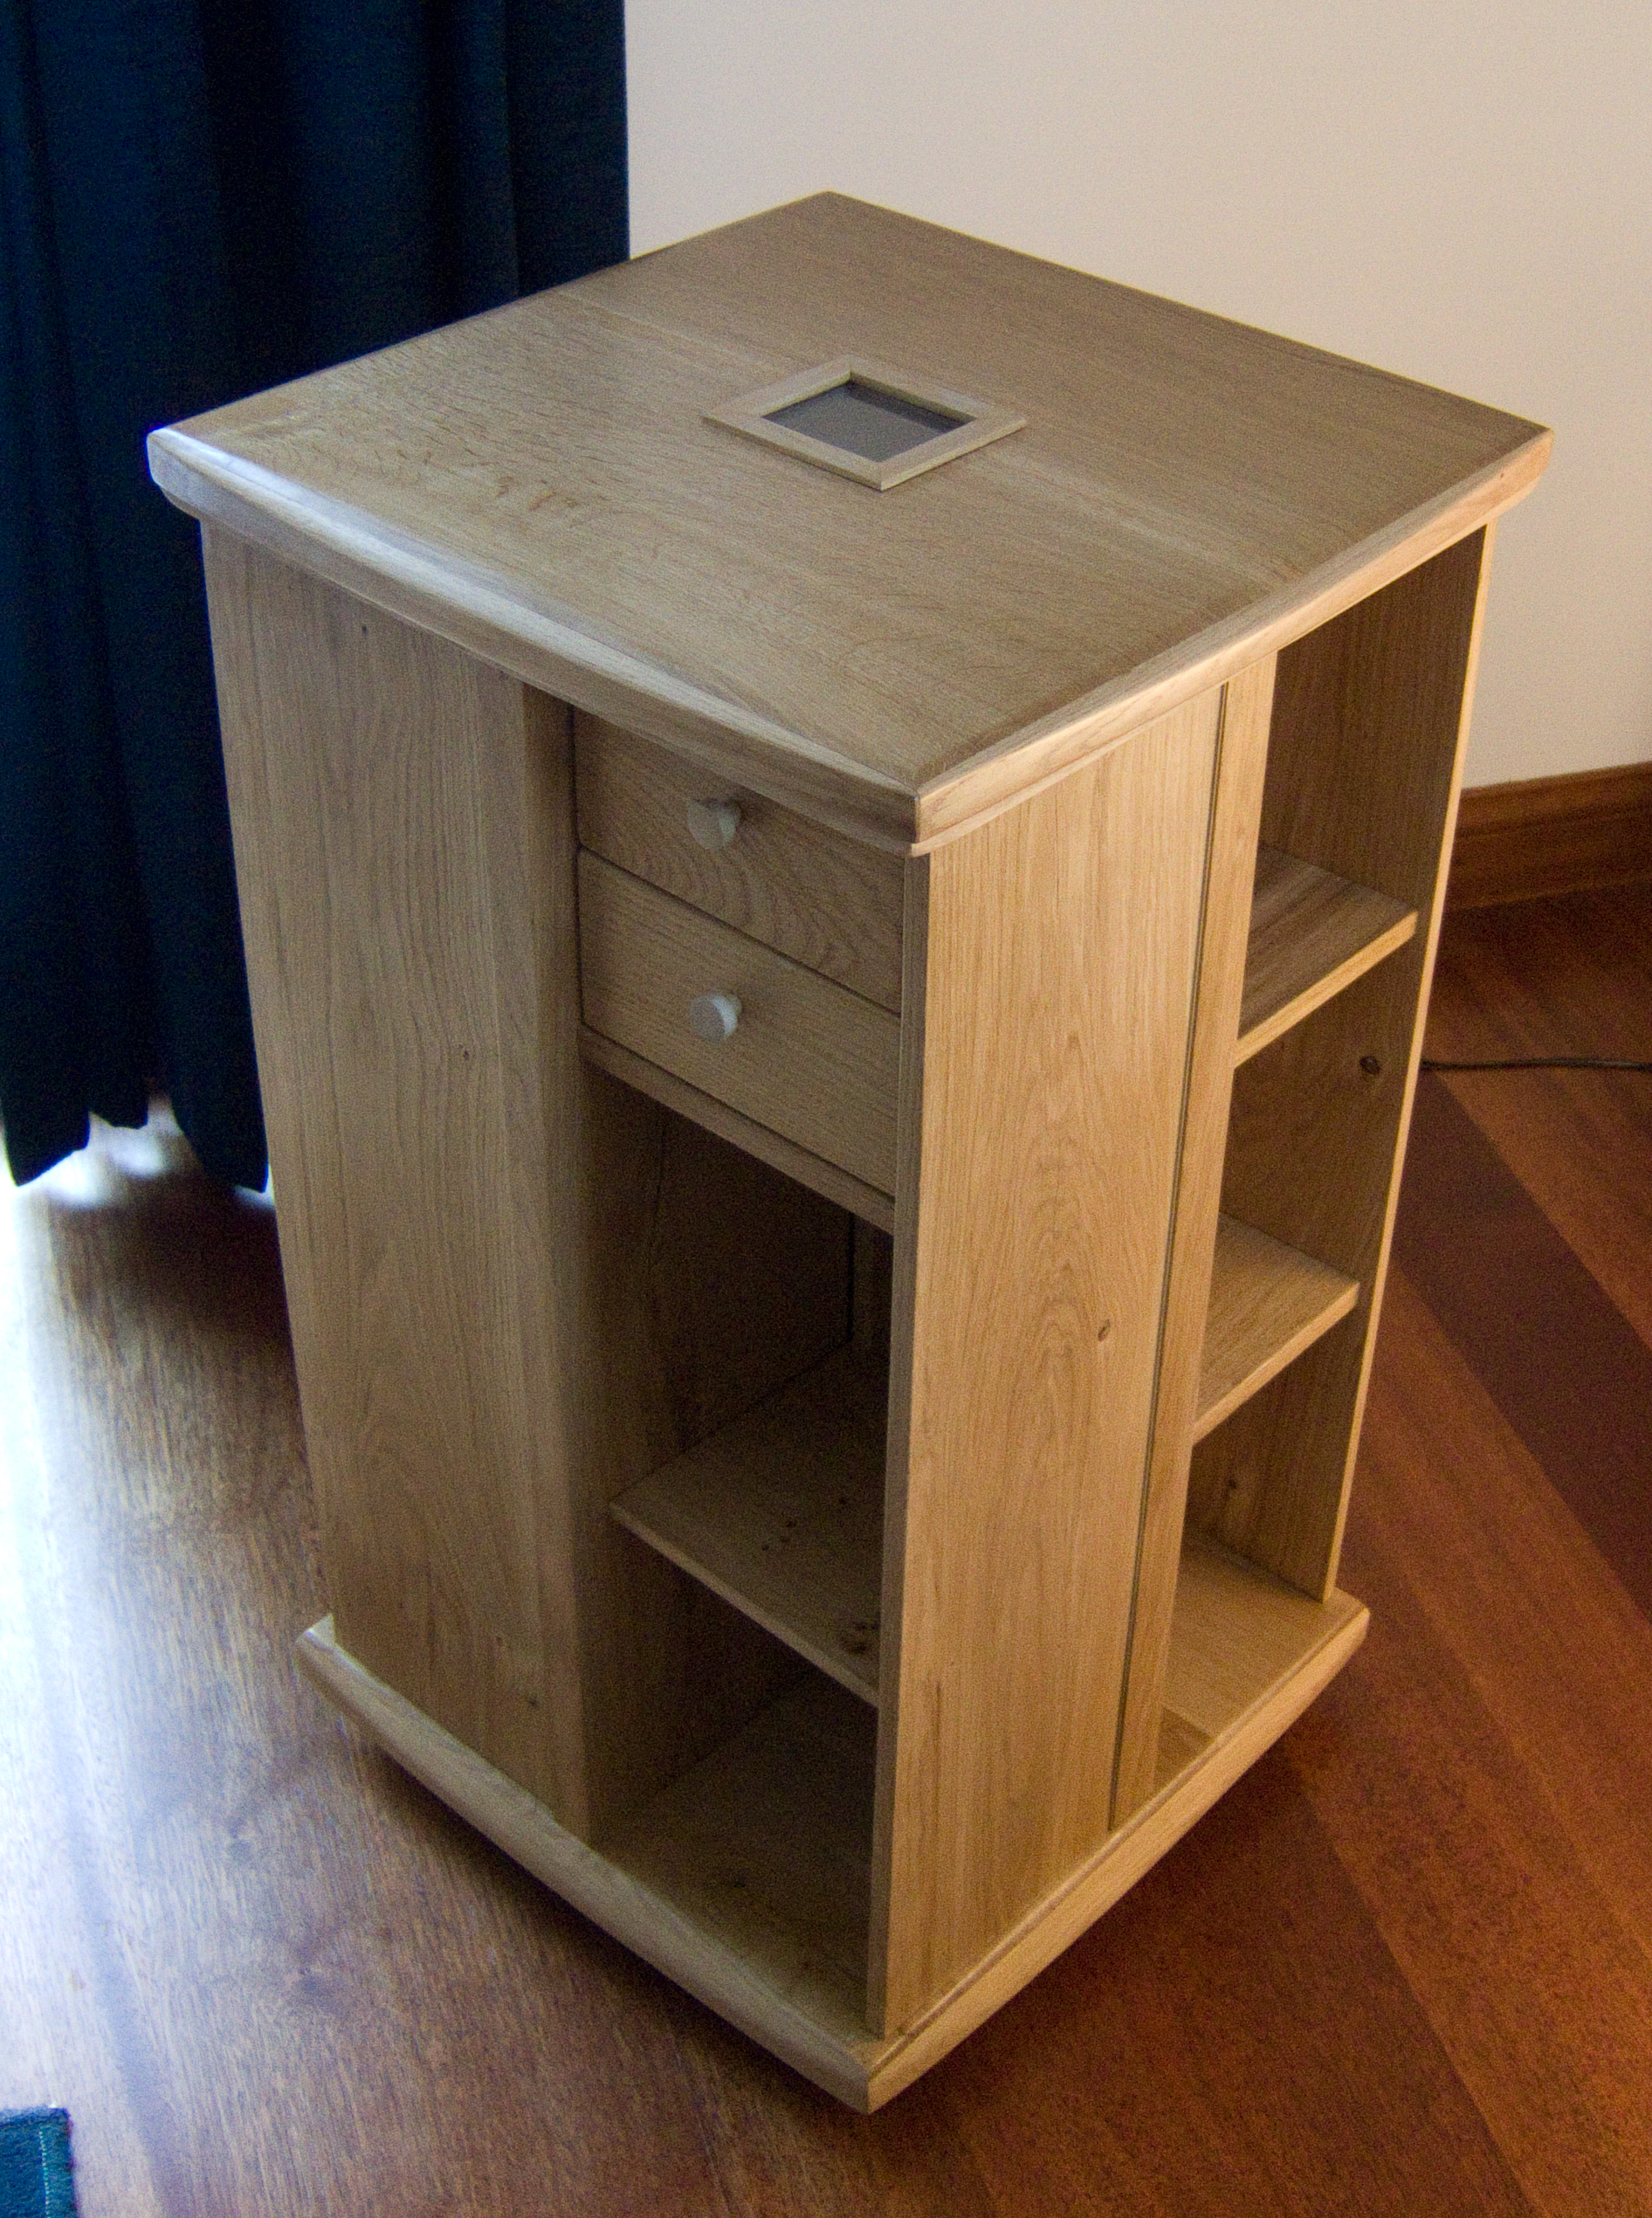
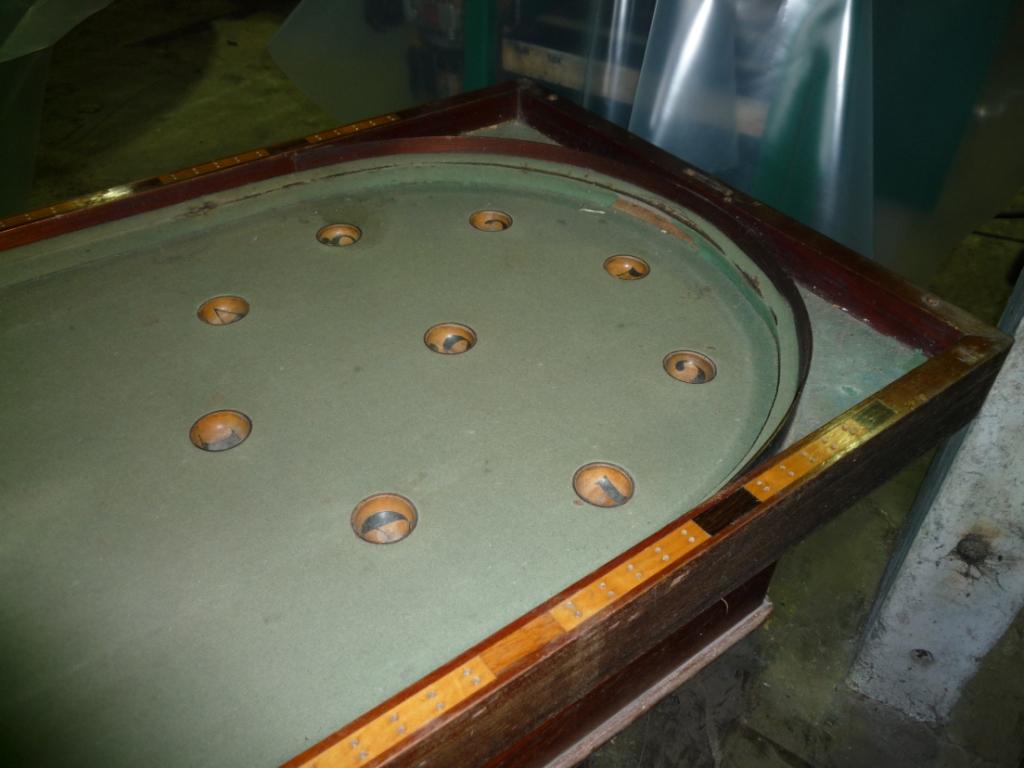
The Revolving Oak Bookcase
This pieces was commissioned as a Christmas
present for the customer's wife. It was to be Oak, solid Oak and nothing
else. The dimensions were pretty well set by the furniture that would
surround the piece in its new home and the collection
 of
paperbacks that it was to house. The bookcase had to be able to revolve
and was to incorporate a small windowed inset in the centre of the top
to house a treasured antique silver bookmark. Most revolving bookcases
have a pretty straightforward Swastika-like layout when viewed from
above. Each cavity in the legs of the Swastika houses the shelves. I did
not stray from this norm, in terms of basic layout, on this piece as
time was short to complete the bookcase in time for Christmas. I
reversed the Swastika layout as I felt it would be in bad taste to use
the symbol for such a gift. The bookcase needed to house 4 small drawers
for odds and ends as it would reside in a living space rather than a
library. I chose to make these drawers very simply, in a fashion similar
to a number of the antique apprentice pieces I have restored over the
years. I chose to make the drawer internals in Elm (breaking slightly,
with permission of course, from the "everything must be Oak" principle)
and lined the drawers with green Baize. The handles are hand-turned
Holly. It was to be a Christmas gift after all. of
paperbacks that it was to house. The bookcase had to be able to revolve
and was to incorporate a small windowed inset in the centre of the top
to house a treasured antique silver bookmark. Most revolving bookcases
have a pretty straightforward Swastika-like layout when viewed from
above. Each cavity in the legs of the Swastika houses the shelves. I did
not stray from this norm, in terms of basic layout, on this piece as
time was short to complete the bookcase in time for Christmas. I
reversed the Swastika layout as I felt it would be in bad taste to use
the symbol for such a gift. The bookcase needed to house 4 small drawers
for odds and ends as it would reside in a living space rather than a
library. I chose to make these drawers very simply, in a fashion similar
to a number of the antique apprentice pieces I have restored over the
years. I chose to make the drawer internals in Elm (breaking slightly,
with permission of course, from the "everything must be Oak" principle)
and lined the drawers with green Baize. The handles are hand-turned
Holly. It was to be a Christmas gift after all.
In order to break up what could be very
square and hard-edged lines, I contoured the sides of the top and bottom
of the b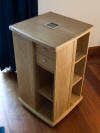 ookcase.
The resultant visual pattern, when viewed from a standing position, is
very attractive, clearly stylised but the clean lines of the Oak are
maintained. The top has a small valance to keep things tidy and
lightwood stringing is used to keep vertical joins nice and tidy. The
inset has a push fit frame, picture glass with polished edges and is
lined with leather and Walnut. ookcase.
The resultant visual pattern, when viewed from a standing position, is
very attractive, clearly stylised but the clean lines of the Oak are
maintained. The top has a small valance to keep things tidy and
lightwood stringing is used to keep vertical joins nice and tidy. The
inset has a push fit frame, picture glass with polished edges and is
lined with leather and Walnut.
I used rustic Oak for this piece. The Oak
needed some repairs to stabilise it prior to use but the resultant
slightly wild grain makes the piece look much more interesting and
attractive than if it were to be made of Oak with less character.
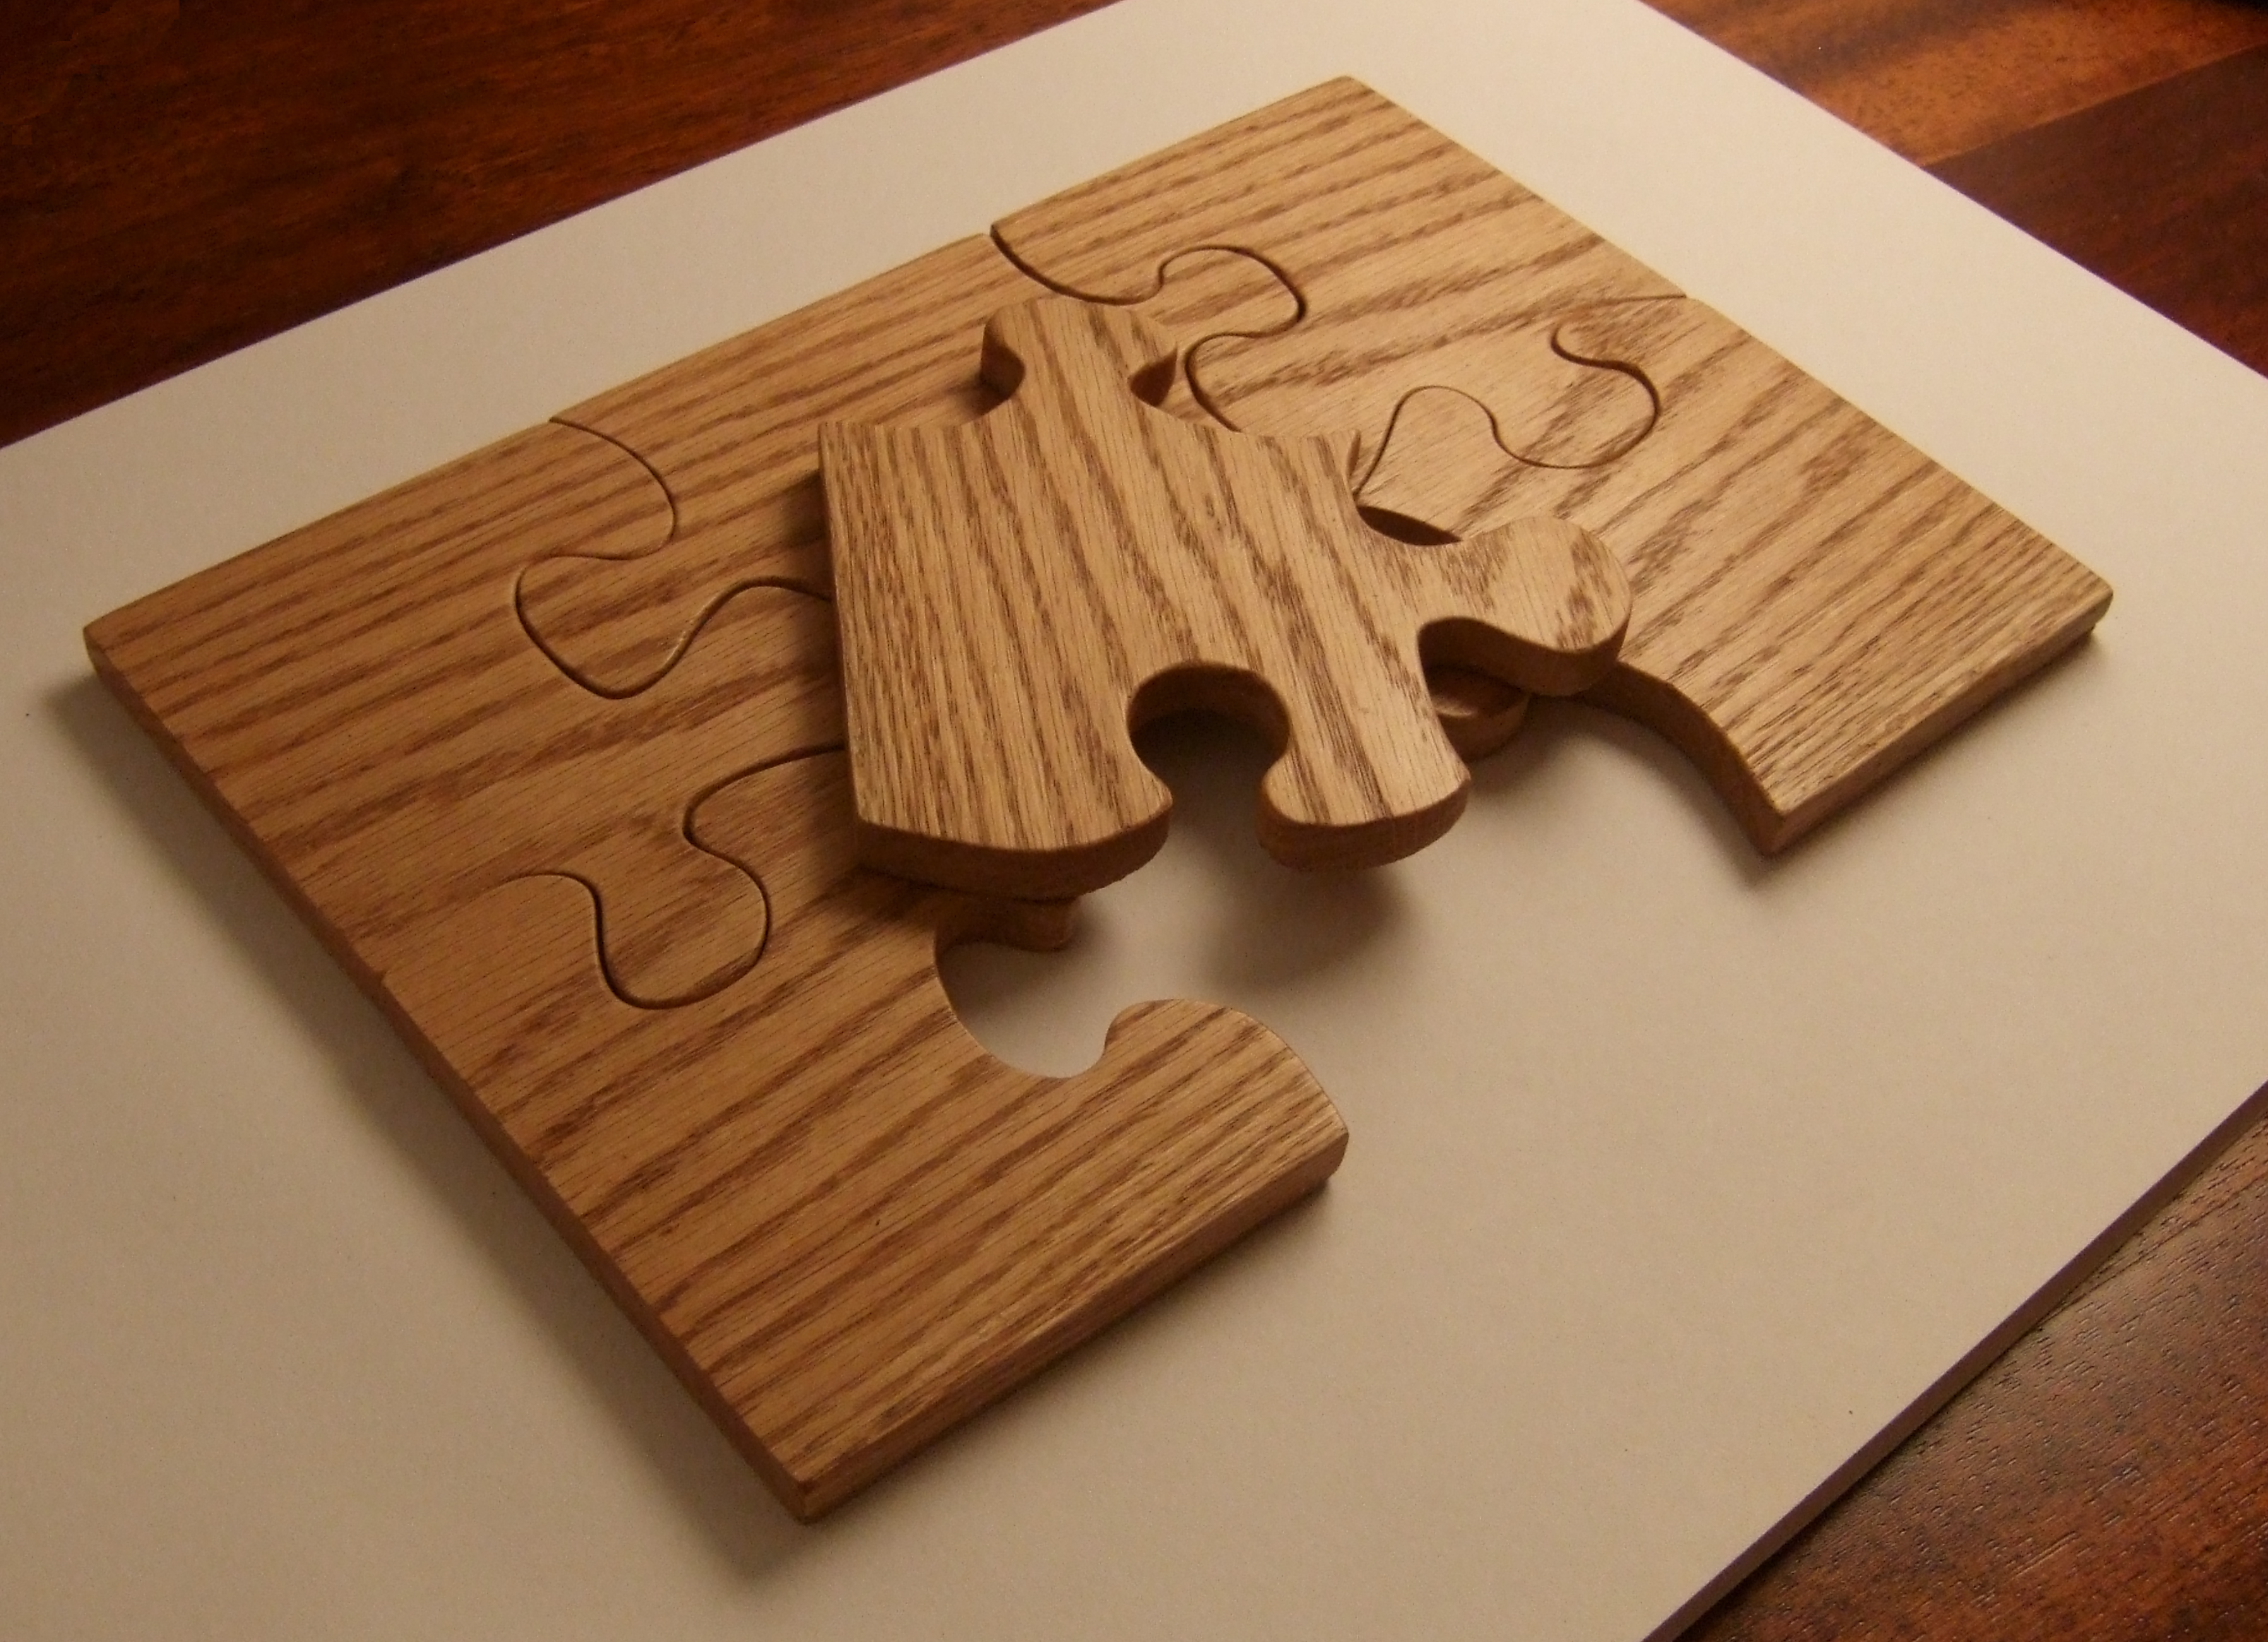
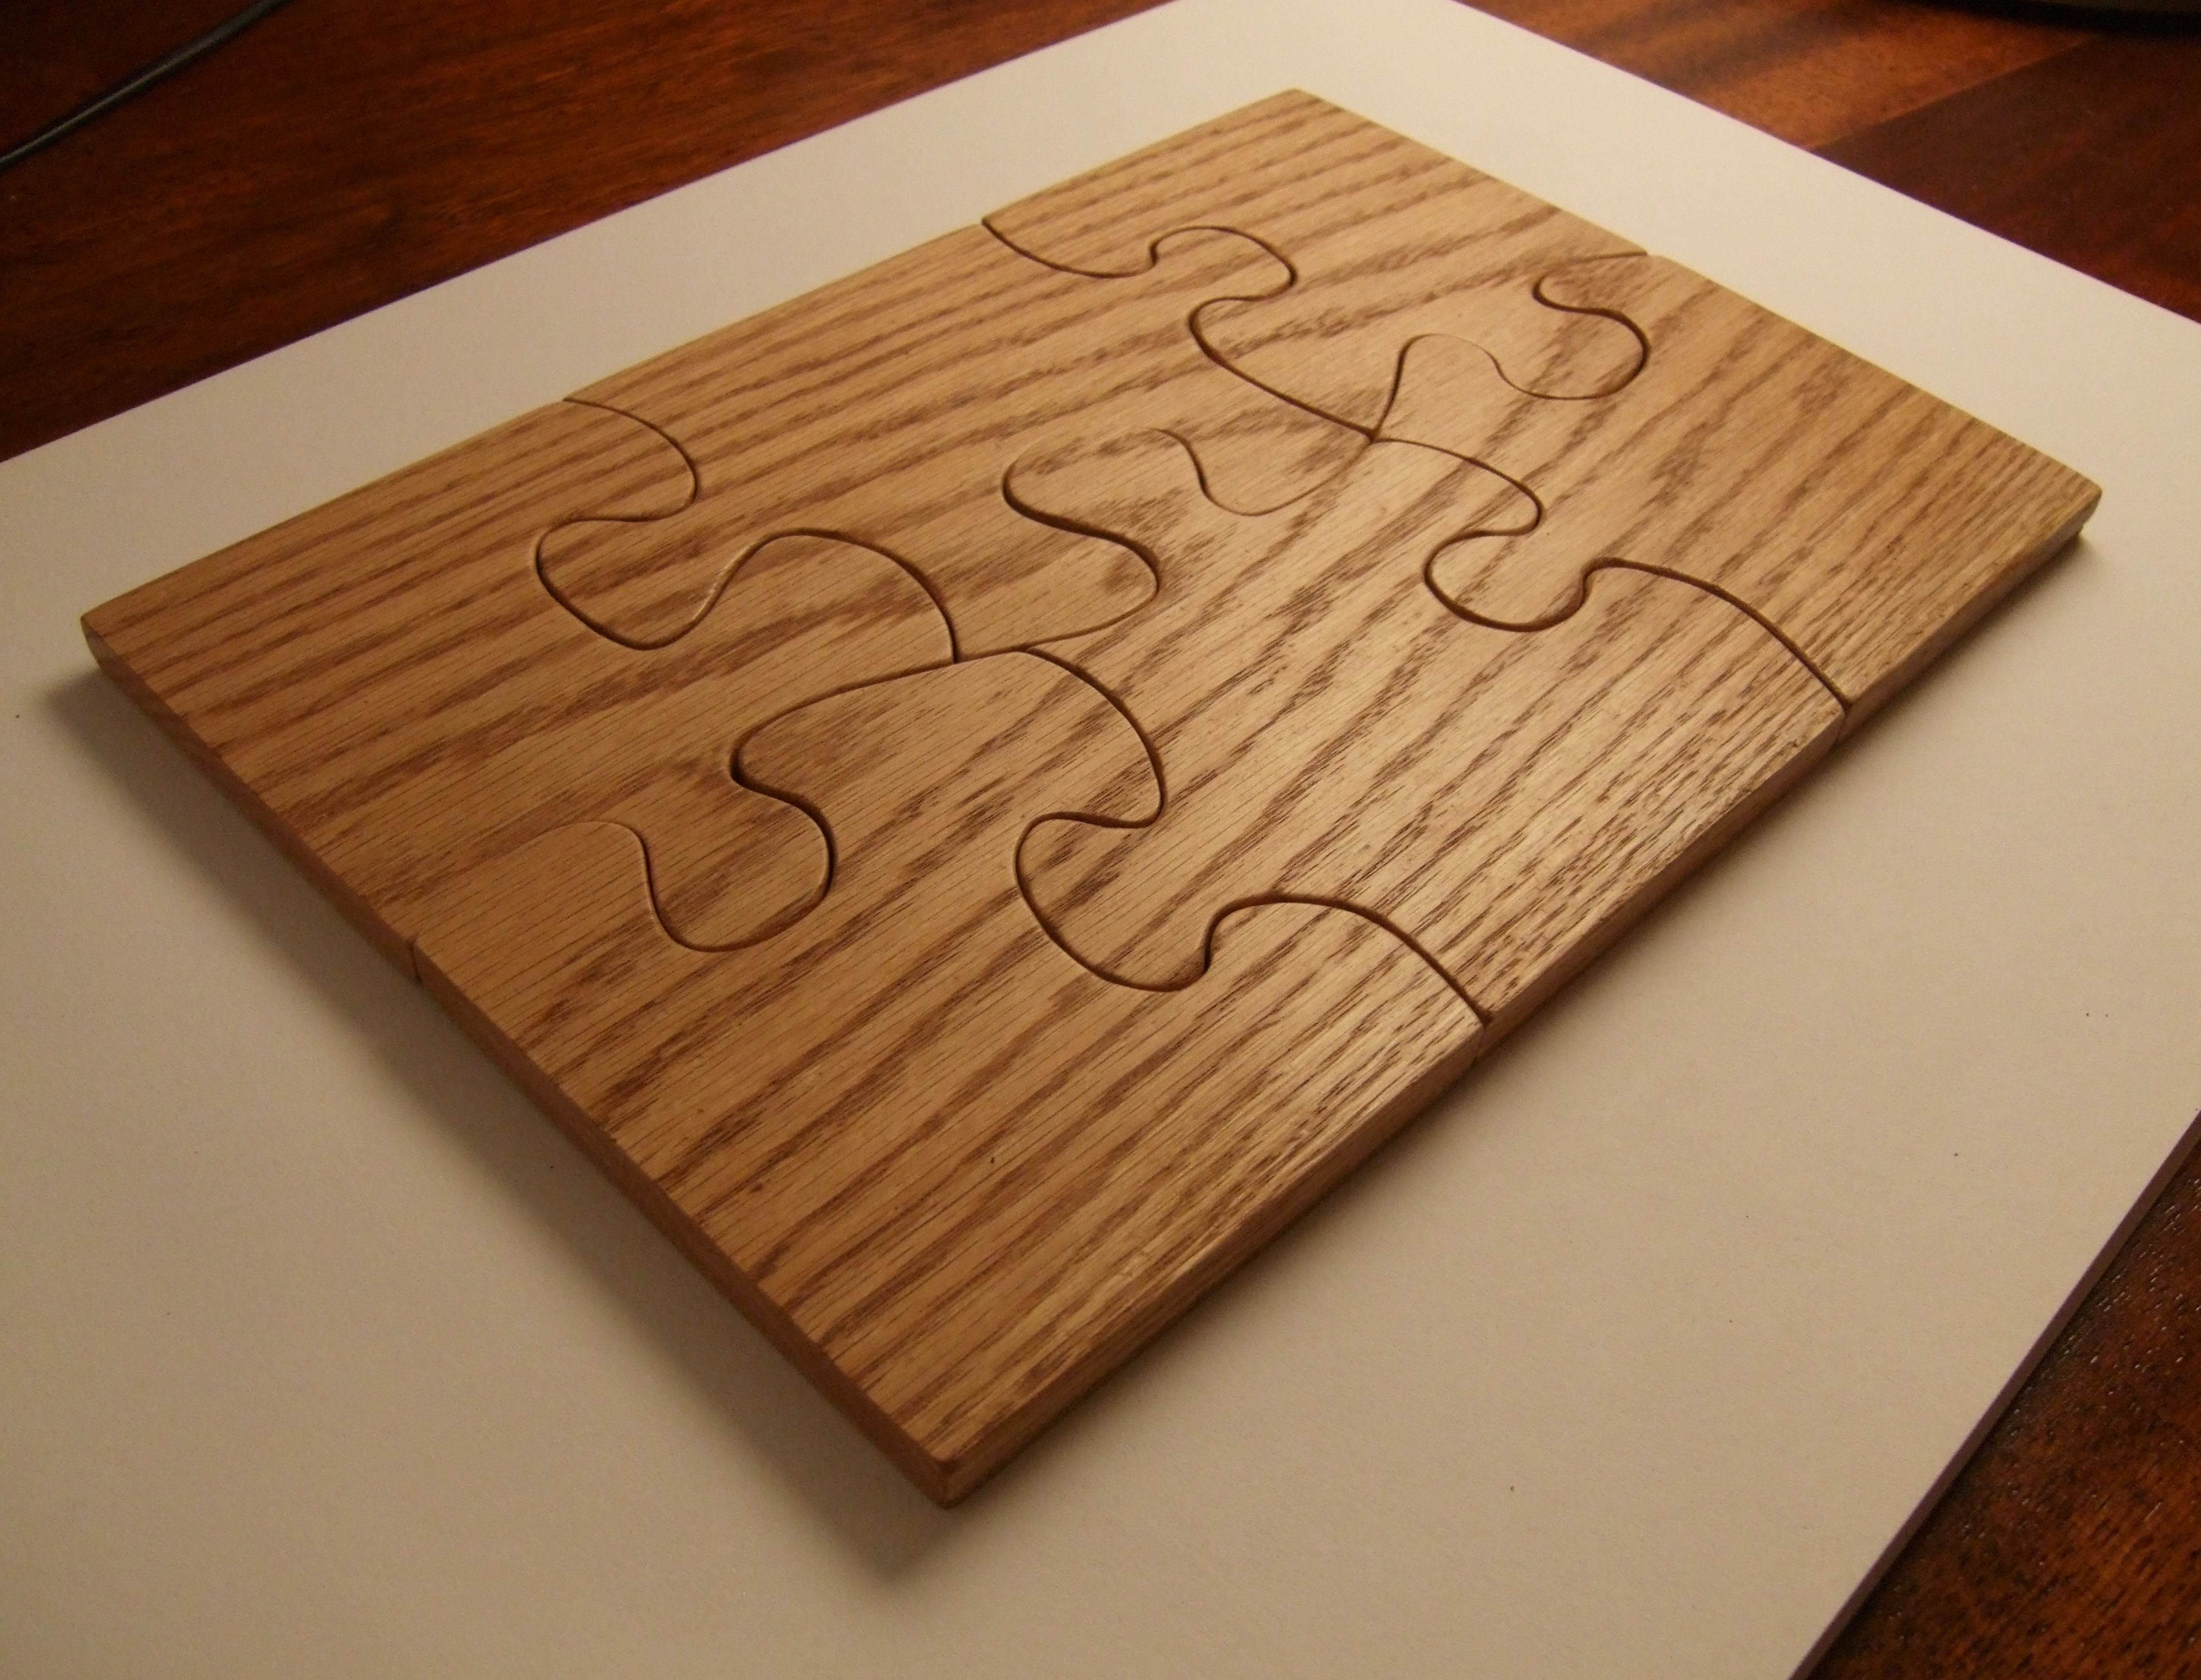
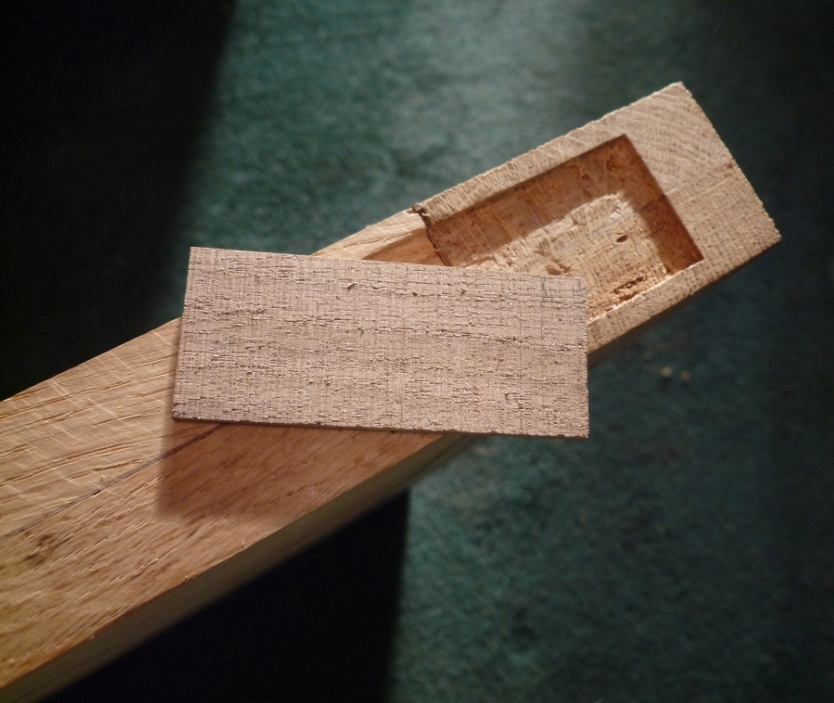
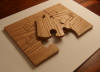
The JigsMat (Copyright
Mark Adams 2010)
I made this original piece for my brother and his wife
as a Christmas present. I wanted to make something a bit different.
 I
had asked them if they needed anything wooden in particular (always a
drawback of being related to a woodworker). They informed me that they
were running short of drink mats. I couldn't just opt for the boring old
square with rounded corners, and circular mats seemed just as tedious.
So I came up with the idea of creating a large piece that used jigsaw
style connections between each smaller piece. The large mat may be
broken apart into smaller mats when the need arises. I
had asked them if they needed anything wooden in particular (always a
drawback of being related to a woodworker). They informed me that they
were running short of drink mats. I couldn't just opt for the boring old
square with rounded corners, and circular mats seemed just as tedious.
So I came up with the idea of creating a large piece that used jigsaw
style connections between each smaller piece. The large mat may be
broken apart into smaller mats when the need arises.
 I liked the idea but I didn't tell anyone
about it as I could imagine breaking saw blade after saw blade trying to
get through the Oak and I might have to revert to something a little
less ambitious. I only broke one blade and it worked out just fine. I liked the idea but I didn't tell anyone
about it as I could imagine breaking saw blade after saw blade trying to
get through the Oak and I might have to revert to something a little
less ambitious. I only broke one blade and it worked out just fine.
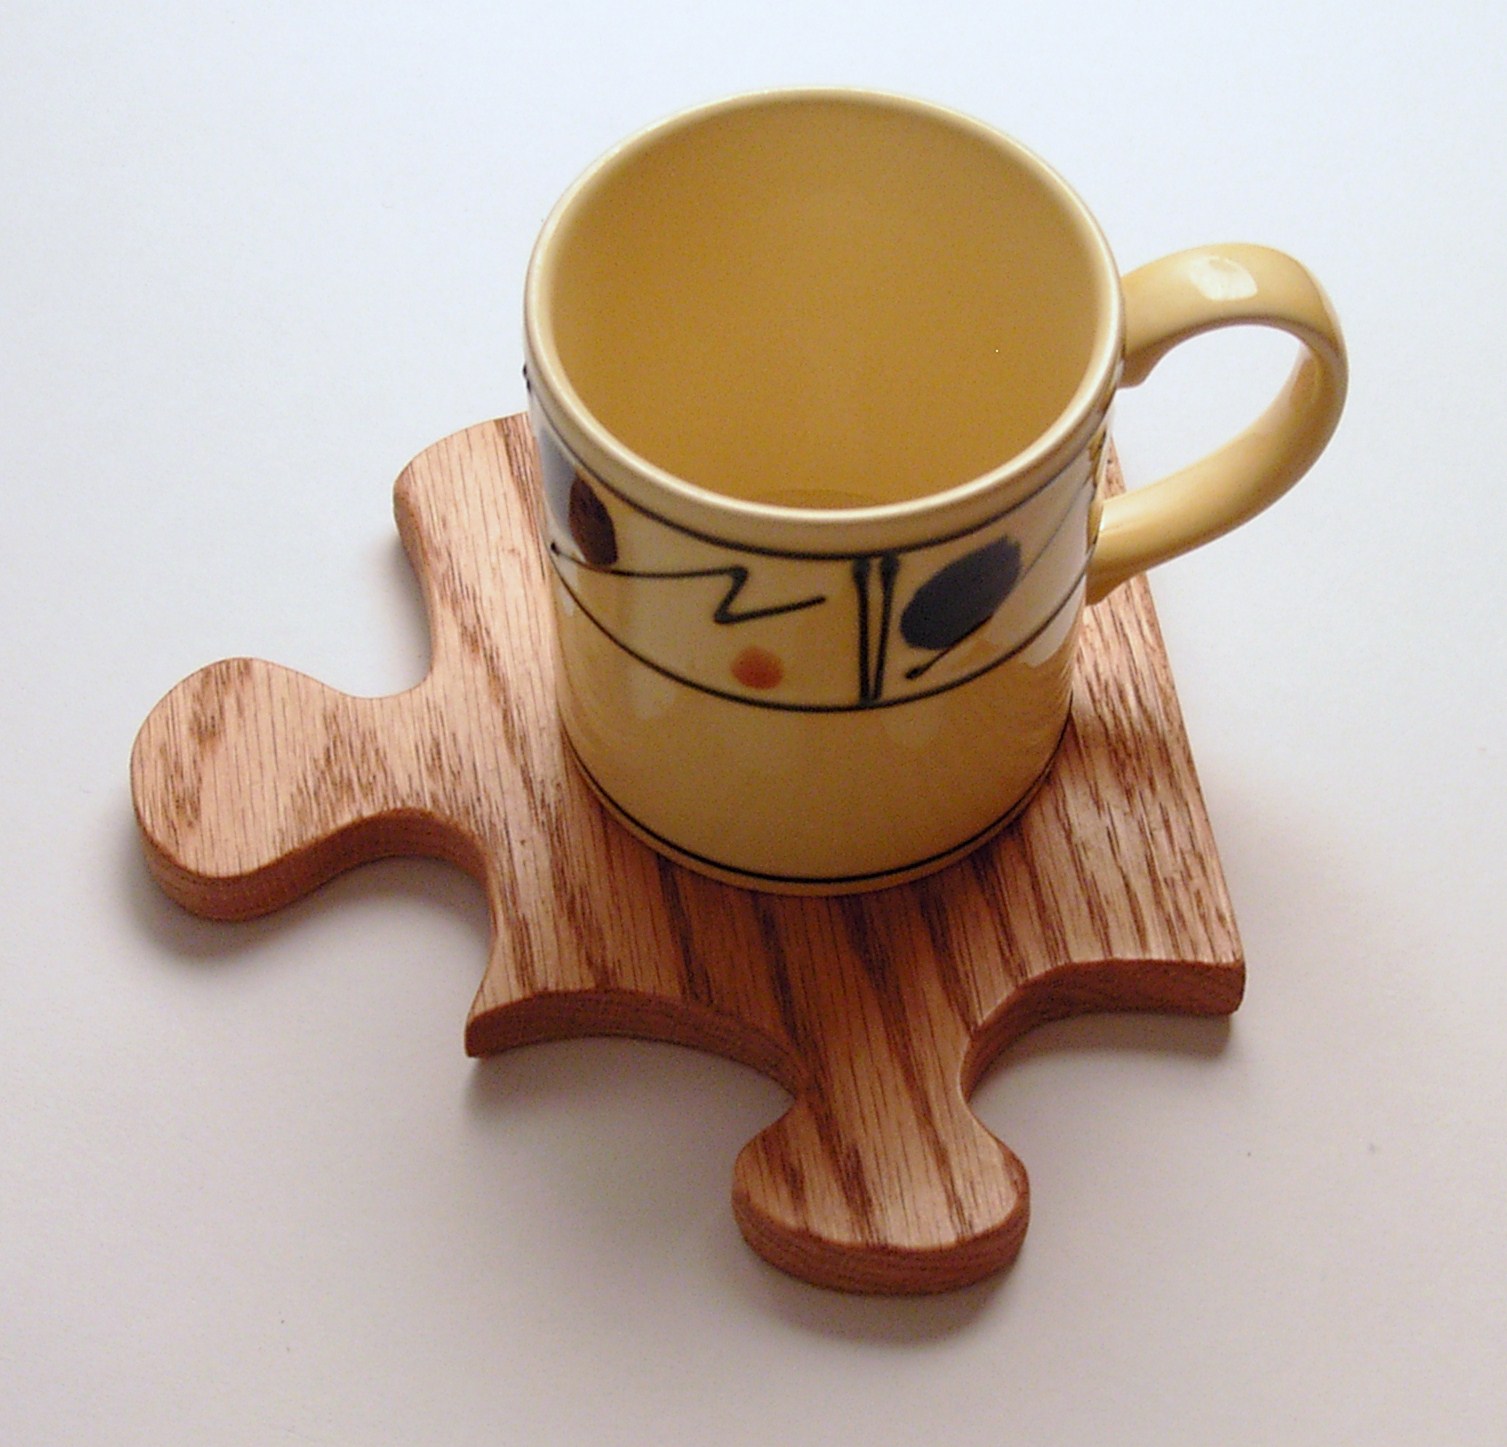
The "jigsaw" pieces are sized so that they
can easily host a wine glass or coffee mug. They are finished in a table
top polish with a very fine wax. I am very pleased with them, as is my
brother and his wife, they look p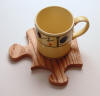 retty, they are a talking point and are
very functional. I have toyed with the idea of making a larger set for a
dinner table incorporating place mats as well as drinks mats, probably
in Walnut, but I haven't got round to that quite yet. I may include a
complimentary set with the table commissions I have underway. retty, they are a talking point and are
very functional. I have toyed with the idea of making a larger set for a
dinner table incorporating place mats as well as drinks mats, probably
in Walnut, but I haven't got round to that quite yet. I may include a
complimentary set with the table commissions I have underway.
Let me know if you are interested in a
bespoke set for some purpose.
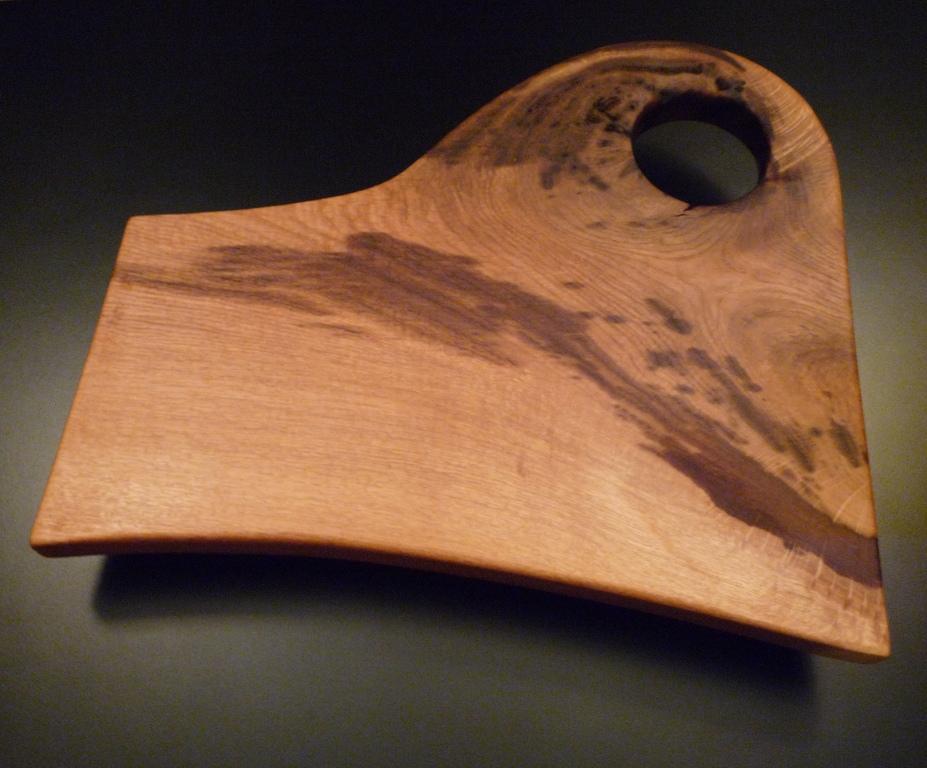
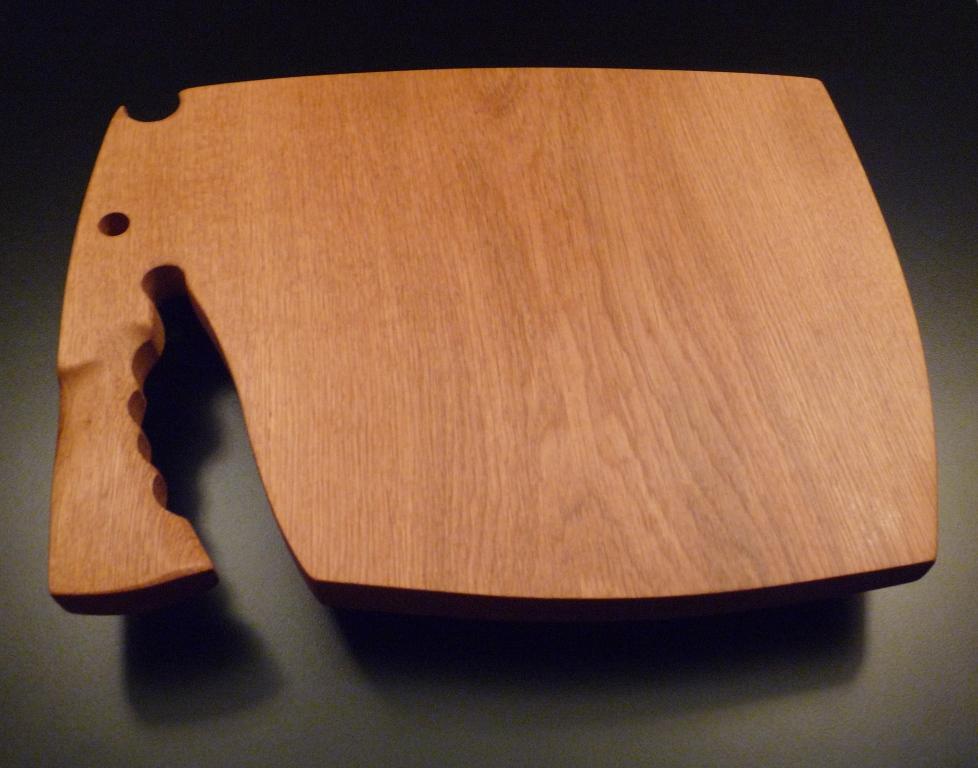
A Humble Oak Chopping Board
Lots of woodworkers produce chopping boards,
often from off-cuts. I do know some people who select wood very
carefully for their boards and utility items. They really make an art of
it. I don't know if I could sit making chopping boards day after day.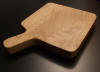
Every so often I shall see a nice piece of
wood coming off a plank being cut for a larger piece. So I decide to put
that aside and make it up into a board at some time. I now have more
pieces of wood than I know what to do with. Every so often I dig through
the pile and work on a design that compliments the figure in the wood.
Now and then, when you plane into the wood
you get a very pleasant surprise. Just as in this case. Very much for
interest only as the board found a caring home soon after its
construction.
 This piece of oak looked pretty
straightforward. I had machine planed what was a very rough, warped
surface. Often, unless it is perfectly set up (usually lasting about 10
minutes), machine planers will leave very faint marks across the face of
the wood. These are known as "chatter", you can imagine why. I spent
quite some time trying to remove the chatter from the Oak until I
realised that the marks were actually wood "ripples" or "flames". This
sort of feature is typically associated with Sycamore and Maple but is
found in many woods. Turns out my chopping board has a nice ripple
through it. Very much by accident. If I had known the ripple was there I
would most probably have used the wood for a box. Nonetheless this Oak
chopping board is probably the most decorative I have seen. This piece of oak looked pretty
straightforward. I had machine planed what was a very rough, warped
surface. Often, unless it is perfectly set up (usually lasting about 10
minutes), machine planers will leave very faint marks across the face of
the wood. These are known as "chatter", you can imagine why. I spent
quite some time trying to remove the chatter from the Oak until I
realised that the marks were actually wood "ripples" or "flames". This
sort of feature is typically associated with Sycamore and Maple but is
found in many woods. Turns out my chopping board has a nice ripple
through it. Very much by accident. If I had known the ripple was there I
would most probably have used the wood for a box. Nonetheless this Oak
chopping board is probably the most decorative I have seen.
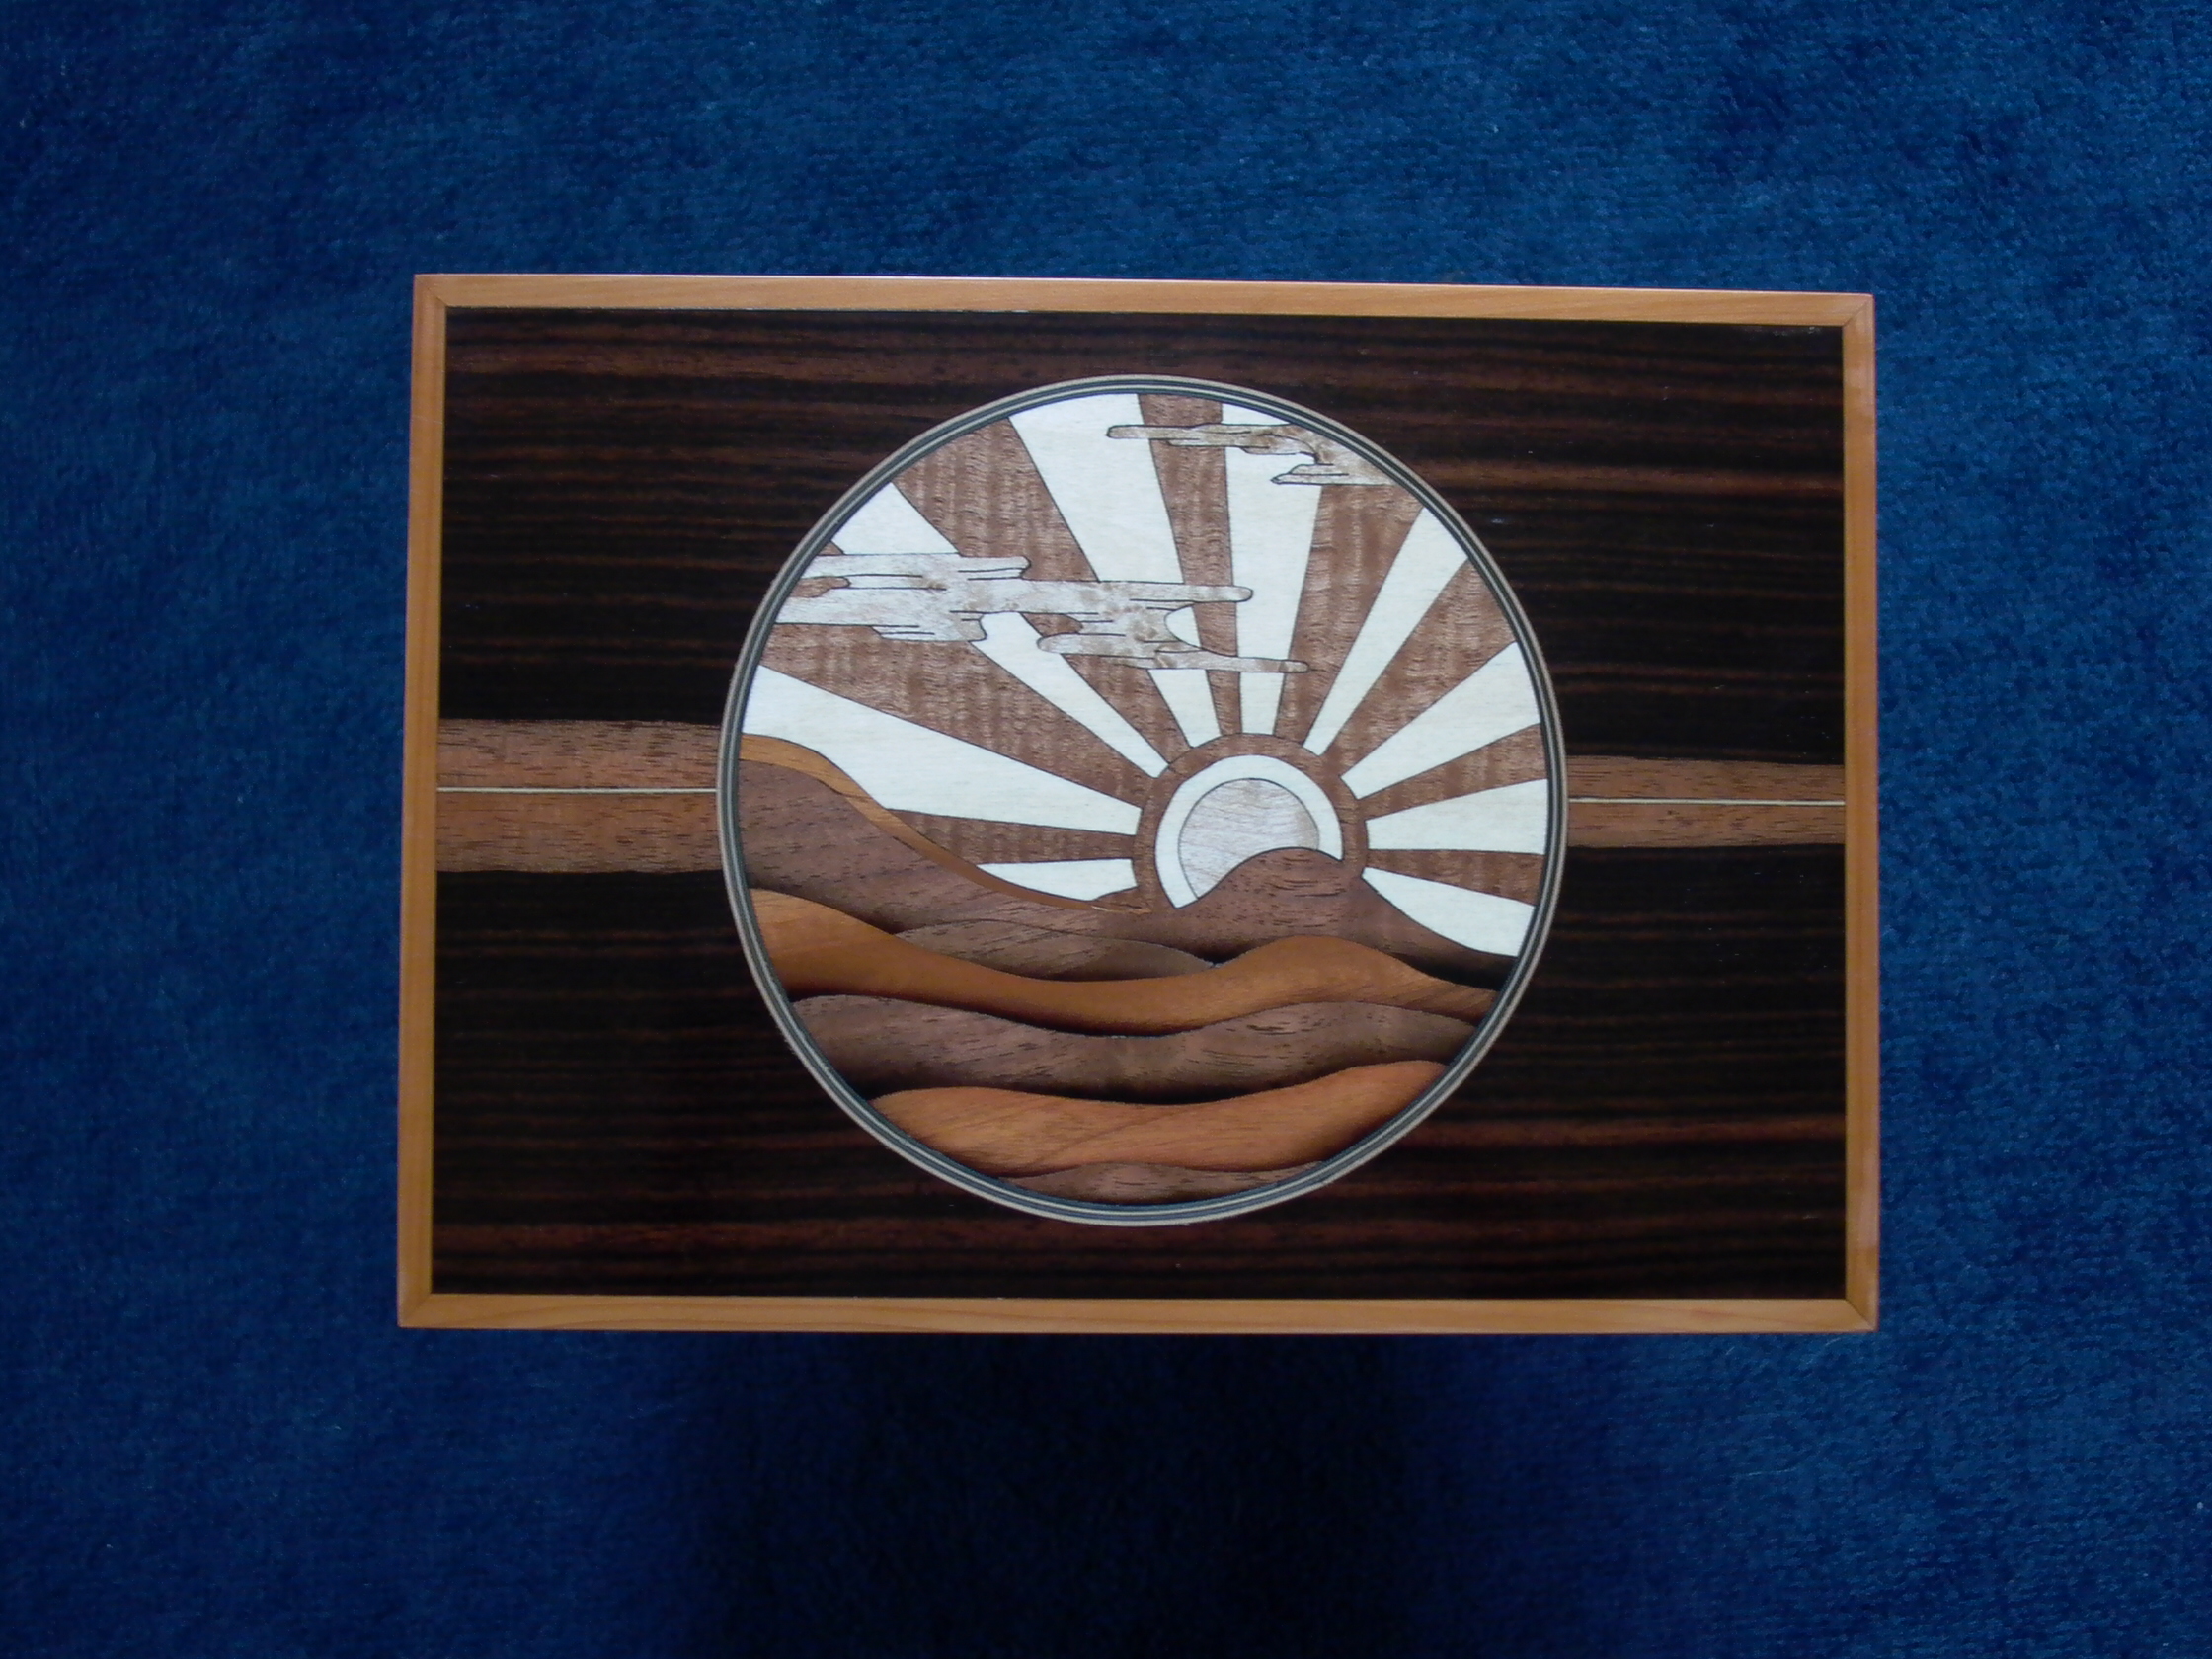
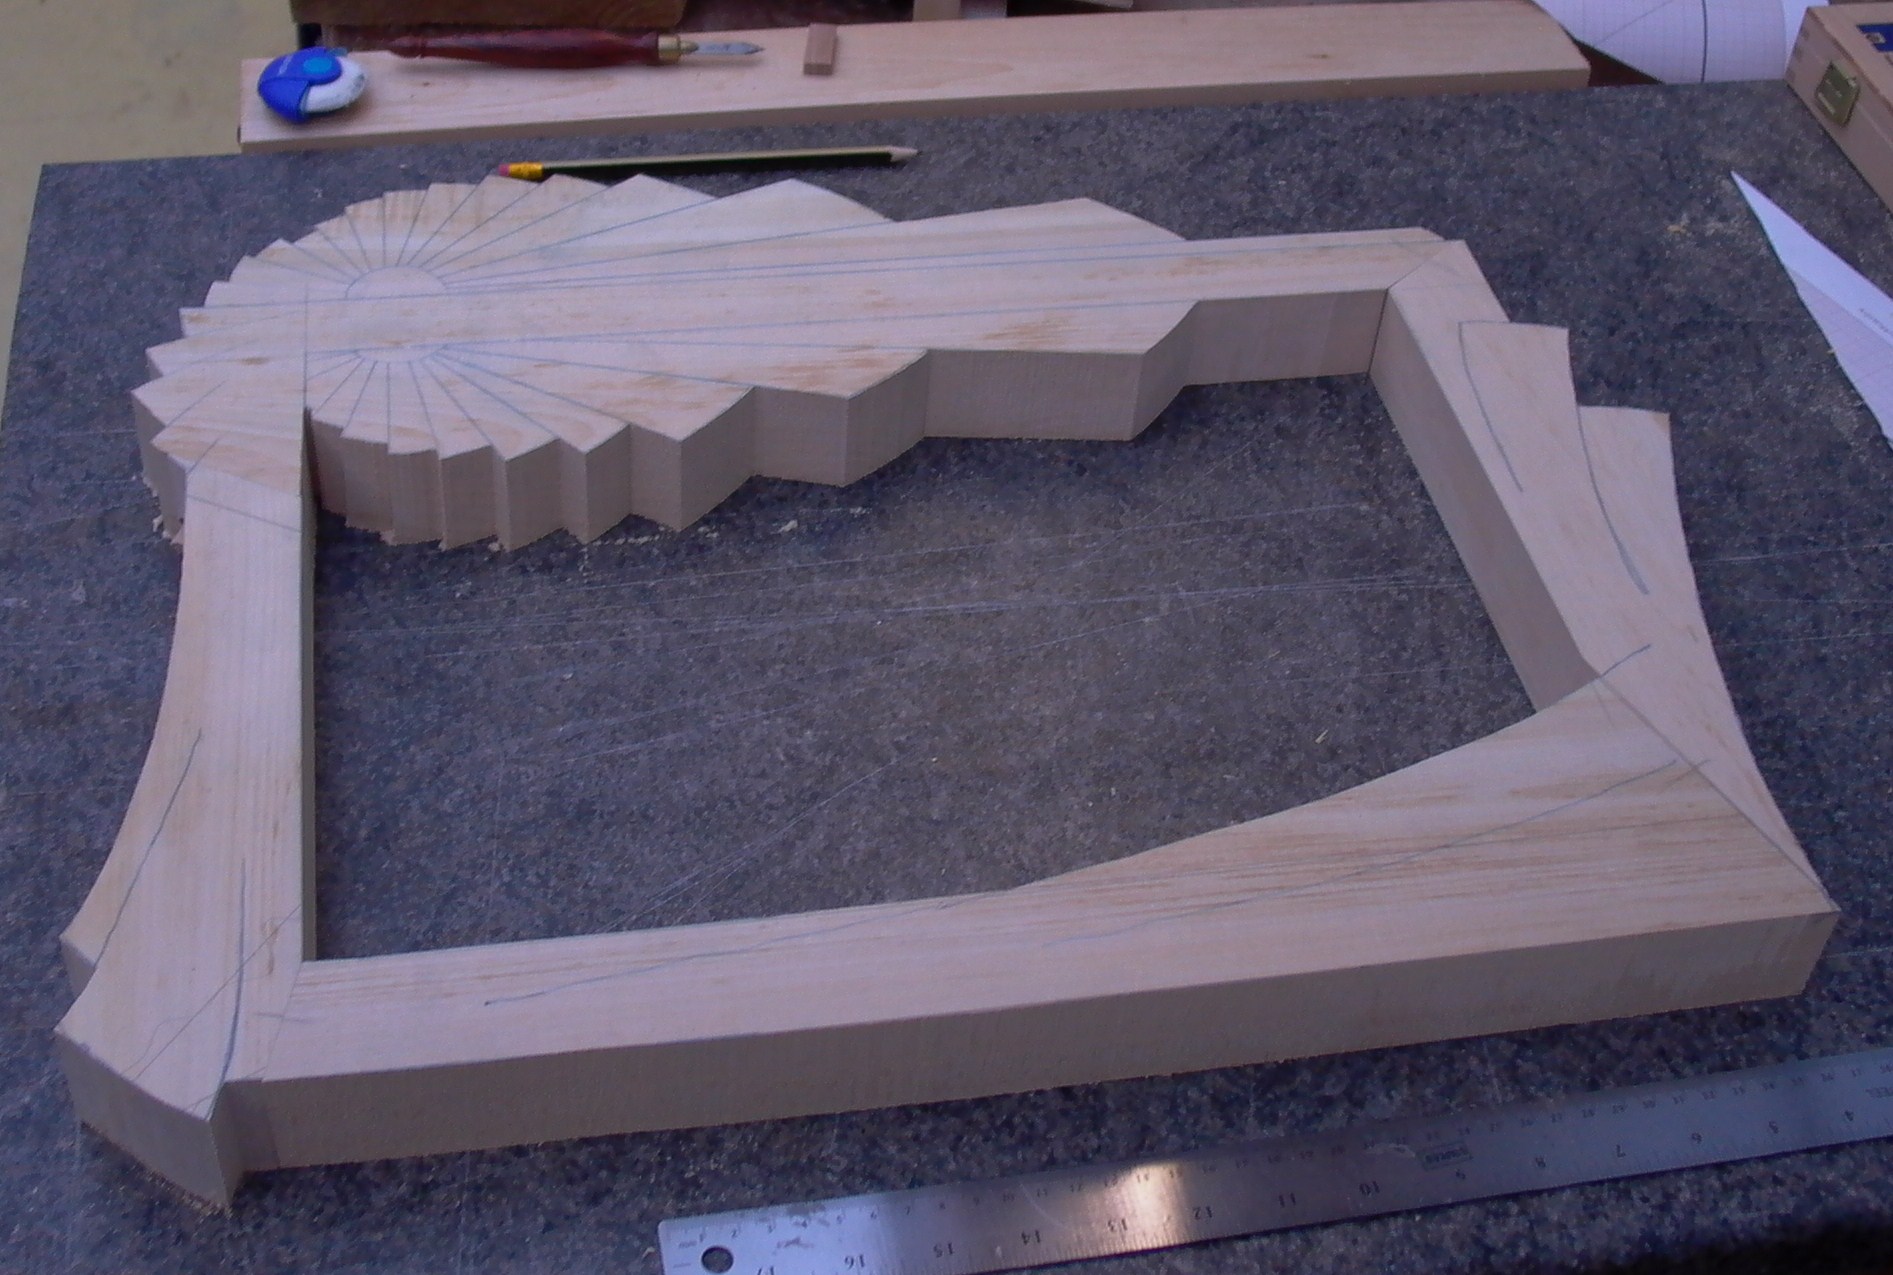
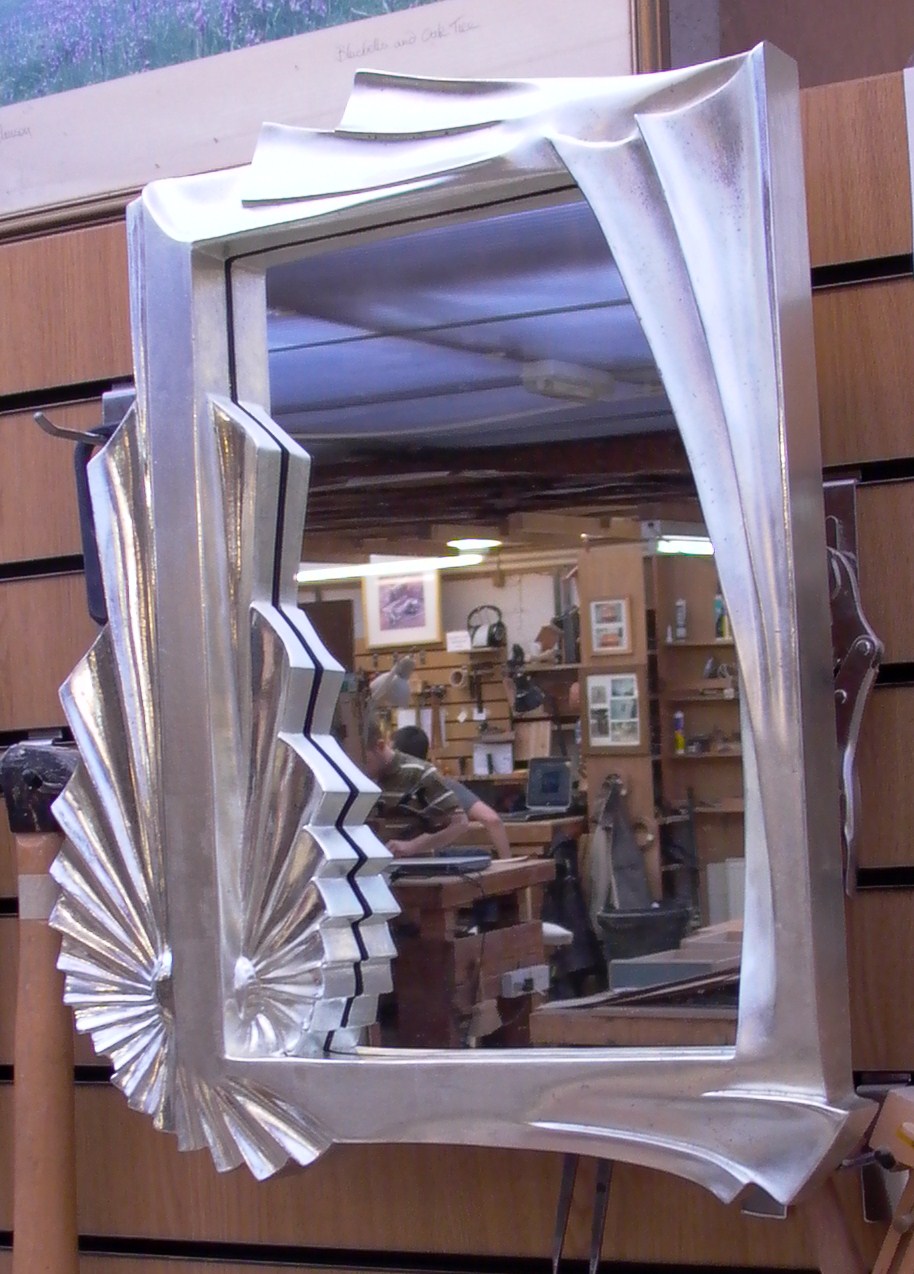
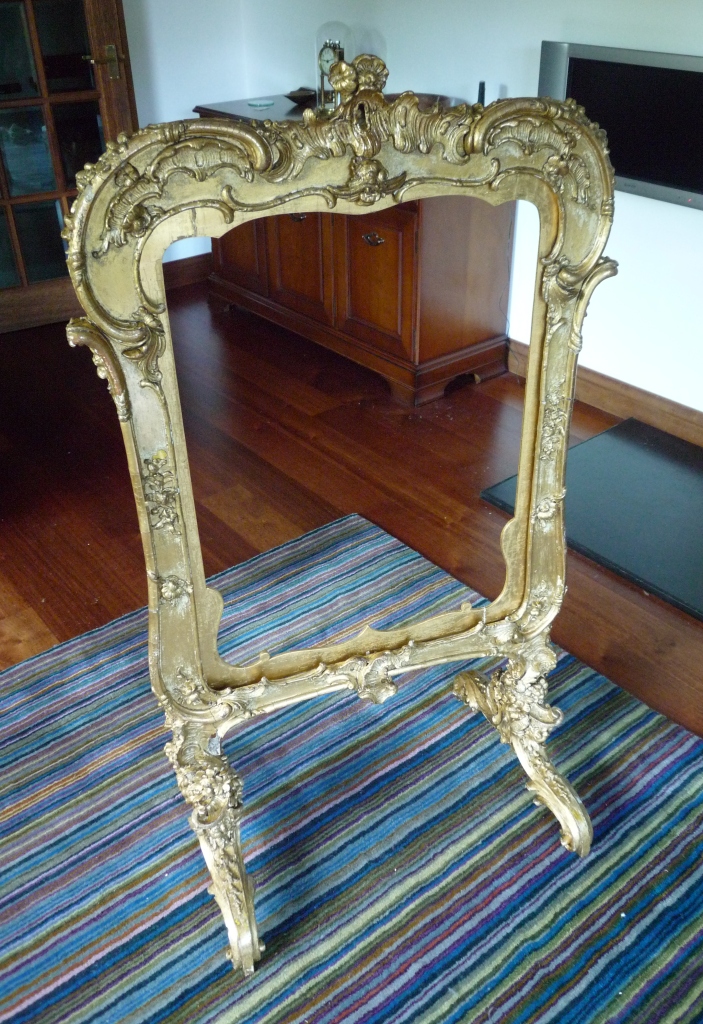
The Art Deco Gilded Mirror
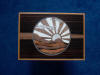 This
piece was destined for the home of a Scots gentleman of Italian
ancestry. It is one of the few pieces I have produced as a portfolio
piece without a commission. I had imagined the design as a simple mirror
frame, possibly using stained glass or perhaps marquetry to create the
reflected sunrise pattern. I had already used a similar theme on a
Marquetry box top but I decided to produce the design in 3 dimensions. This
piece was destined for the home of a Scots gentleman of Italian
ancestry. It is one of the few pieces I have produced as a portfolio
piece without a commission. I had imagined the design as a simple mirror
frame, possibly using stained glass or perhaps marquetry to create the
reflected sunrise pattern. I had already used a similar theme on a
Marquetry box top but I decided to produce the design in 3 dimensions.
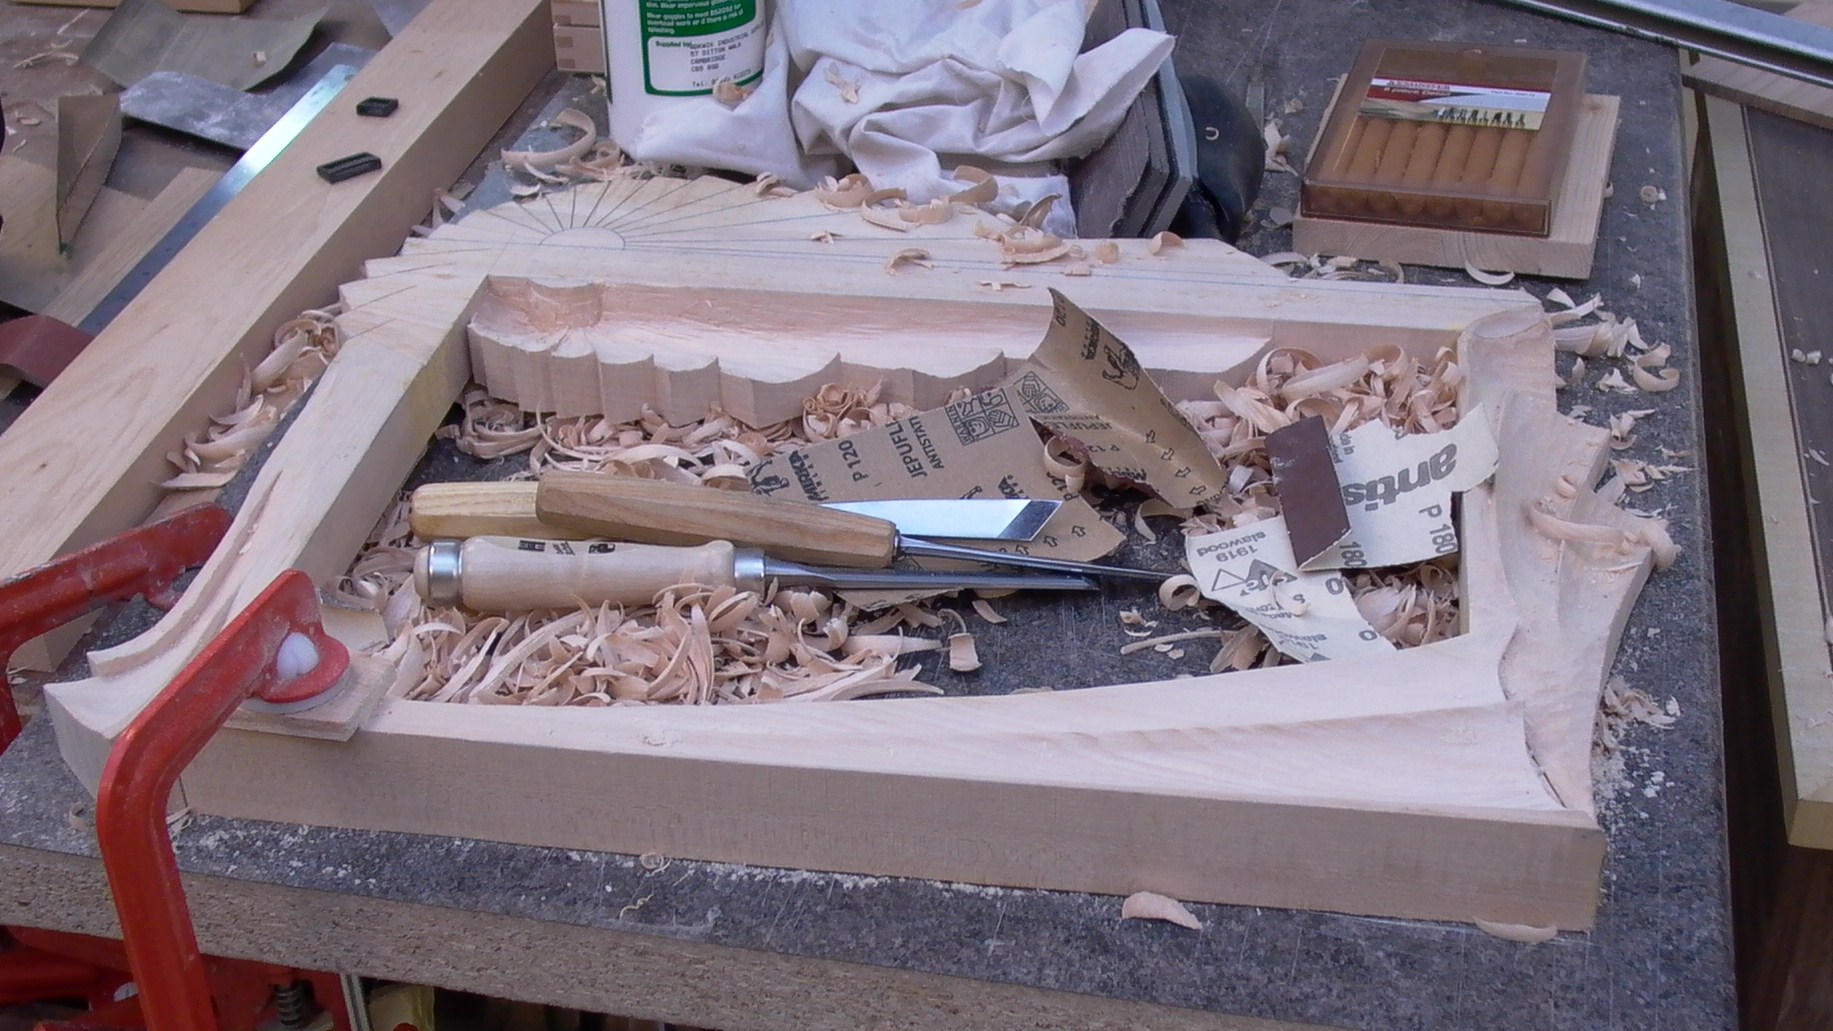
The mirror frame is Lime wood. Lime wood is
most enjoyable to carve. It is compliant under the chisel and can
produce soft shapes as well as hard edged lines as details.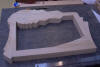
I h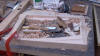 ad
a 2 dimensional design on paper and I transferred that to blocks of Lime
wood that had been glued together to form the rough shape. I found that
I could only address the raised and sunken elements of the design whilst
I was carving the wood. I did not attempt to create a 3 dimensional
drawing. ad
a 2 dimensional design on paper and I transferred that to blocks of Lime
wood that had been glued together to form the rough shape. I found that
I could only address the raised and sunken elements of the design whilst
I was carving the wood. I did not attempt to create a 3 dimensional
drawing.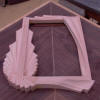
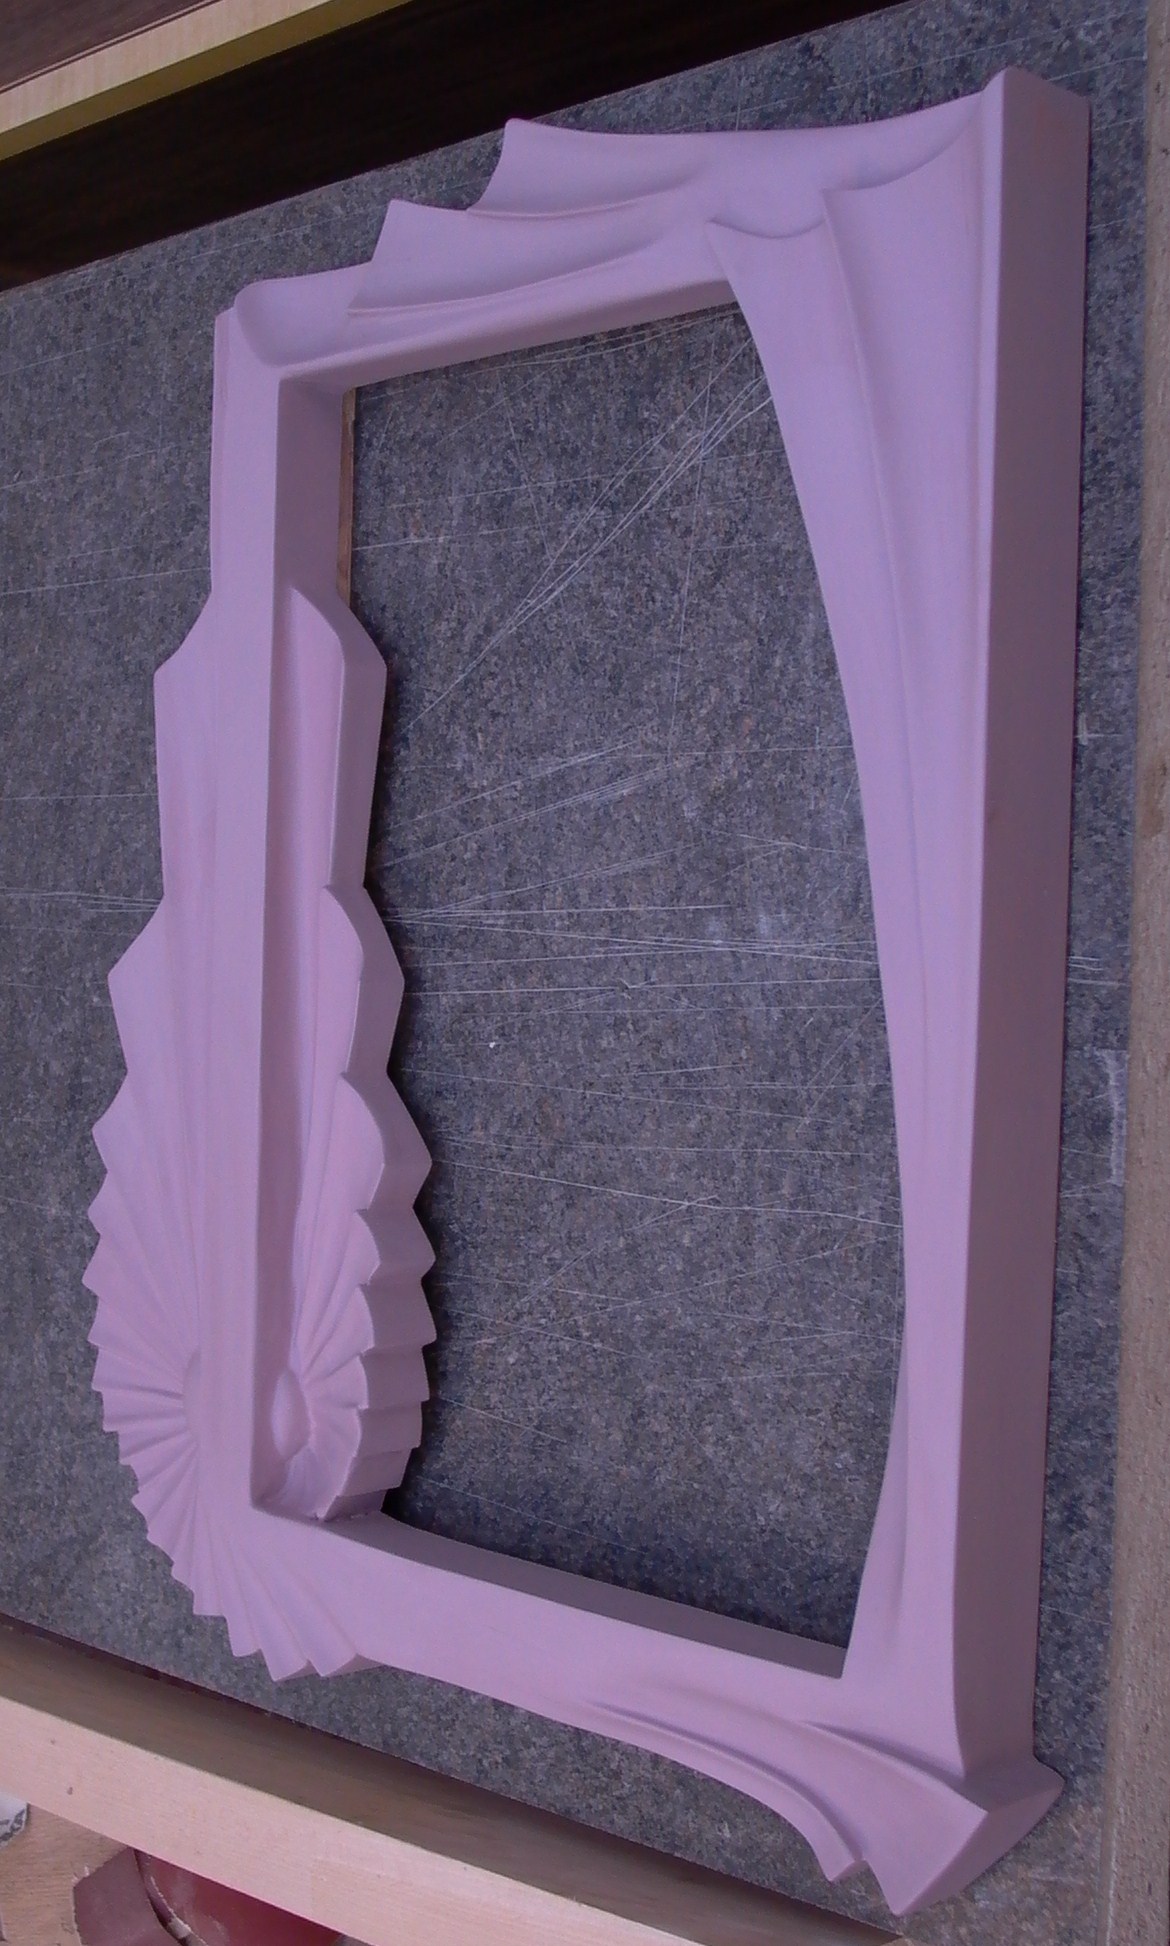
 The
beautiful irony of Gilding is that, having carved this finely detailed
piece, you then obscure the fine detail with coloured Gesso. The Gesso
acts as the base for the leaf providing good adhesion. Once a good thick
layer of Gesso has undone a fair degree of the carving work the detail
is carved back into the Gesso and the Gold leaf is applied using a light
glue size. The
beautiful irony of Gilding is that, having carved this finely detailed
piece, you then obscure the fine detail with coloured Gesso. The Gesso
acts as the base for the leaf providing good adhesion. Once a good thick
layer of Gesso has undone a fair degree of the carving work the detail
is carved back into the Gesso and the Gold leaf is applied using a light
glue size.
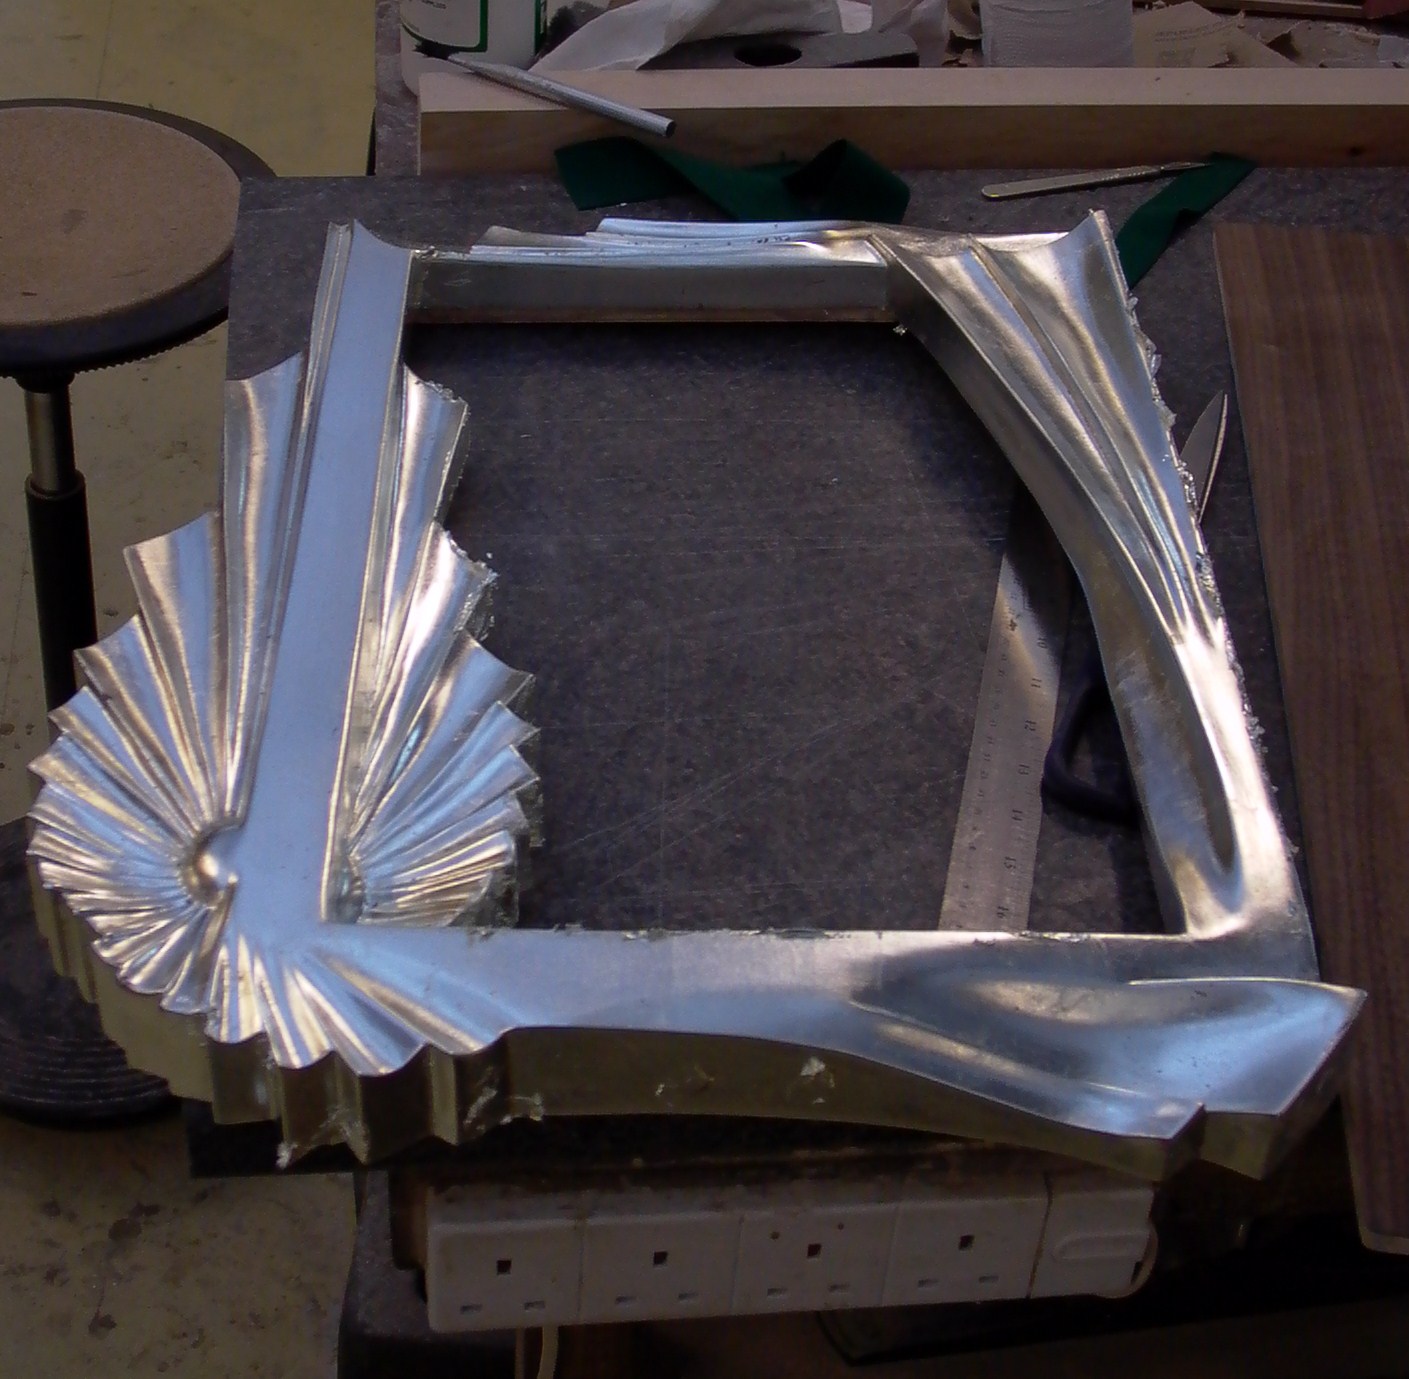
Gilding has to be a lonely task. The Gold
leaf is too easily disturb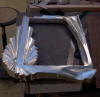 ed
from the Gilder's cushion by the rush of air as colleagues walk past.
You may not think that a human being creates a rush of air in t ed
from the Gilder's cushion by the rush of air as colleagues walk past.
You may not think that a human being creates a rush of air in t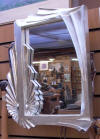 heir
wake but, let me assure you, as another leaf of gold takes to the air
from the cushion, folding and twisting as it goes, you realise just how
devilishly annoying that wake can be. heir
wake but, let me assure you, as another leaf of gold takes to the air
from the cushion, folding and twisting as it goes, you realise just how
devilishly annoying that wake can be.
I chose to burnish only certain elements of
the design which results in the combined finish of high gloss and satin
that you can see to the left. The mirror can be hung as a portrait,
which is my preference, or as a landscape.
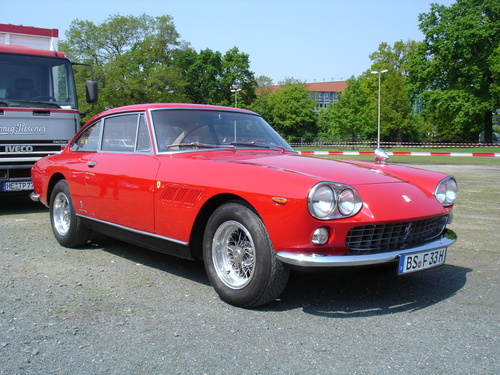
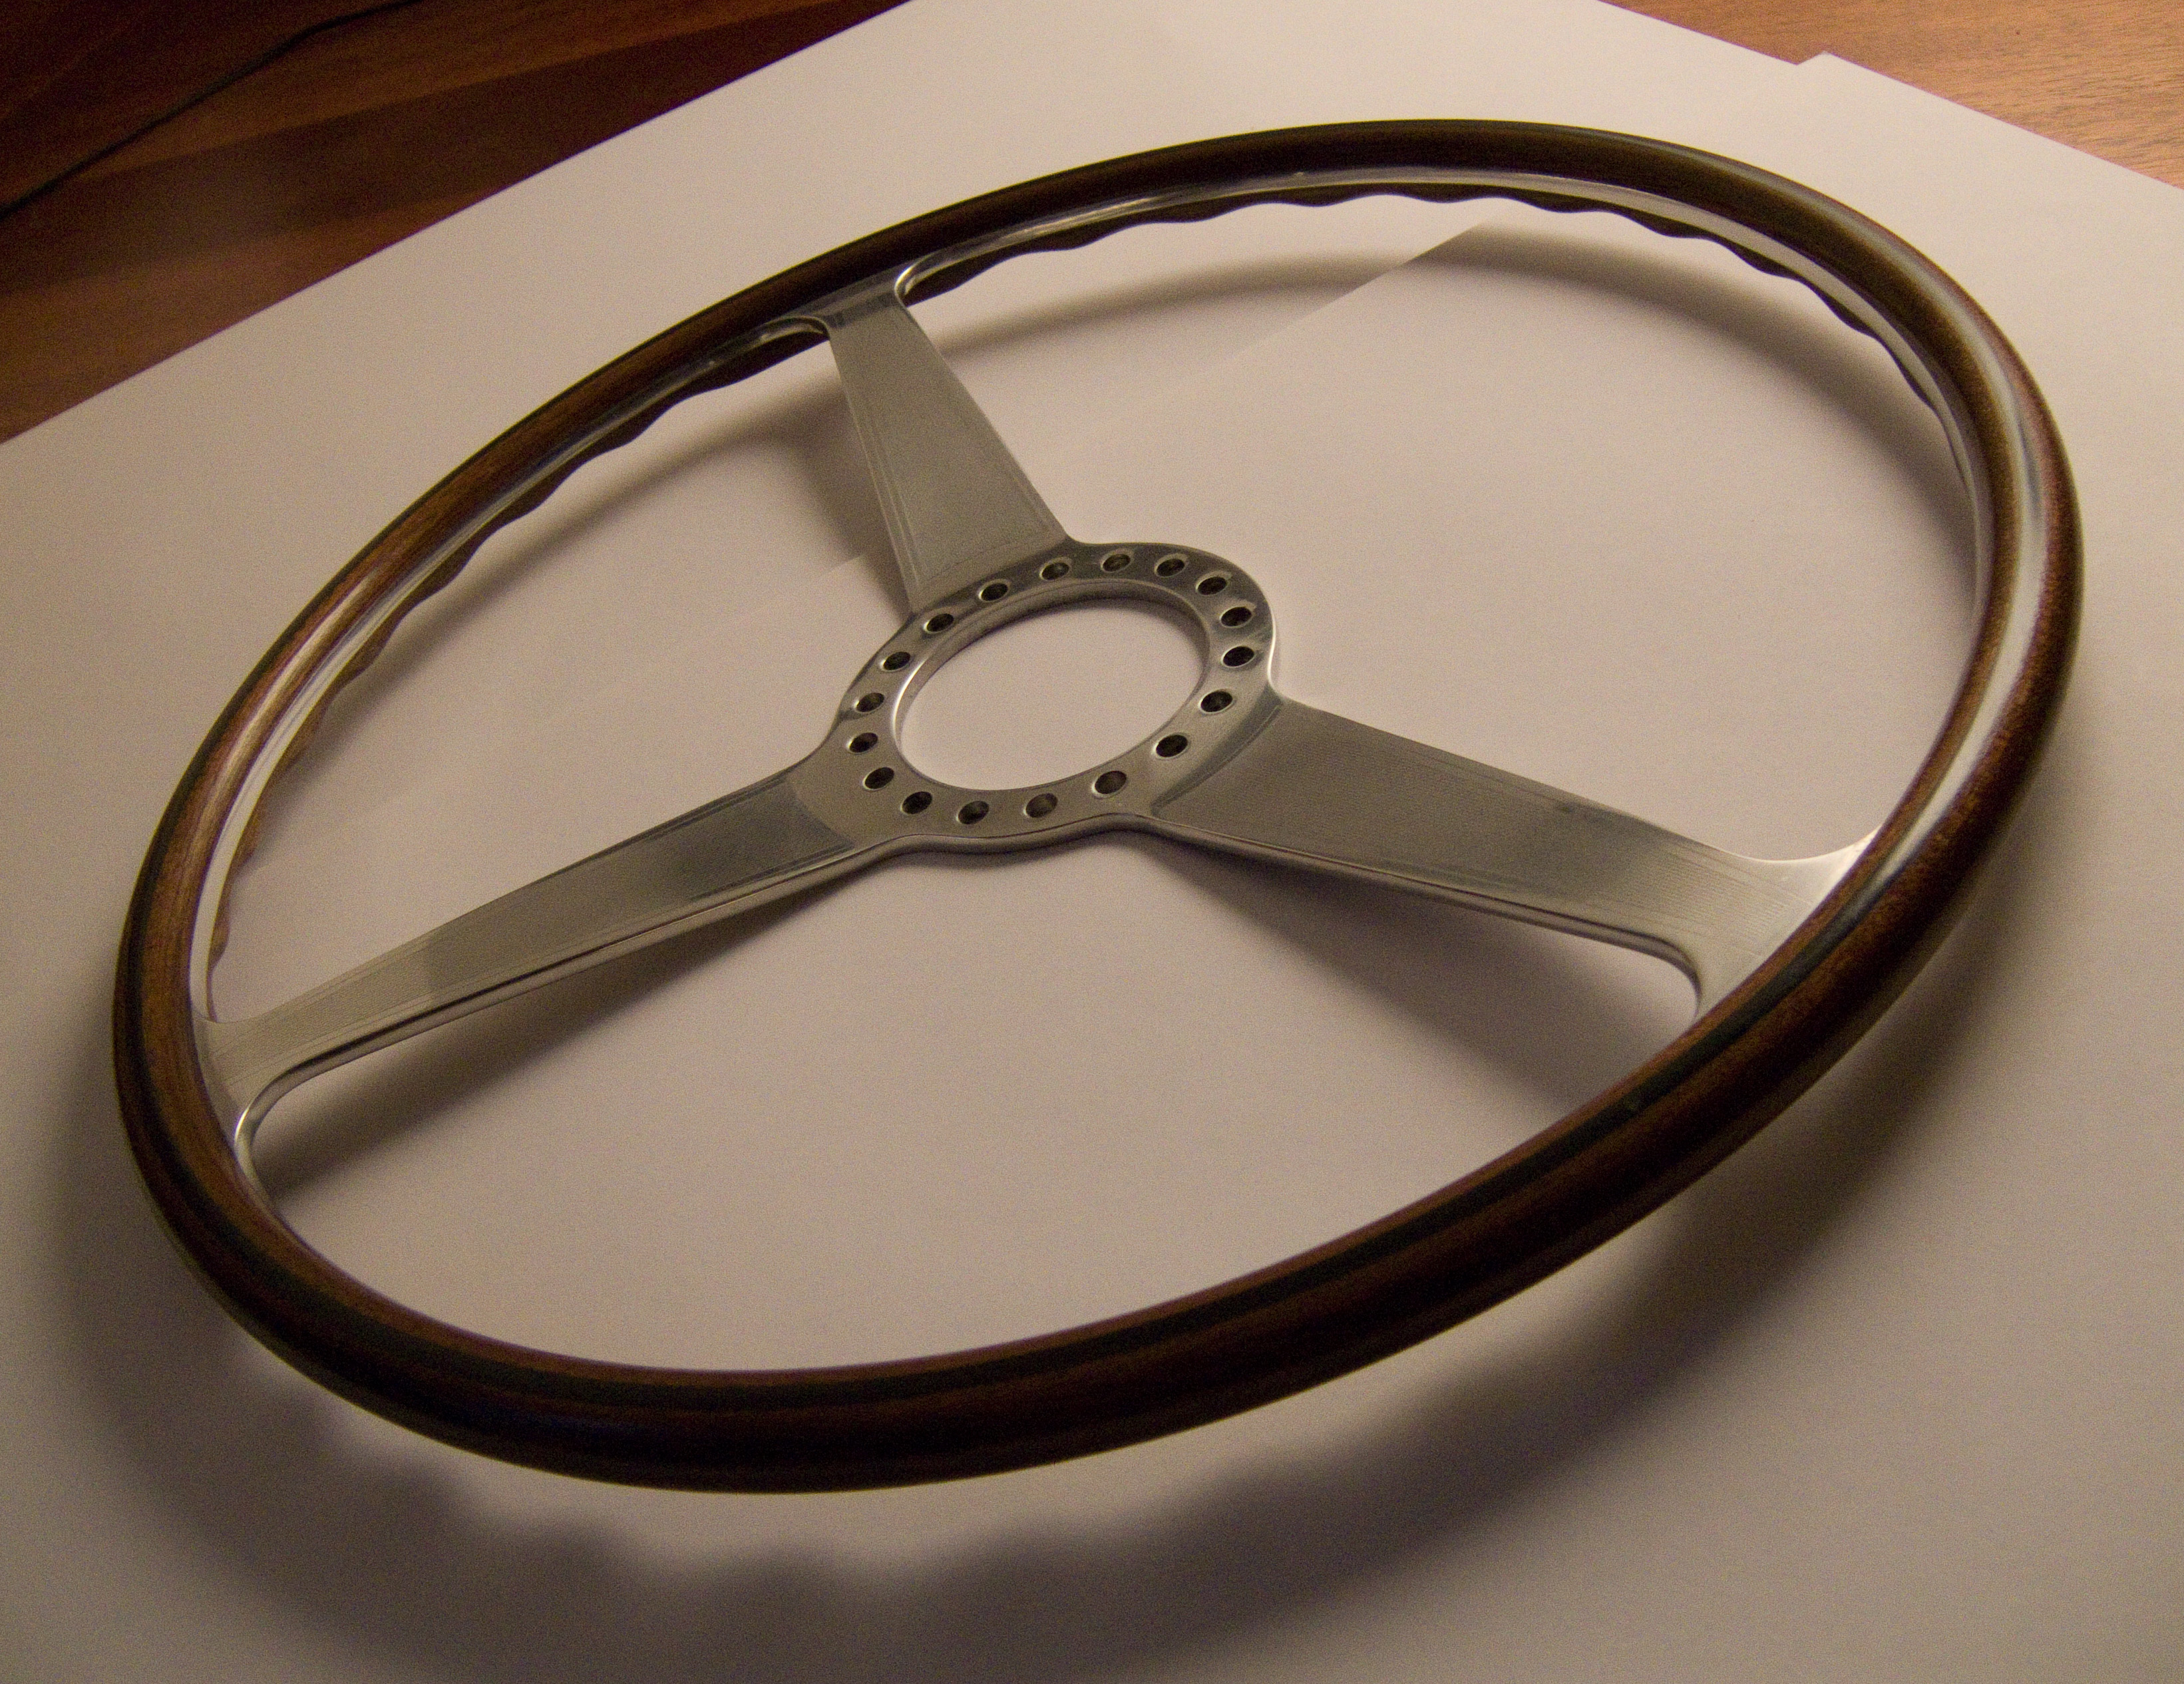
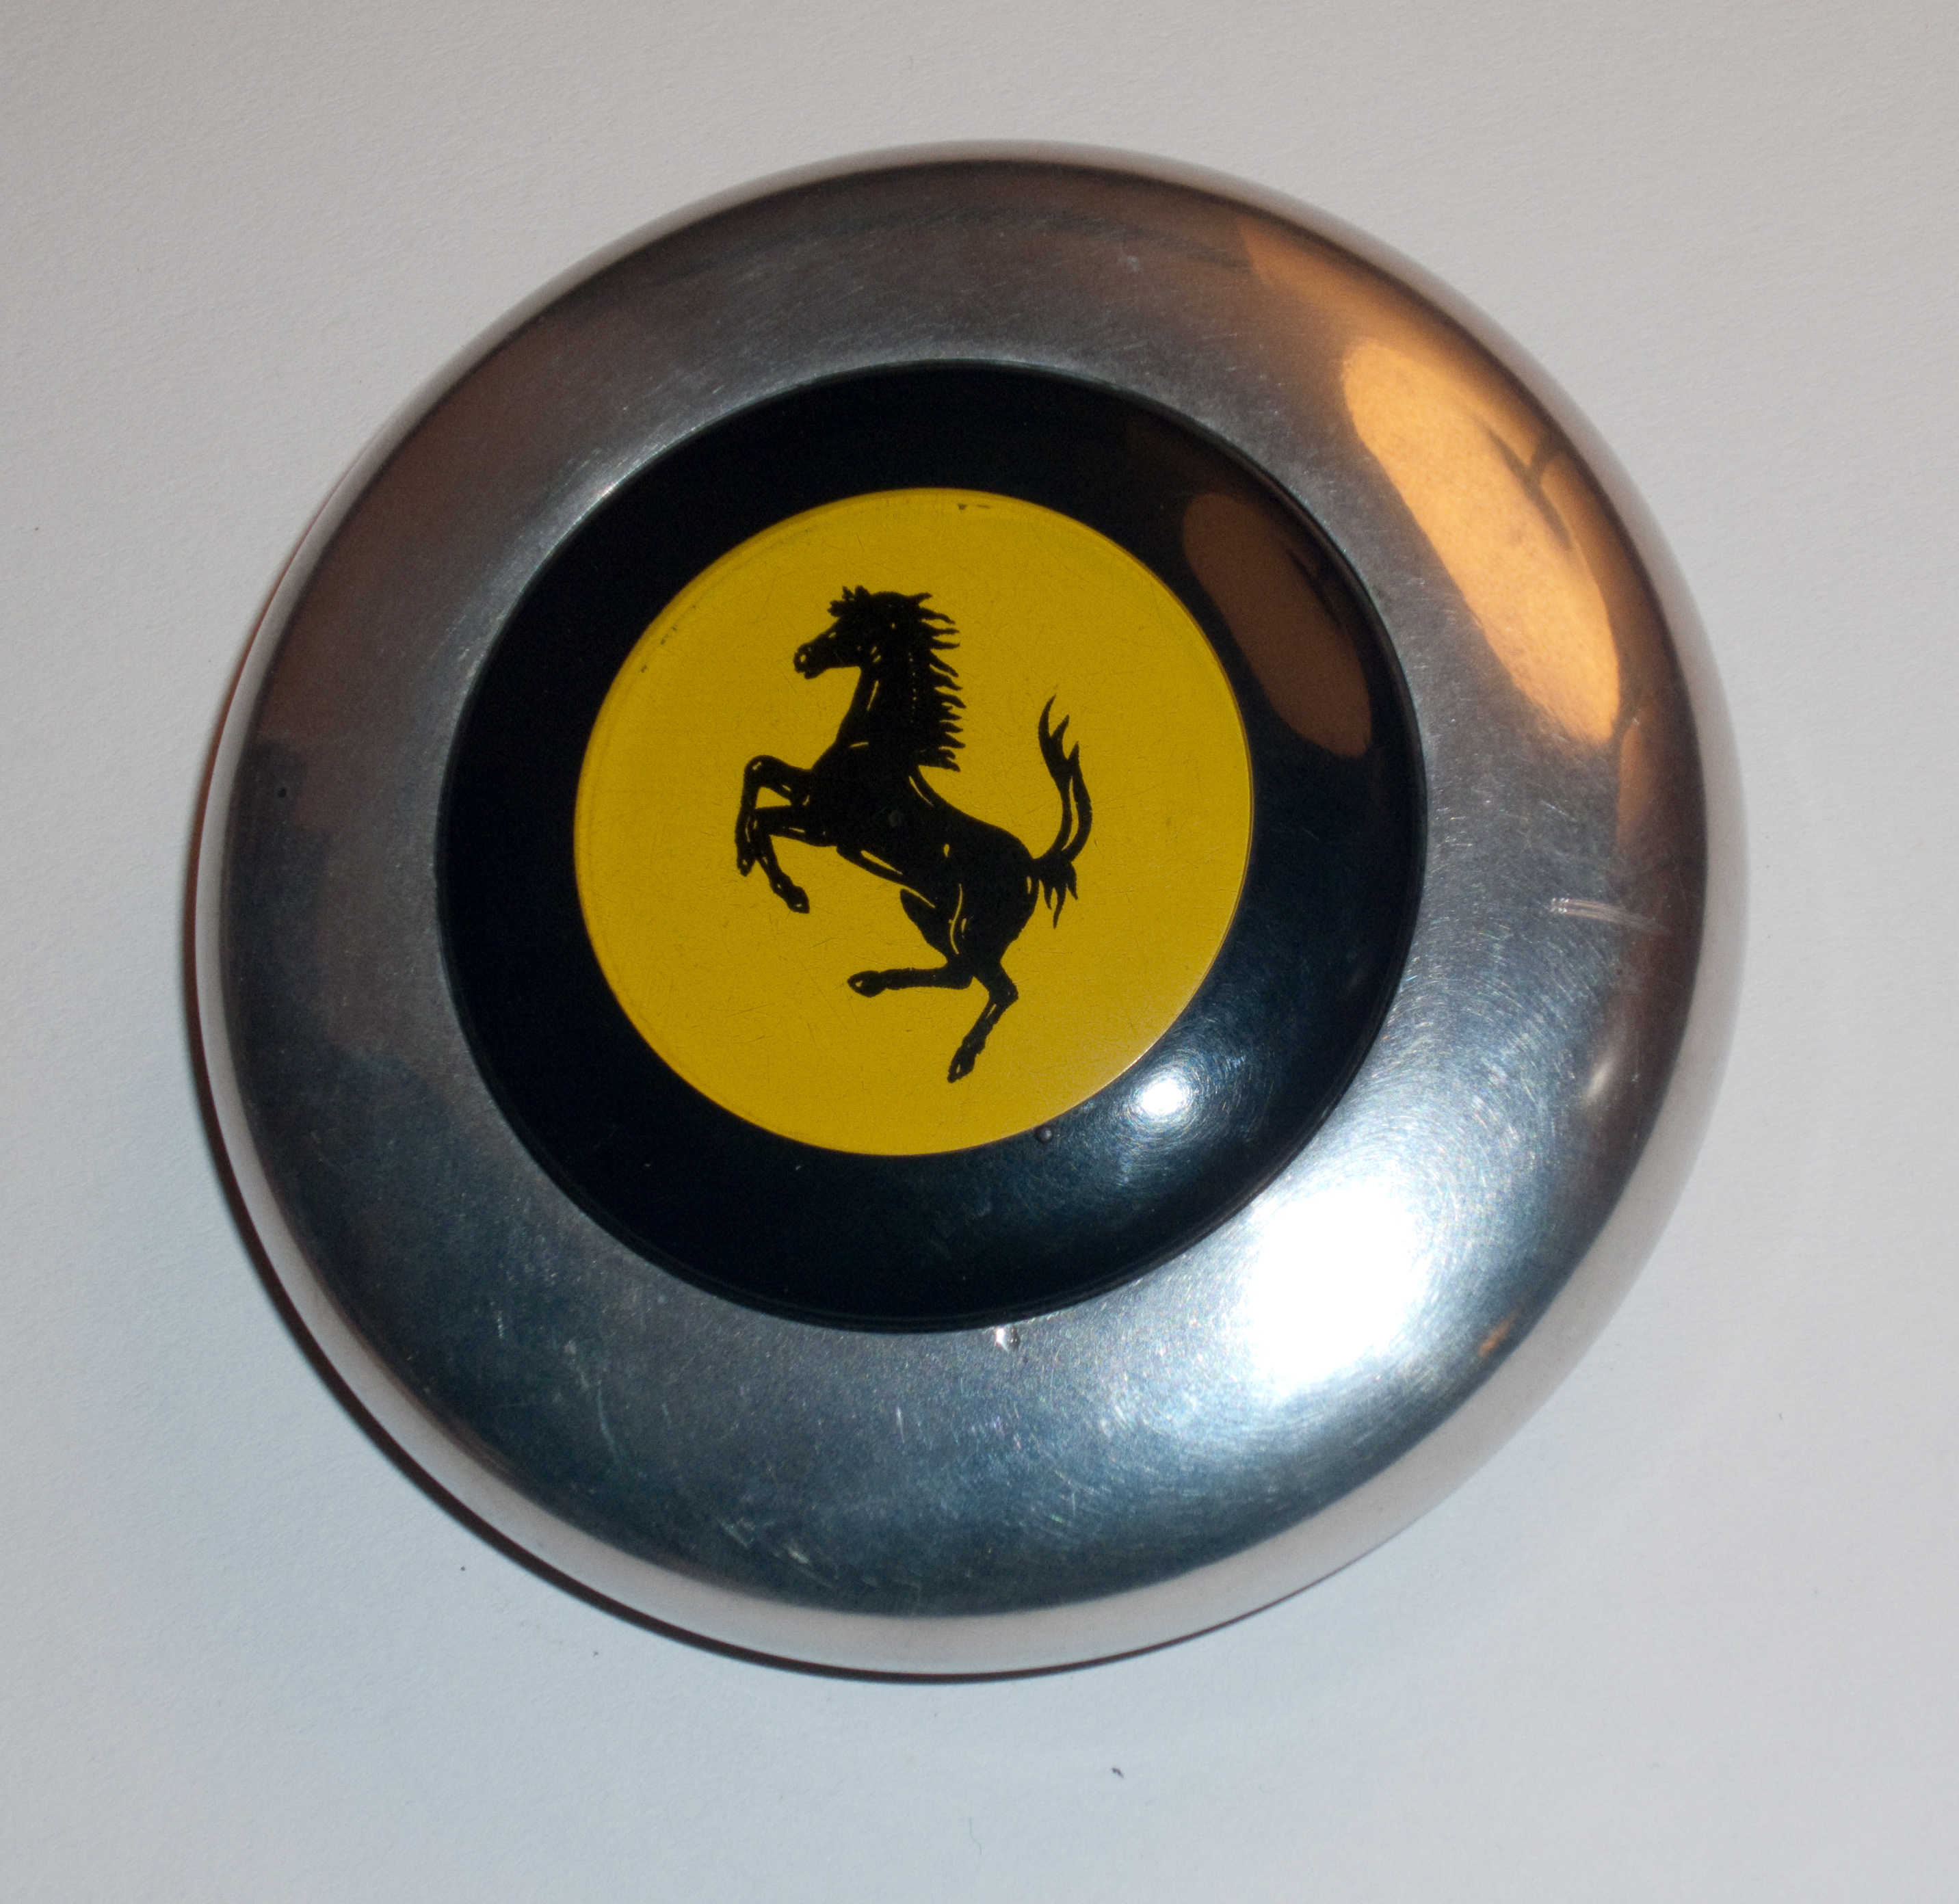
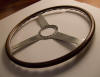
The 1963 Ferrari 330GT
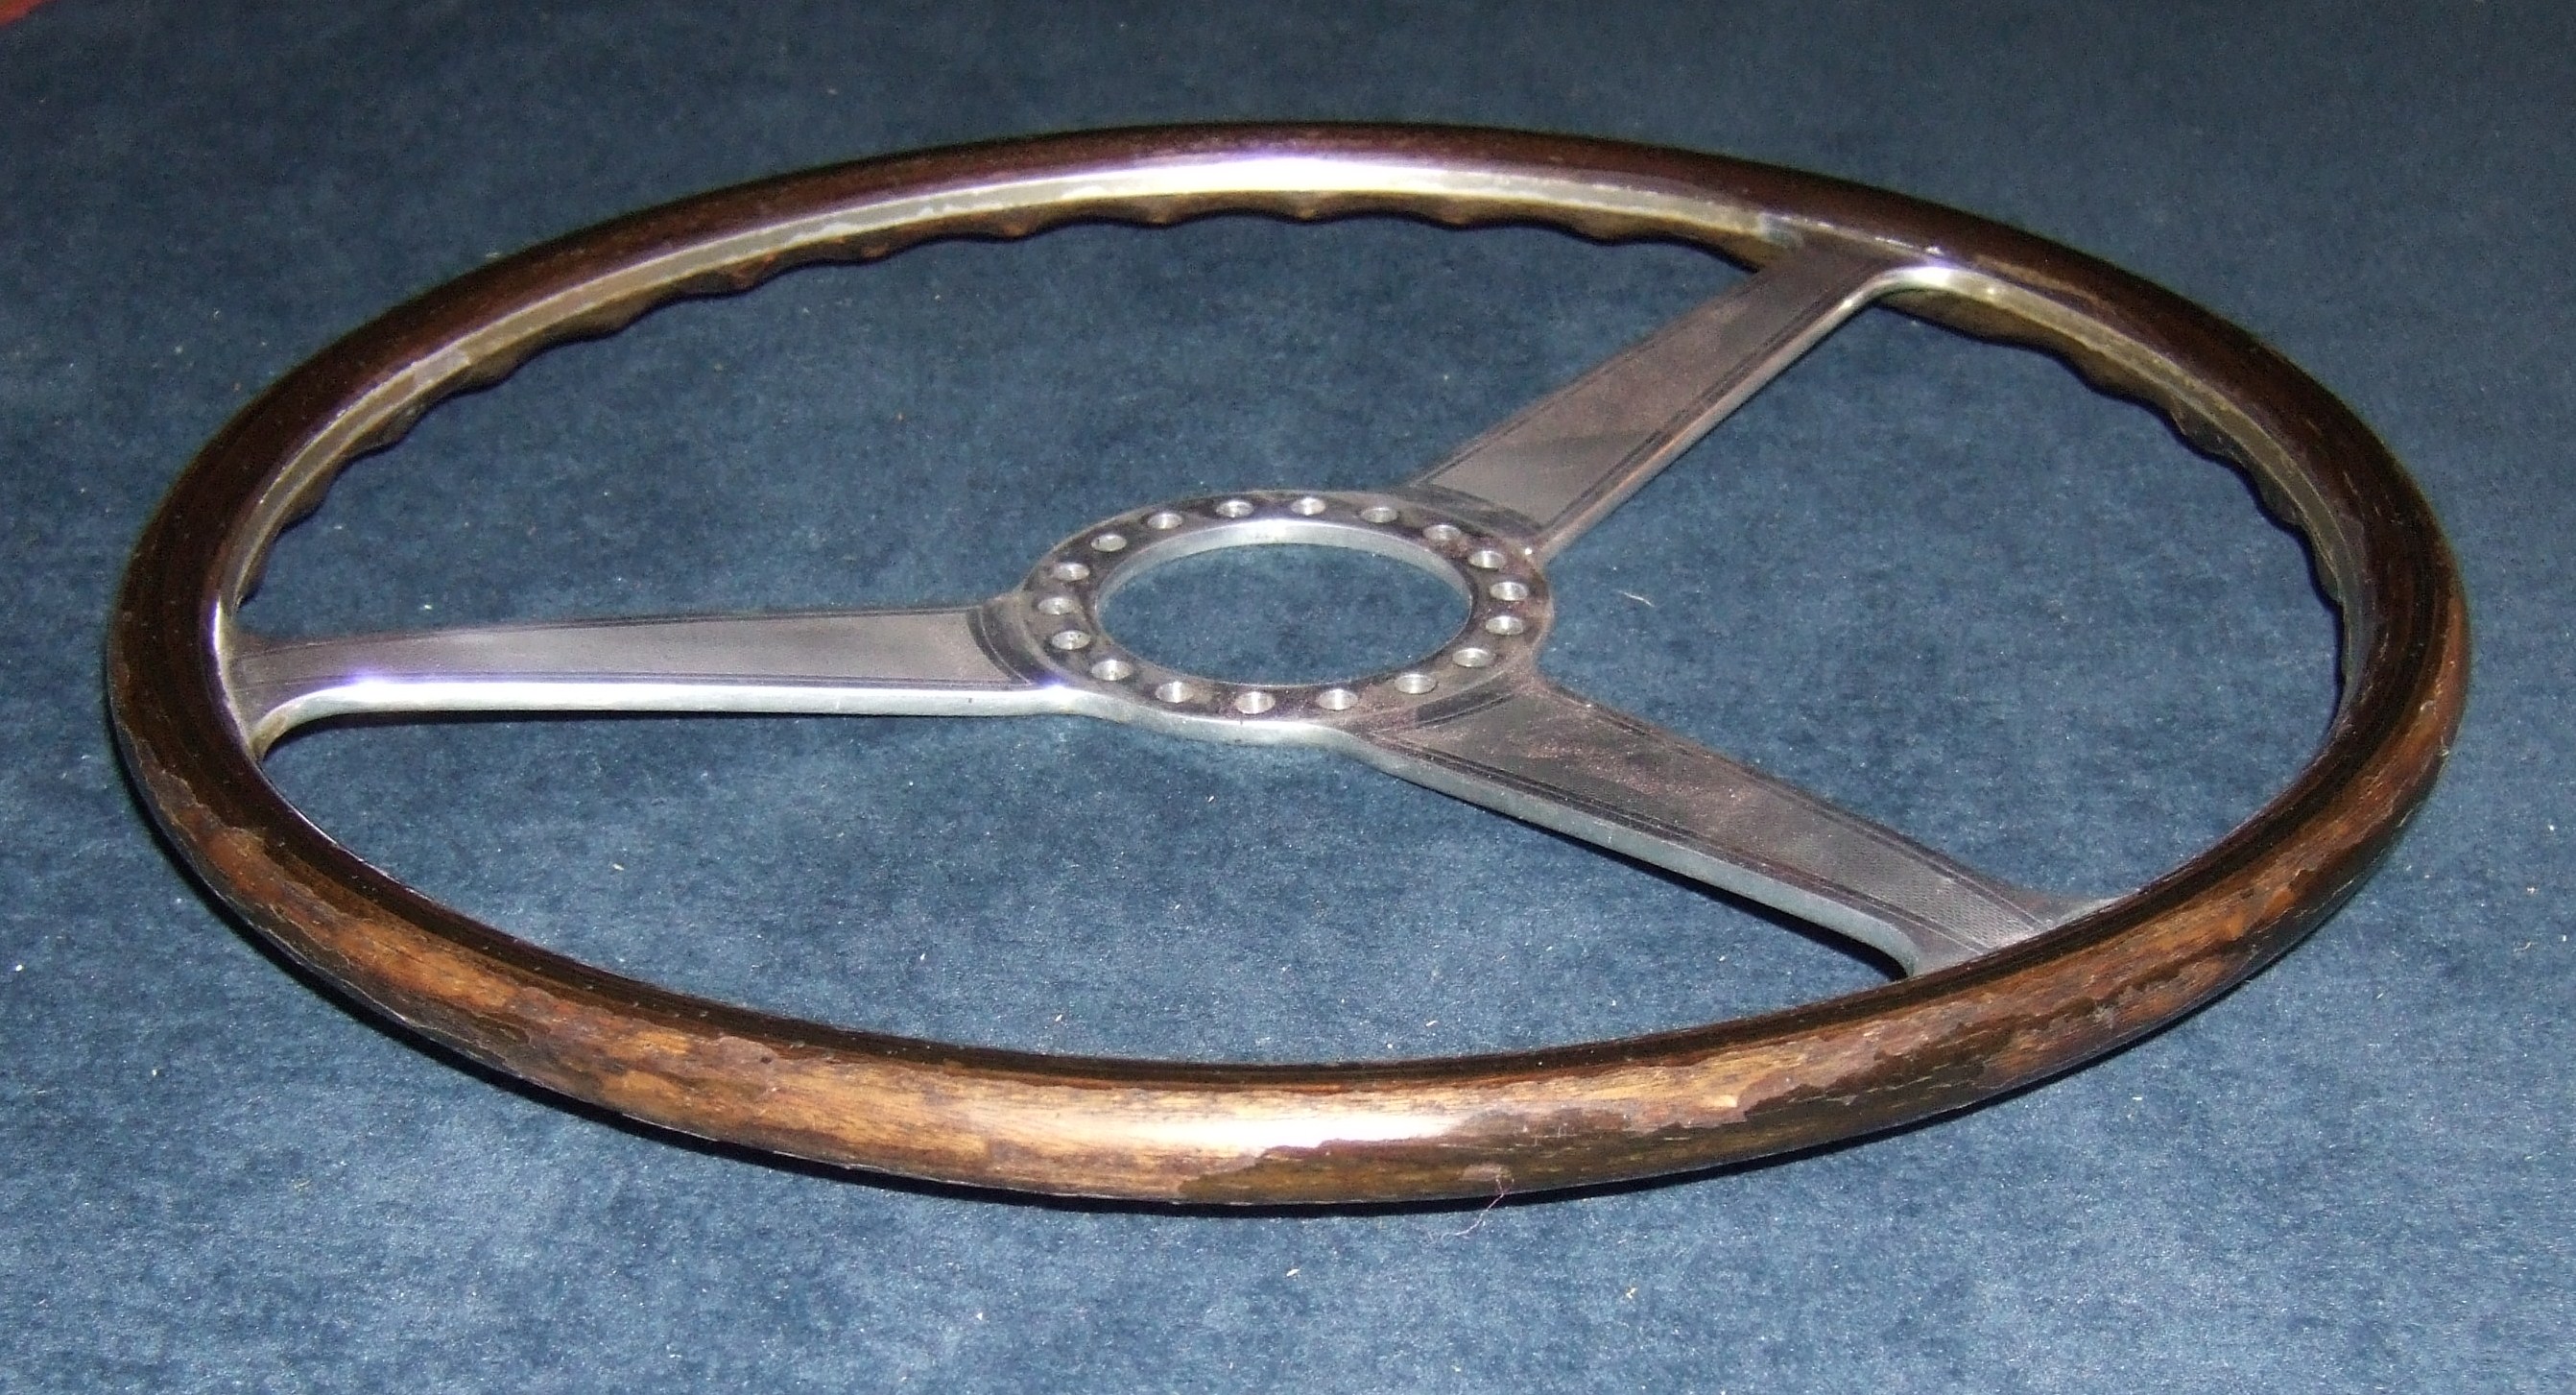
The Steering Wheel
Every so often you get commissioned to do
something that you know you are going to enjoy so much you feel that you
shouldn't take money for it. Usually you manage to get over that pretty
quickly.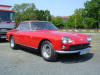
The Ferrari 330GT is a beautiful car. It is
front-engined (a true Ferrari by some people's definitions), has four
seats and goes like stink. Probably doesn't stop so well but is good
enough by 1963 standards. It is also worth quite a lot. Here's a red
one.
I am working on the dashboard for this car
and I should have pictures of that also when the work is finished.
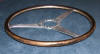 The
steering wheel metalwork is milled from a metal disc and cut to shape.
The wood is Ash (bends easy) and it has a black bakelite ring inlaid.
The wood is riveted in position. The
steering wheel metalwork is milled from a metal disc and cut to shape.
The wood is Ash (bends easy) and it has a black bakelite ring inlaid.
The wood is riveted in position.
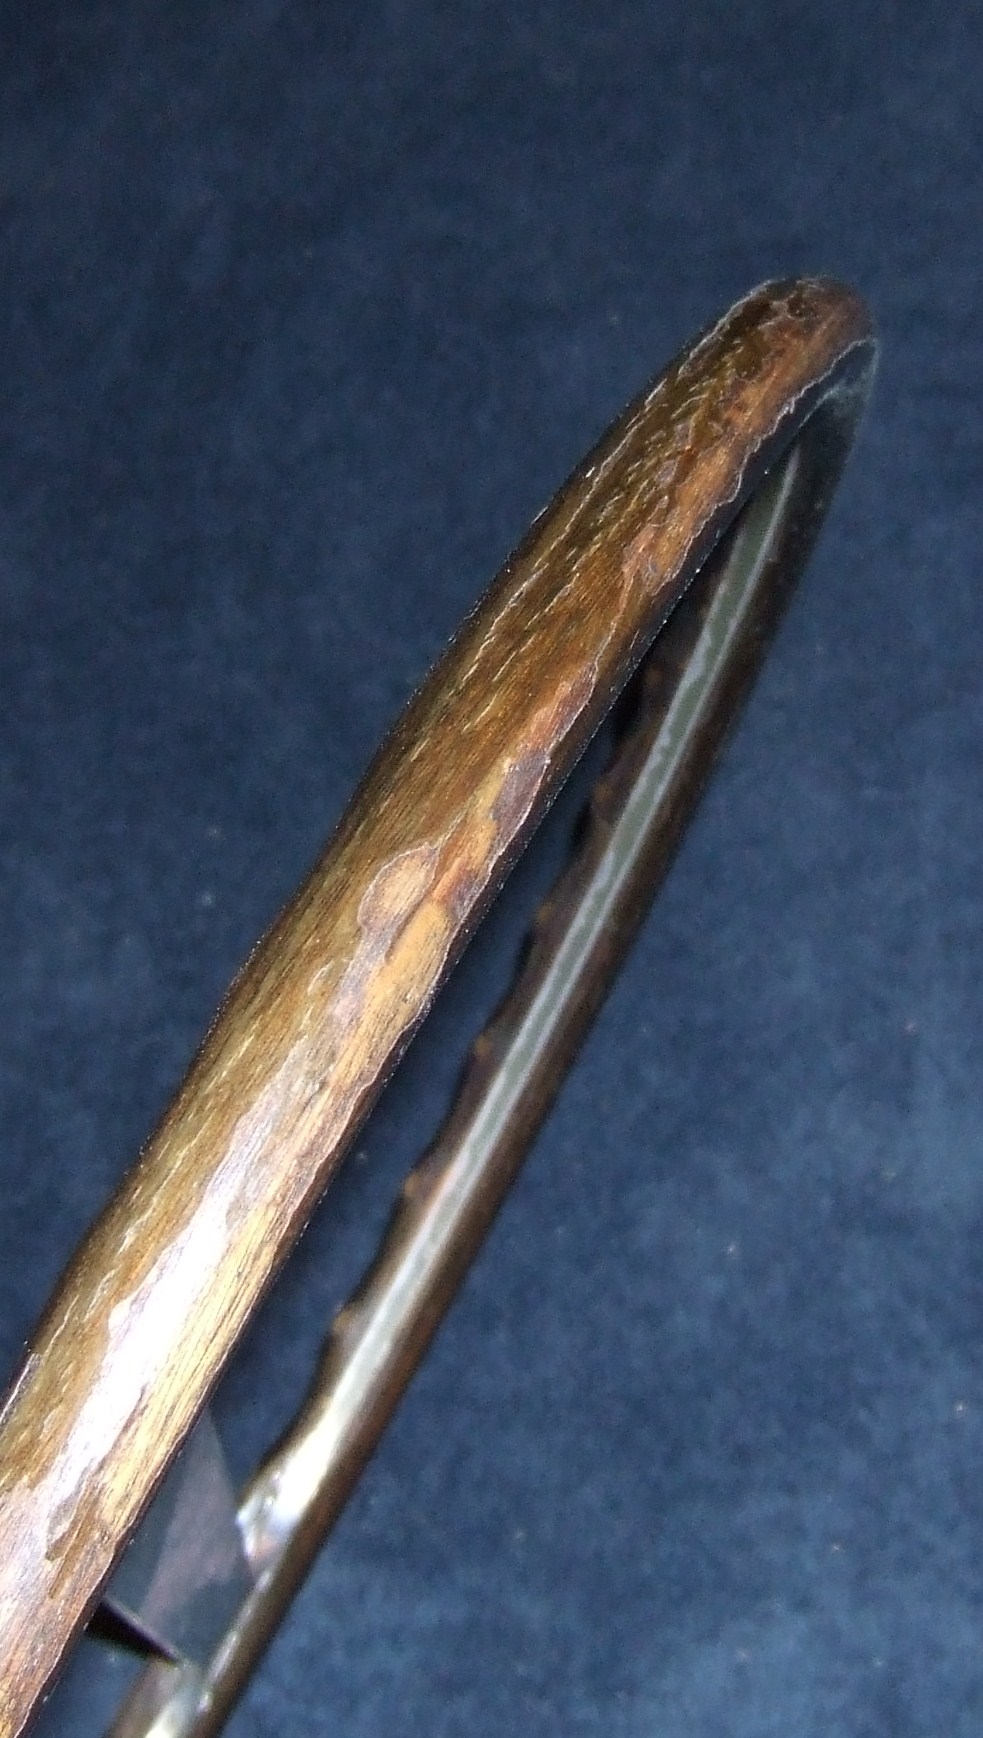
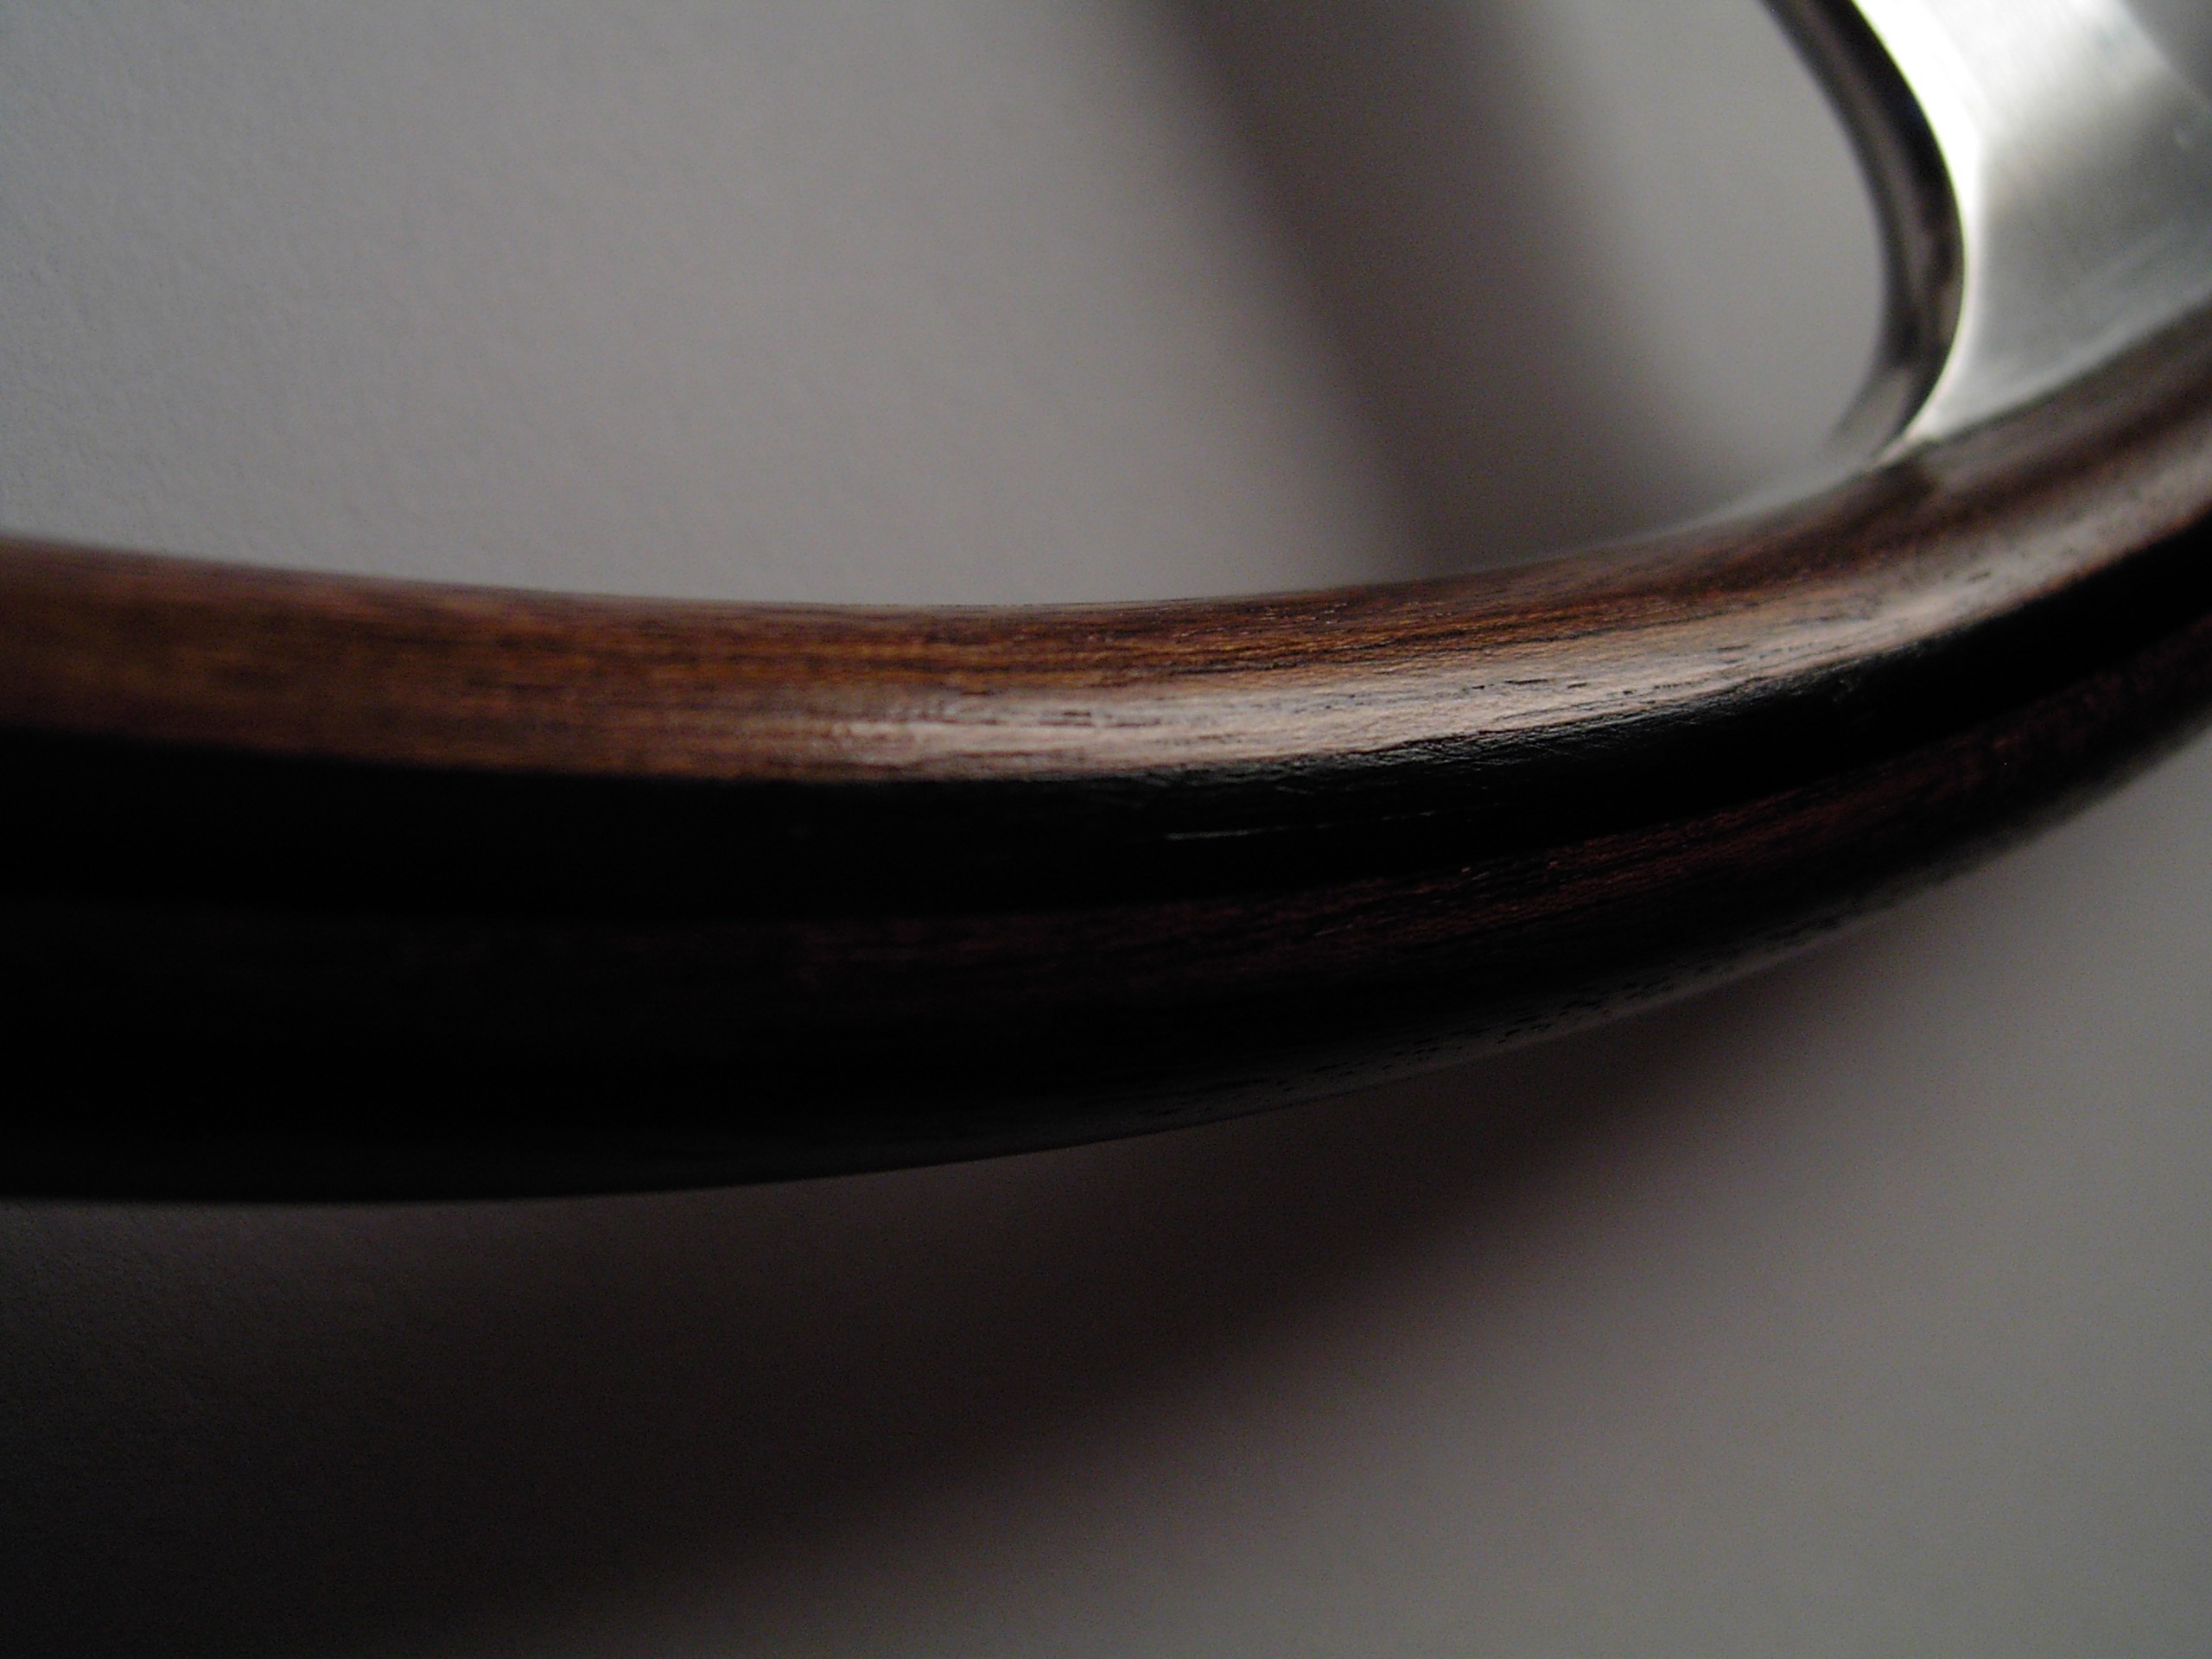
After some 47 years the steering wheel was in
pretty poor aesthetic shape. The lacquer was tainted, browning the
metalwork and peeling in great chunks from the wood. You can see this in
the photos. The original dash was European Walnut veneer on ply and the
steering wheel had been coloured to match. The colour had faded and had
been worn away in many places. The dashboard has been restored using an
aged Burr Walnut veneer and the wheel needed to be stripped and
re-coloured to match and re-finished in something a little more
sympathetic to its age. The metalwork needed the lacquer removed and
polished to remove damage.
Lacquer/varnish, probably cellulose based,
does not age gracefully. It doesn't wear down with a smooth edge as
Shellac would. It cracks, flakes and disintegrates. However, it fights
pretty hard when you try and strip it off. The task was made more
complex by the bakelite inlay. Chemical stripping would melt the
bakelite. A quick test spot determined that that was definitely the
case. The lacquer needed to be persuaded off carefully with chemicals,
scrapers and glass paper.
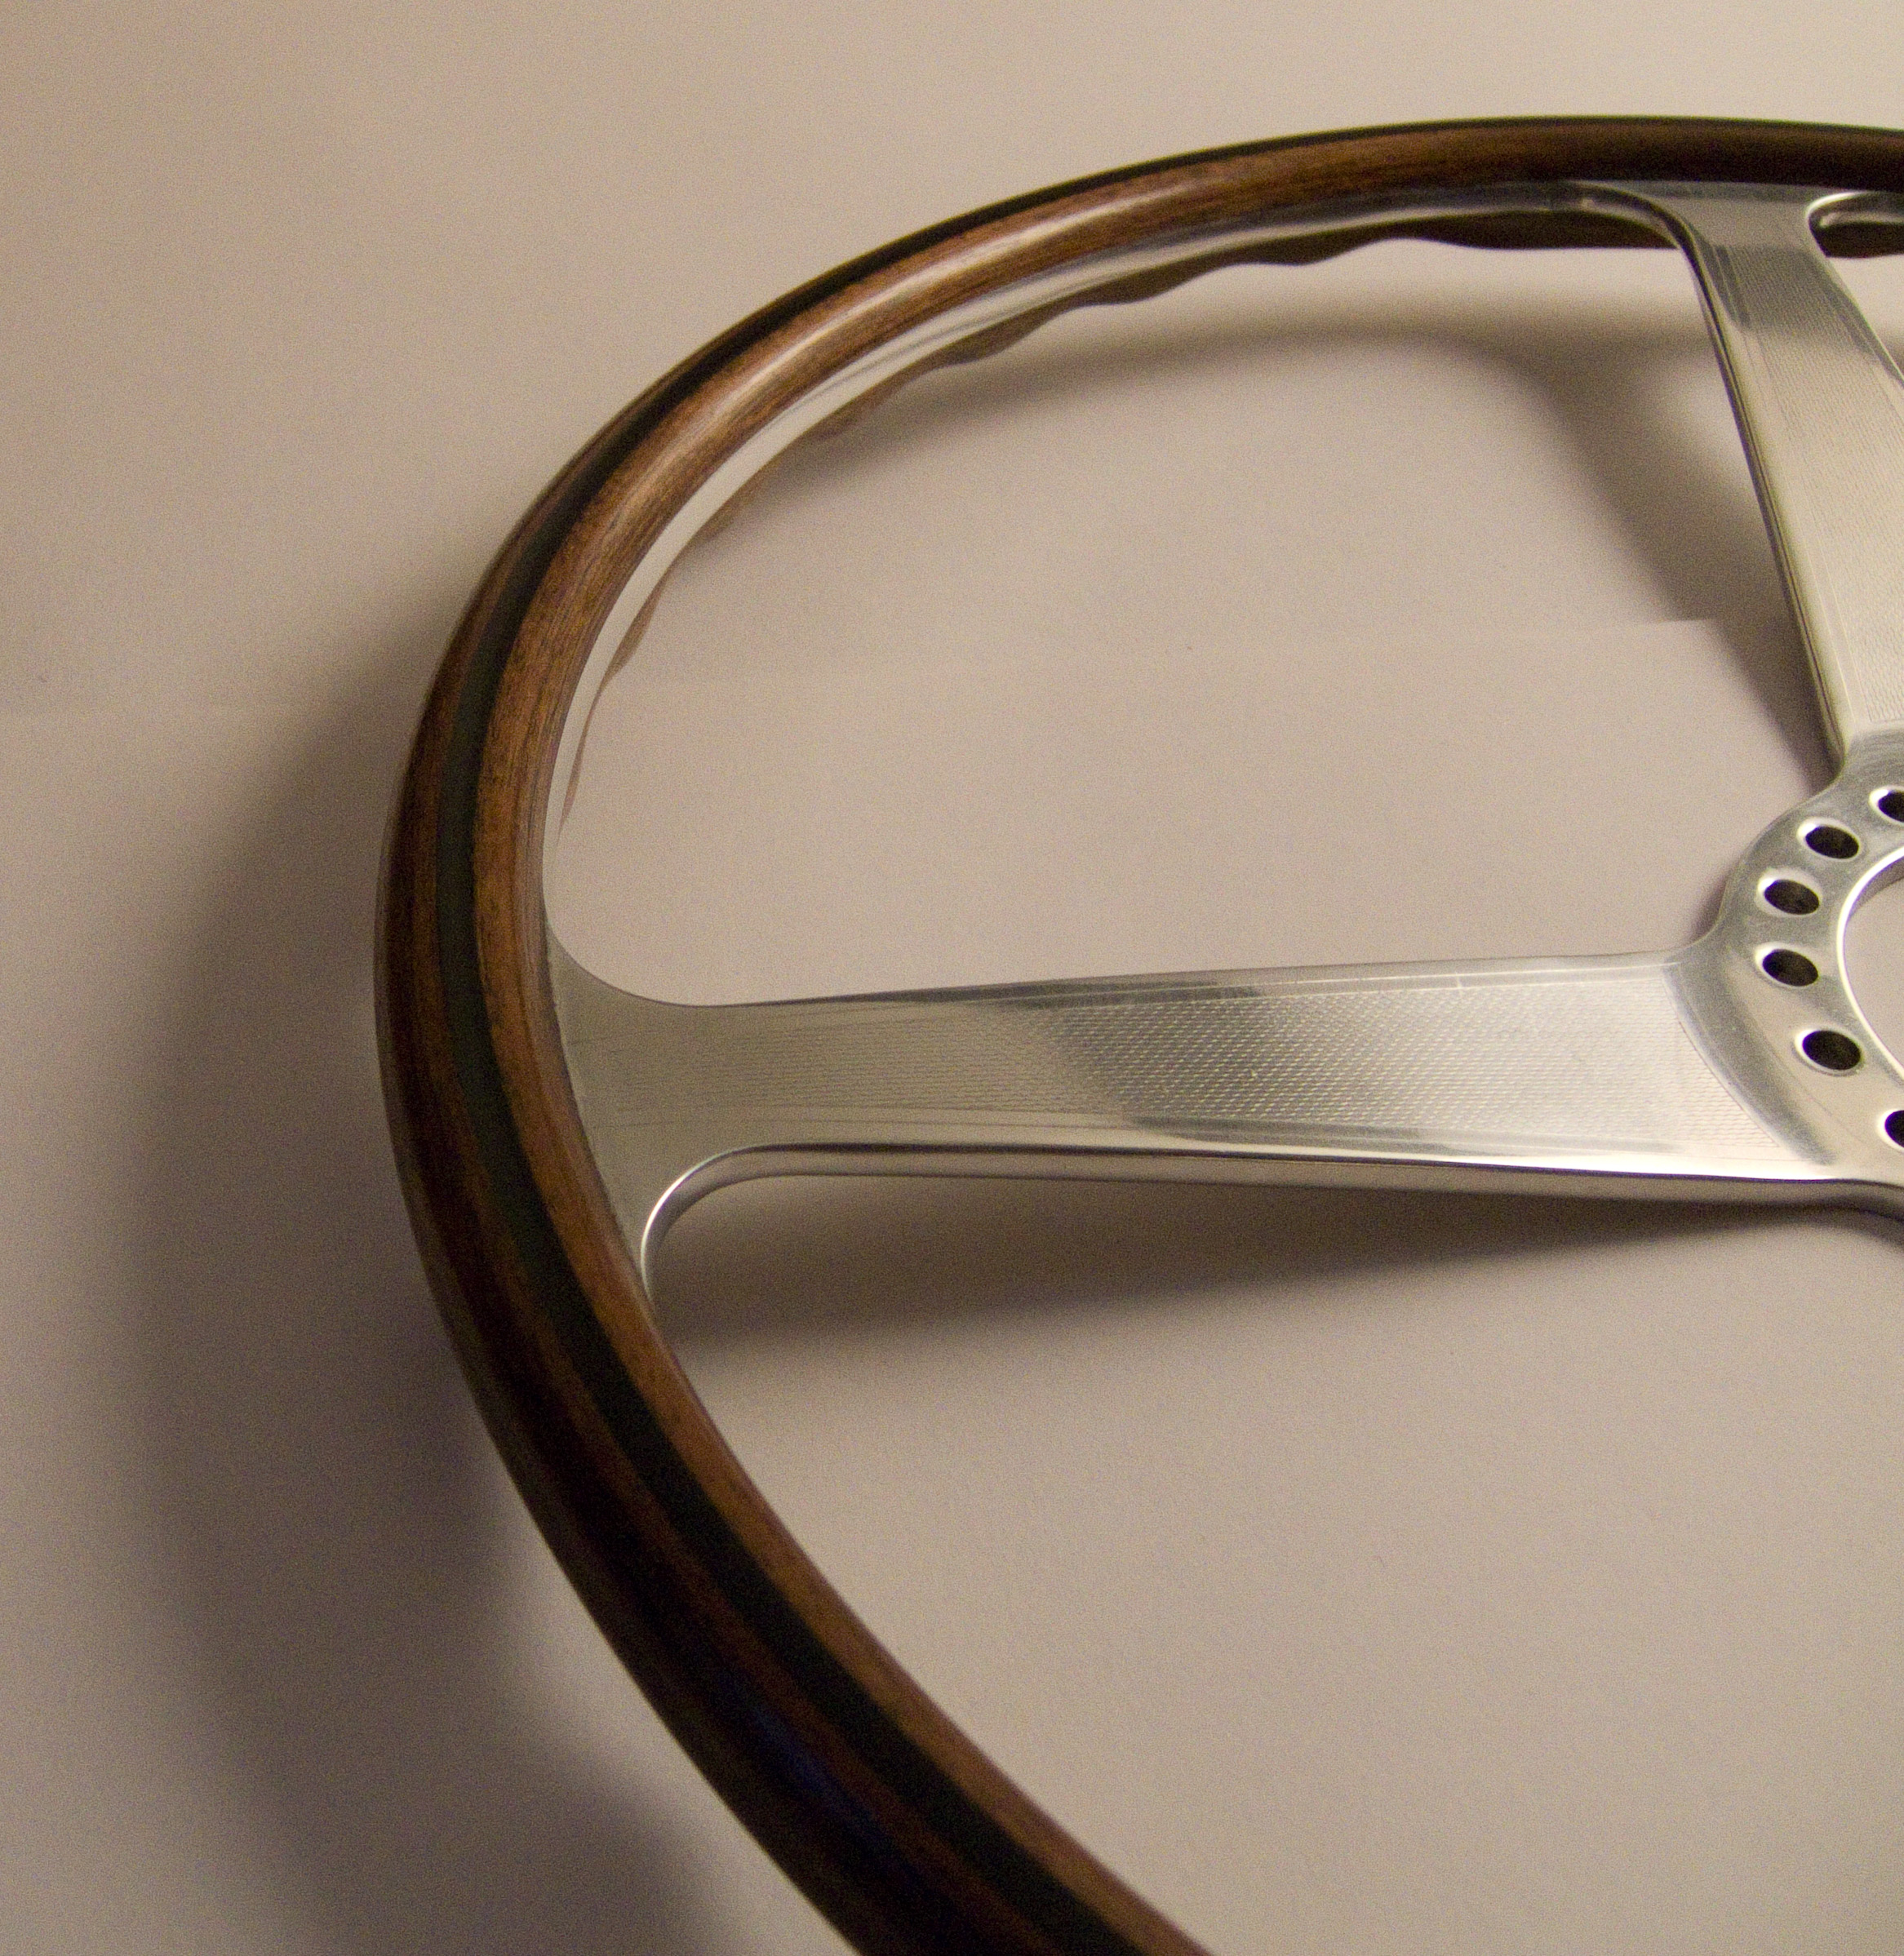
 Once
free of lacquer the wood and the metal were smoothed and polished. Once
free of lacquer the wood and the metal were smoothed and polished.
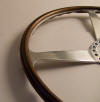 The
wood was re-coloured over a period of several days to bring it up to
match slowly and was sealed with Shellac. Further coats of Shellac were
applied until the grain was filled but not to a high polish. I thought
that with some grain apparent the steering wheel The
wood was re-coloured over a period of several days to bring it up to
match slowly and was sealed with Shellac. Further coats of Shellac were
applied until the grain was filled but not to a high polish. I thought
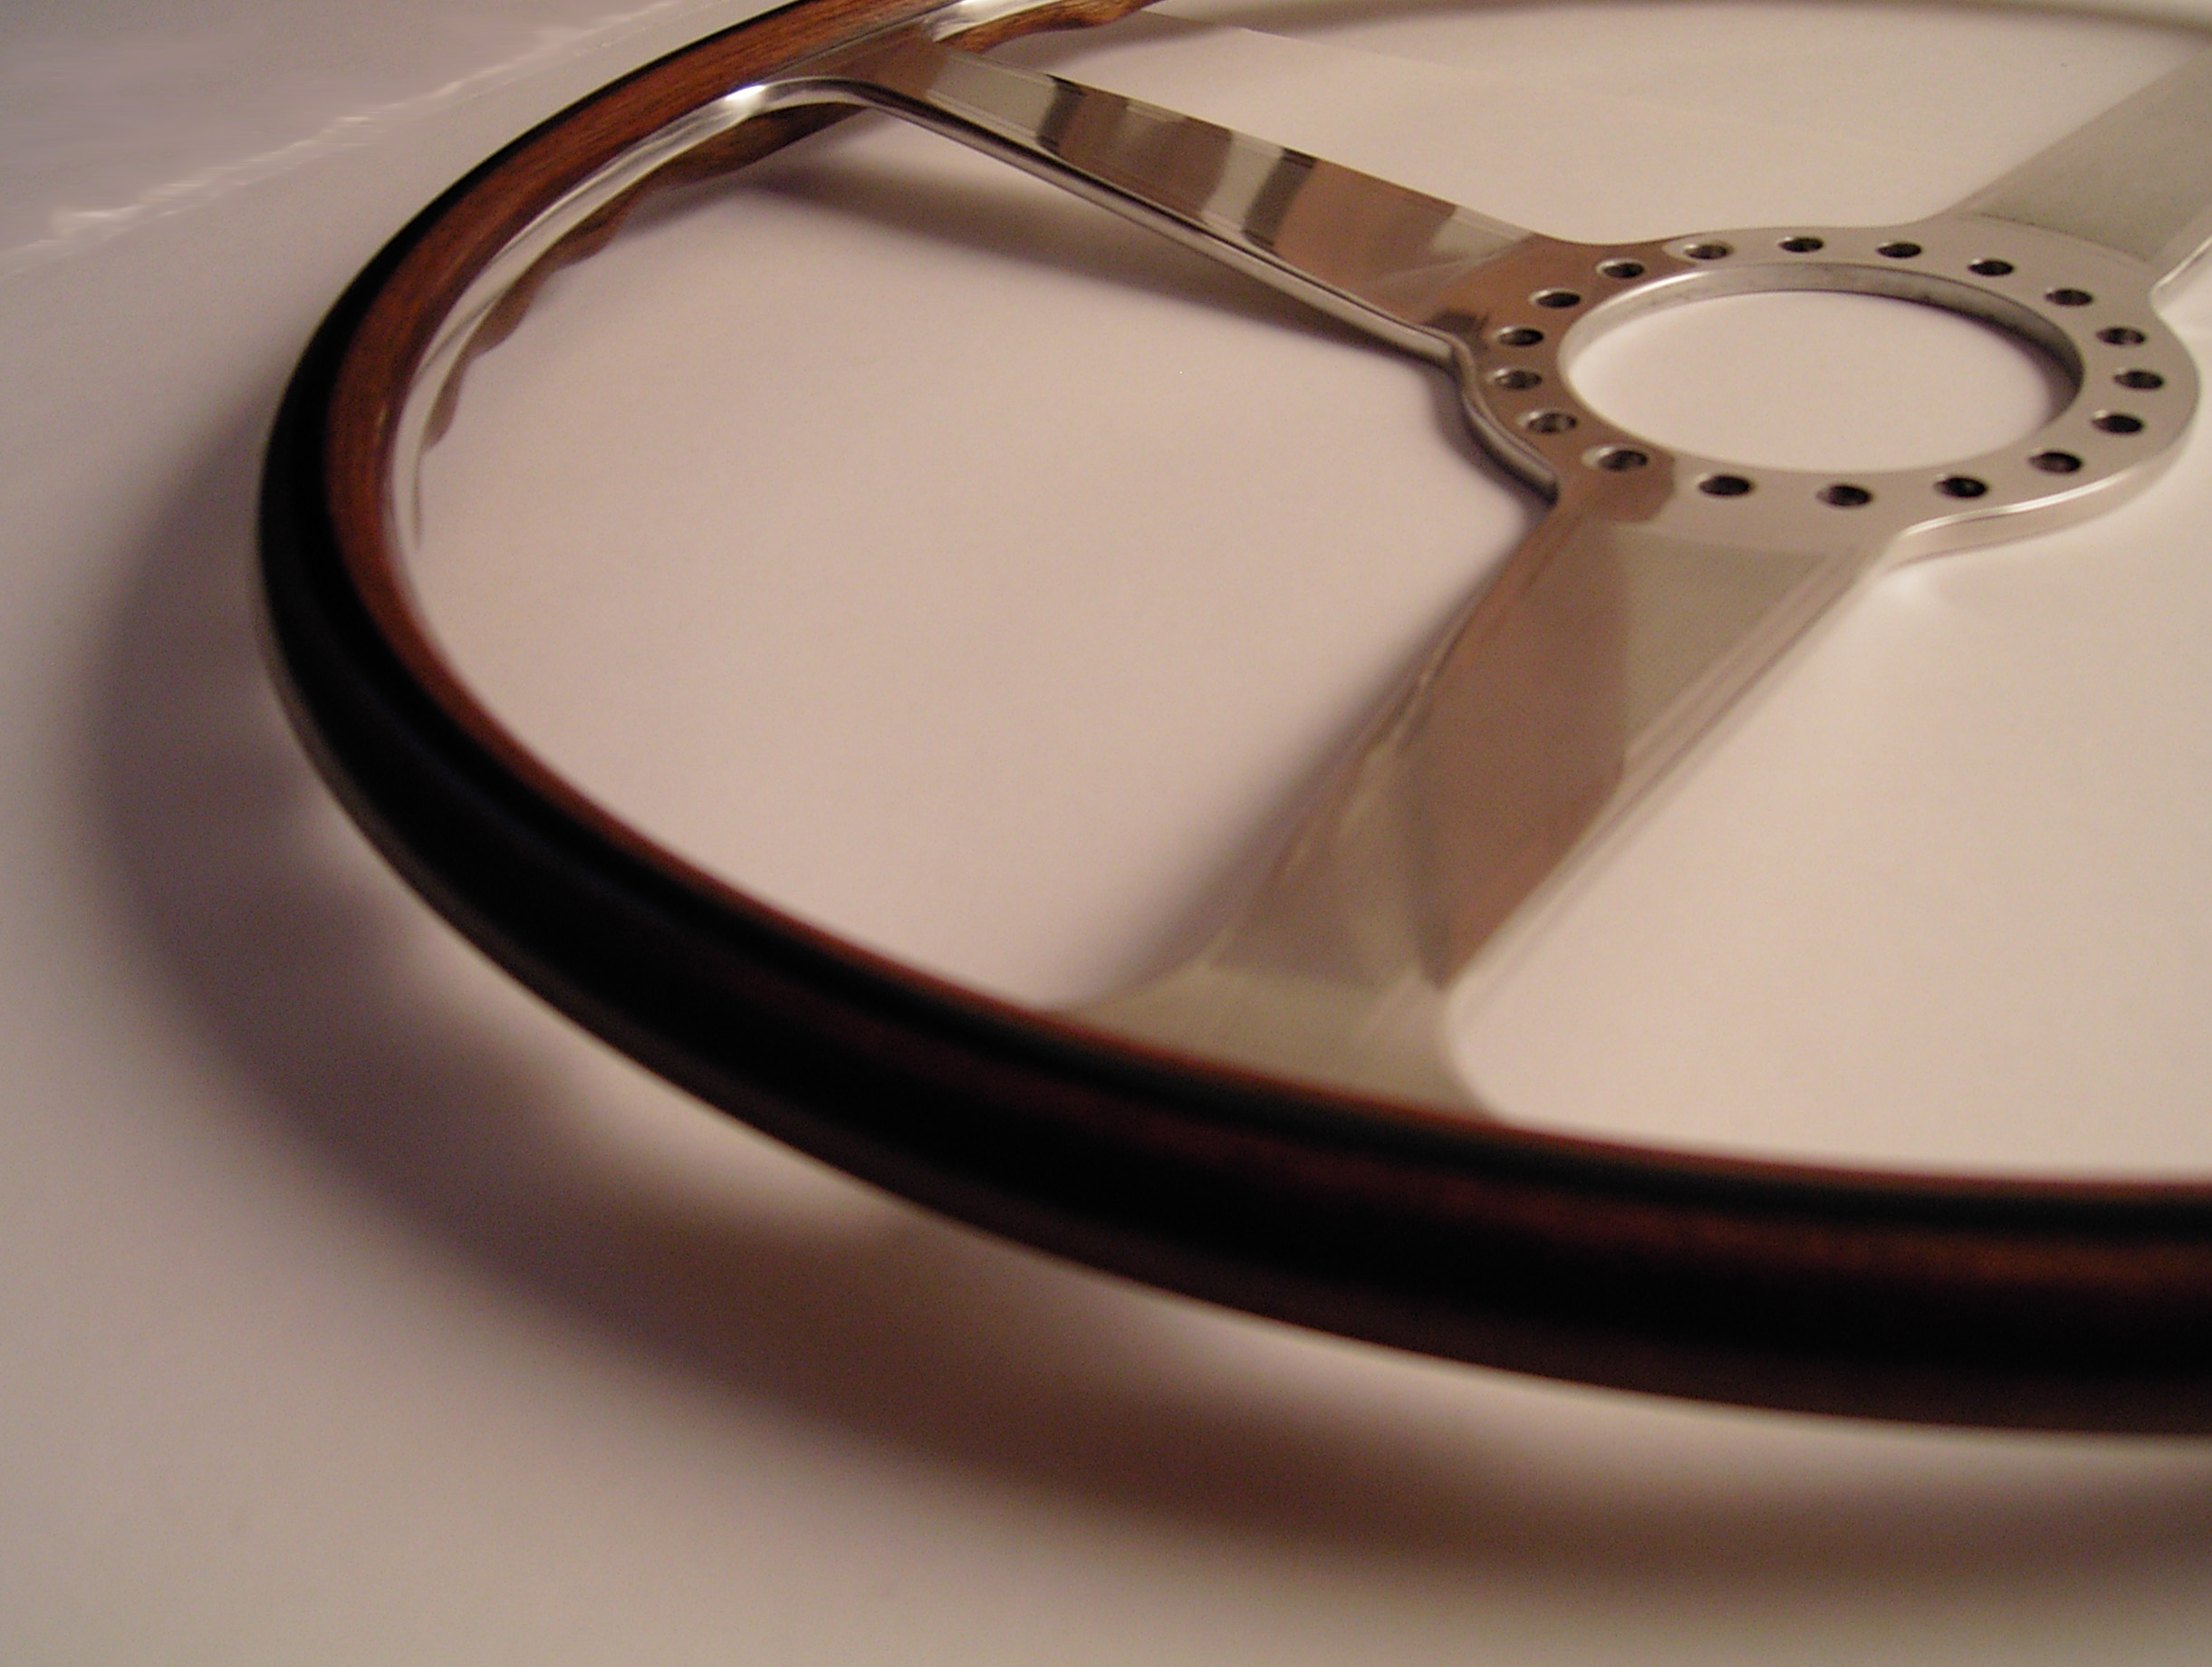
that with some grain apparent the steering wheel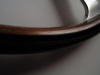 had a nice aged patina. It was impossible not to coat the metalwork in
Shell
had a nice aged patina. It was impossible not to coat the metalwork in
Shell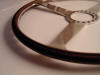 ac
while the wood was being treated. The Shellac was removed from the
metalwork and the metal was brought to a high polish. Once polished you
can see the very faint milling marks on the surface of the metal where
it was hewn from the solid disc. The steering wheel is finished with a
very fine coat of conservation wax. ac
while the wood was being treated. The Shellac was removed from the
metalwork and the metal was brought to a high polish. Once polished you
can see the very faint milling marks on the surface of the metal where
it was hewn from the solid disc. The steering wheel is finished with a
very fine coat of conservation wax.
Most arty photographs so far. I loved working
on it. You can probably tell.
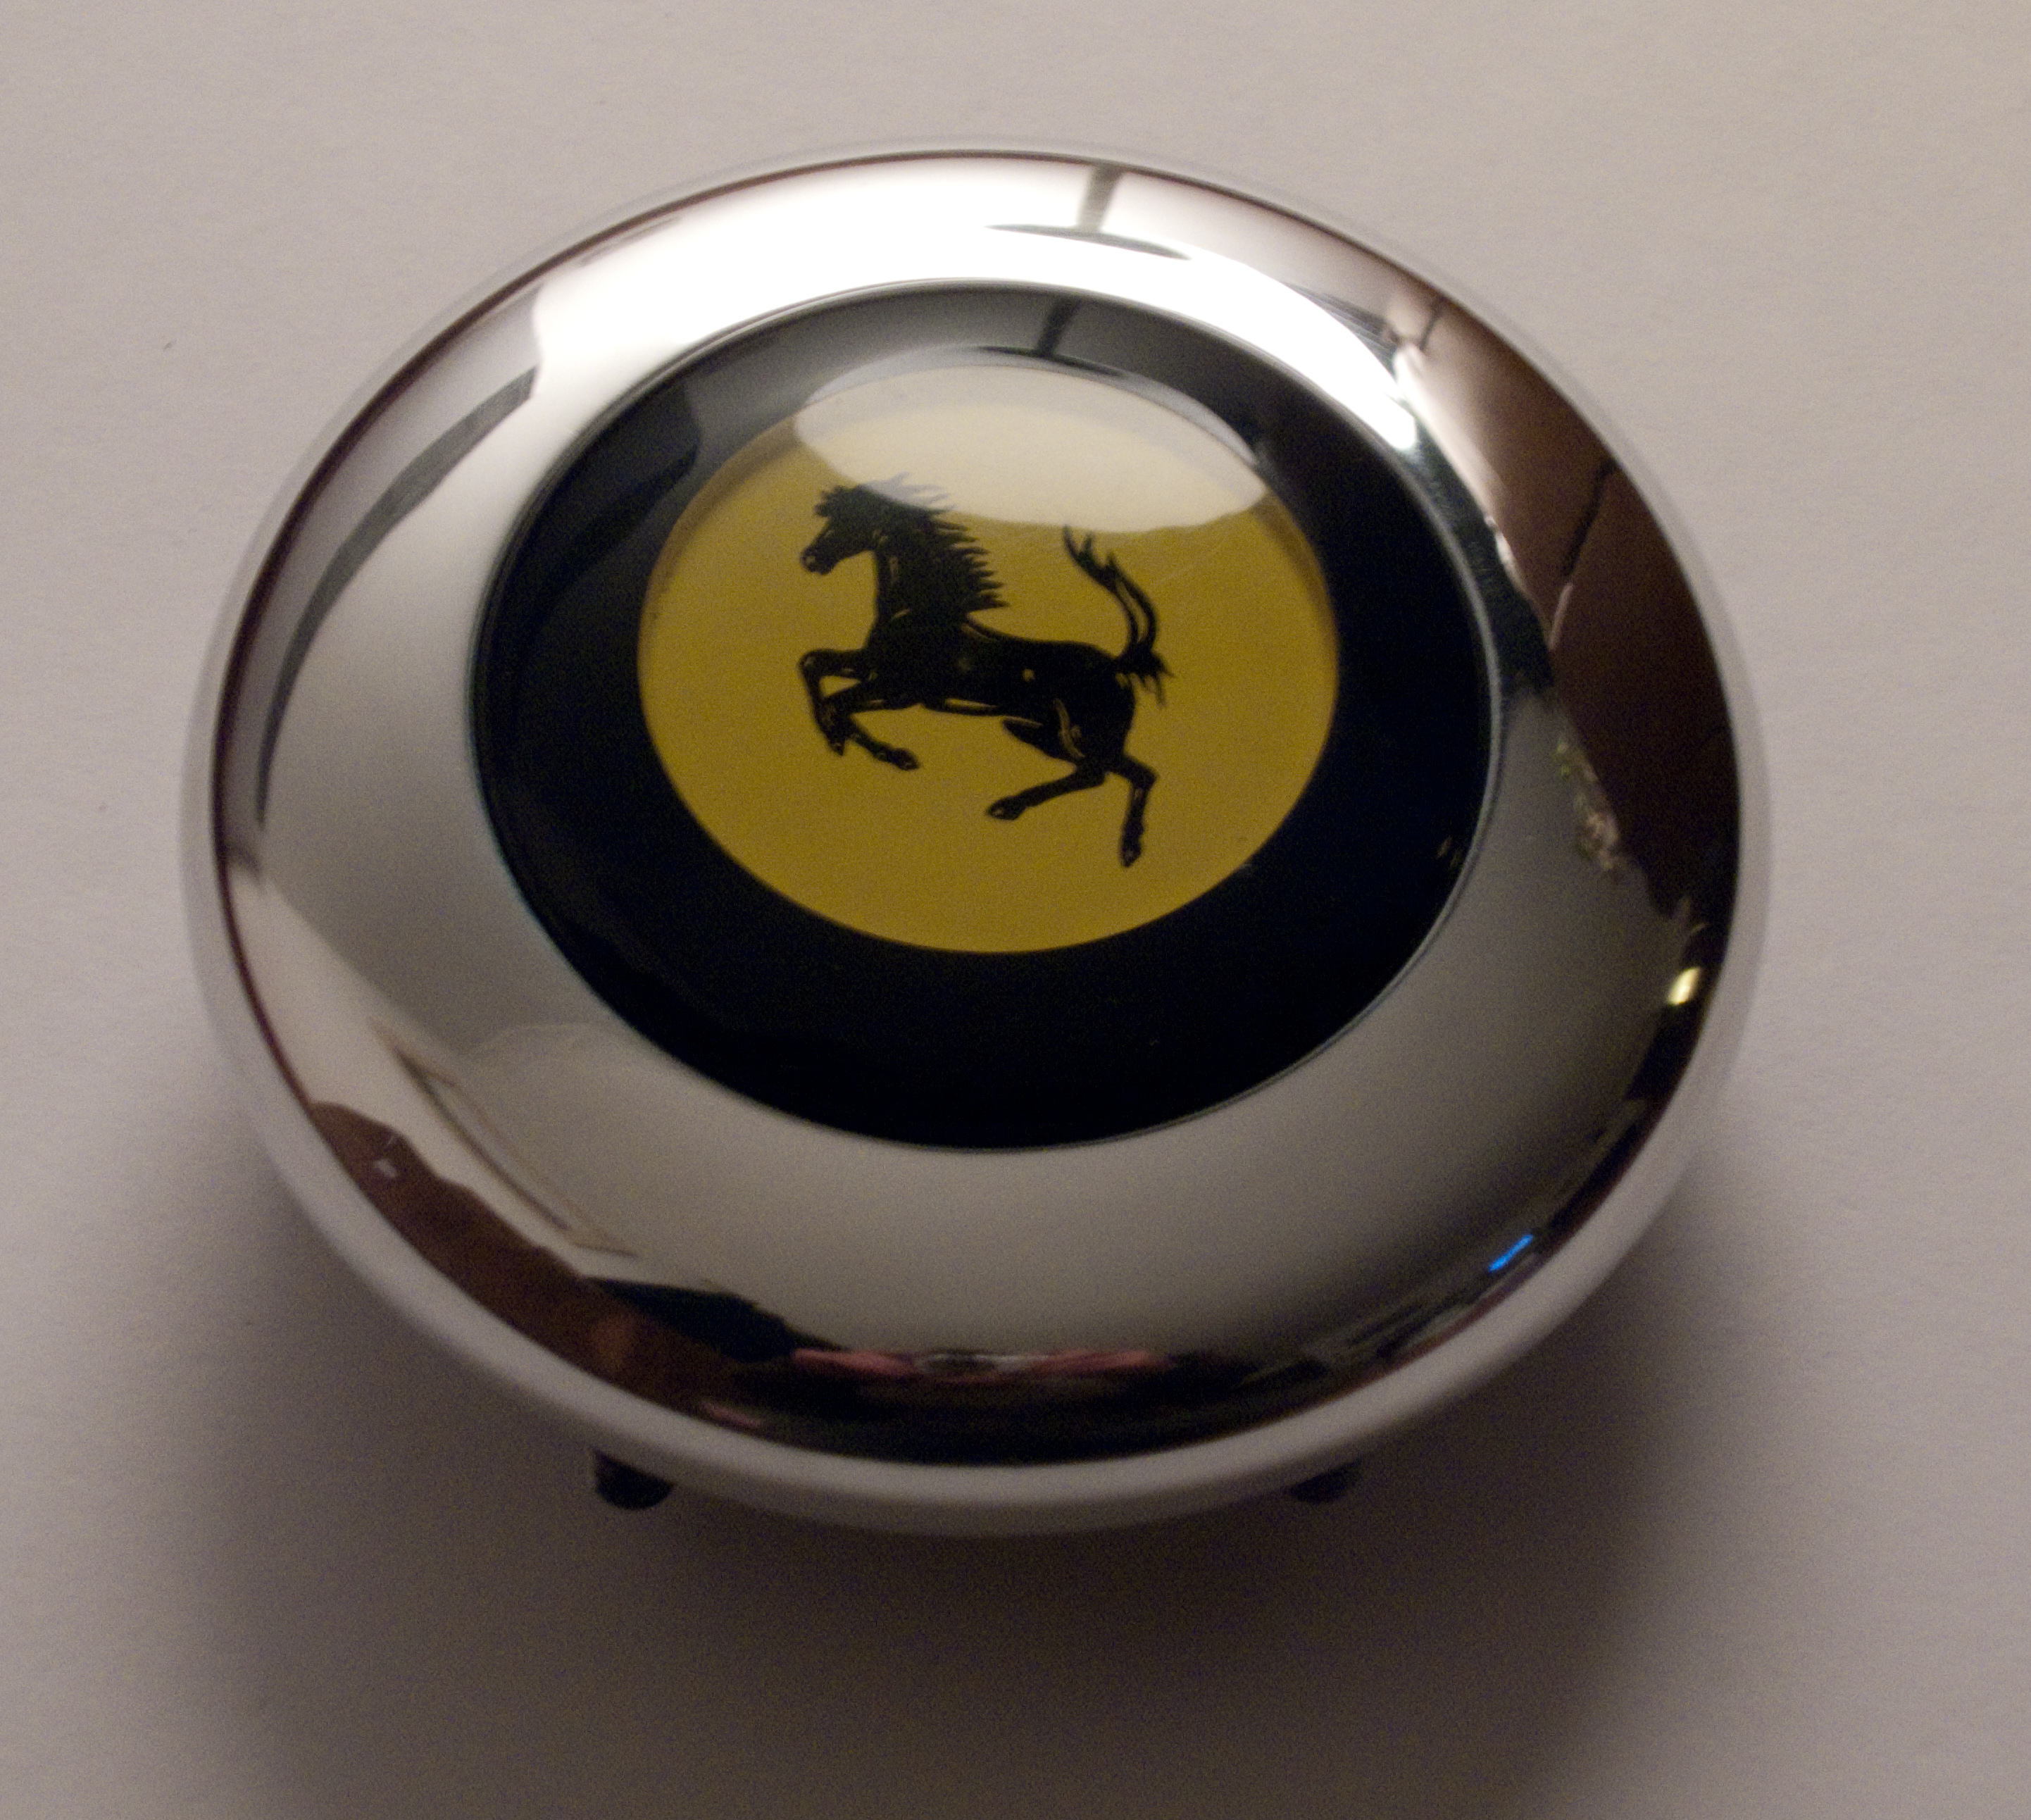
The Steering Wheel Boss Cover
Once the steering wheel was complete it
became apparent that the cover for the steering wheel centre looked a
 little
dowdy by comparison. there were a number of surface imperfections, cuts
and abrasions. Machine polishing can be unkind to soft metal items like
this. There is often visible directions to the resultant sheen and the
vigour with which the machine removes an imperfection can lead to
flatting of domed surfaces, causing a real twist in the reflected light.
I prefer to hand polish most items. Takes a good bit longer but I think
the little
dowdy by comparison. there were a number of surface imperfections, cuts
and abrasions. Machine polishing can be unkind to soft metal items like
this. There is often visible directions to the resultant sheen and the
vigour with which the machine removes an imperfection can lead to
flatting of domed surfaces, causing a real twist in the reflected light.
I prefer to hand polish most items. Takes a good bit longer but I think
the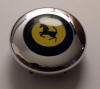 results are better. The imperfections were relatively easy to remove as
none were too deep. One mysterious small diameter hole remains. I can't
figure out what would have caused it. It is much reduced in size now, a
pin prick rather than a noticeable hole. It was the depth of the hole
that was the issue. Positioned on the outer rim of the cover the hole
could not be removed as this would definitely have corrupted the
outline. The car's restorer reckoned I was being a little retentive
about the pin prick. He was right. The cover has been refitted, albeit
with the imperfection on the underside, to please me. Certainly looks a
lot happier now and you can even see me holding my camera in the
reflection.
results are better. The imperfections were relatively easy to remove as
none were too deep. One mysterious small diameter hole remains. I can't
figure out what would have caused it. It is much reduced in size now, a
pin prick rather than a noticeable hole. It was the depth of the hole
that was the issue. Positioned on the outer rim of the cover the hole
could not be removed as this would definitely have corrupted the
outline. The car's restorer reckoned I was being a little retentive
about the pin prick. He was right. The cover has been refitted, albeit
with the imperfection on the underside, to please me. Certainly looks a
lot happier now and you can even see me holding my camera in the
reflection.
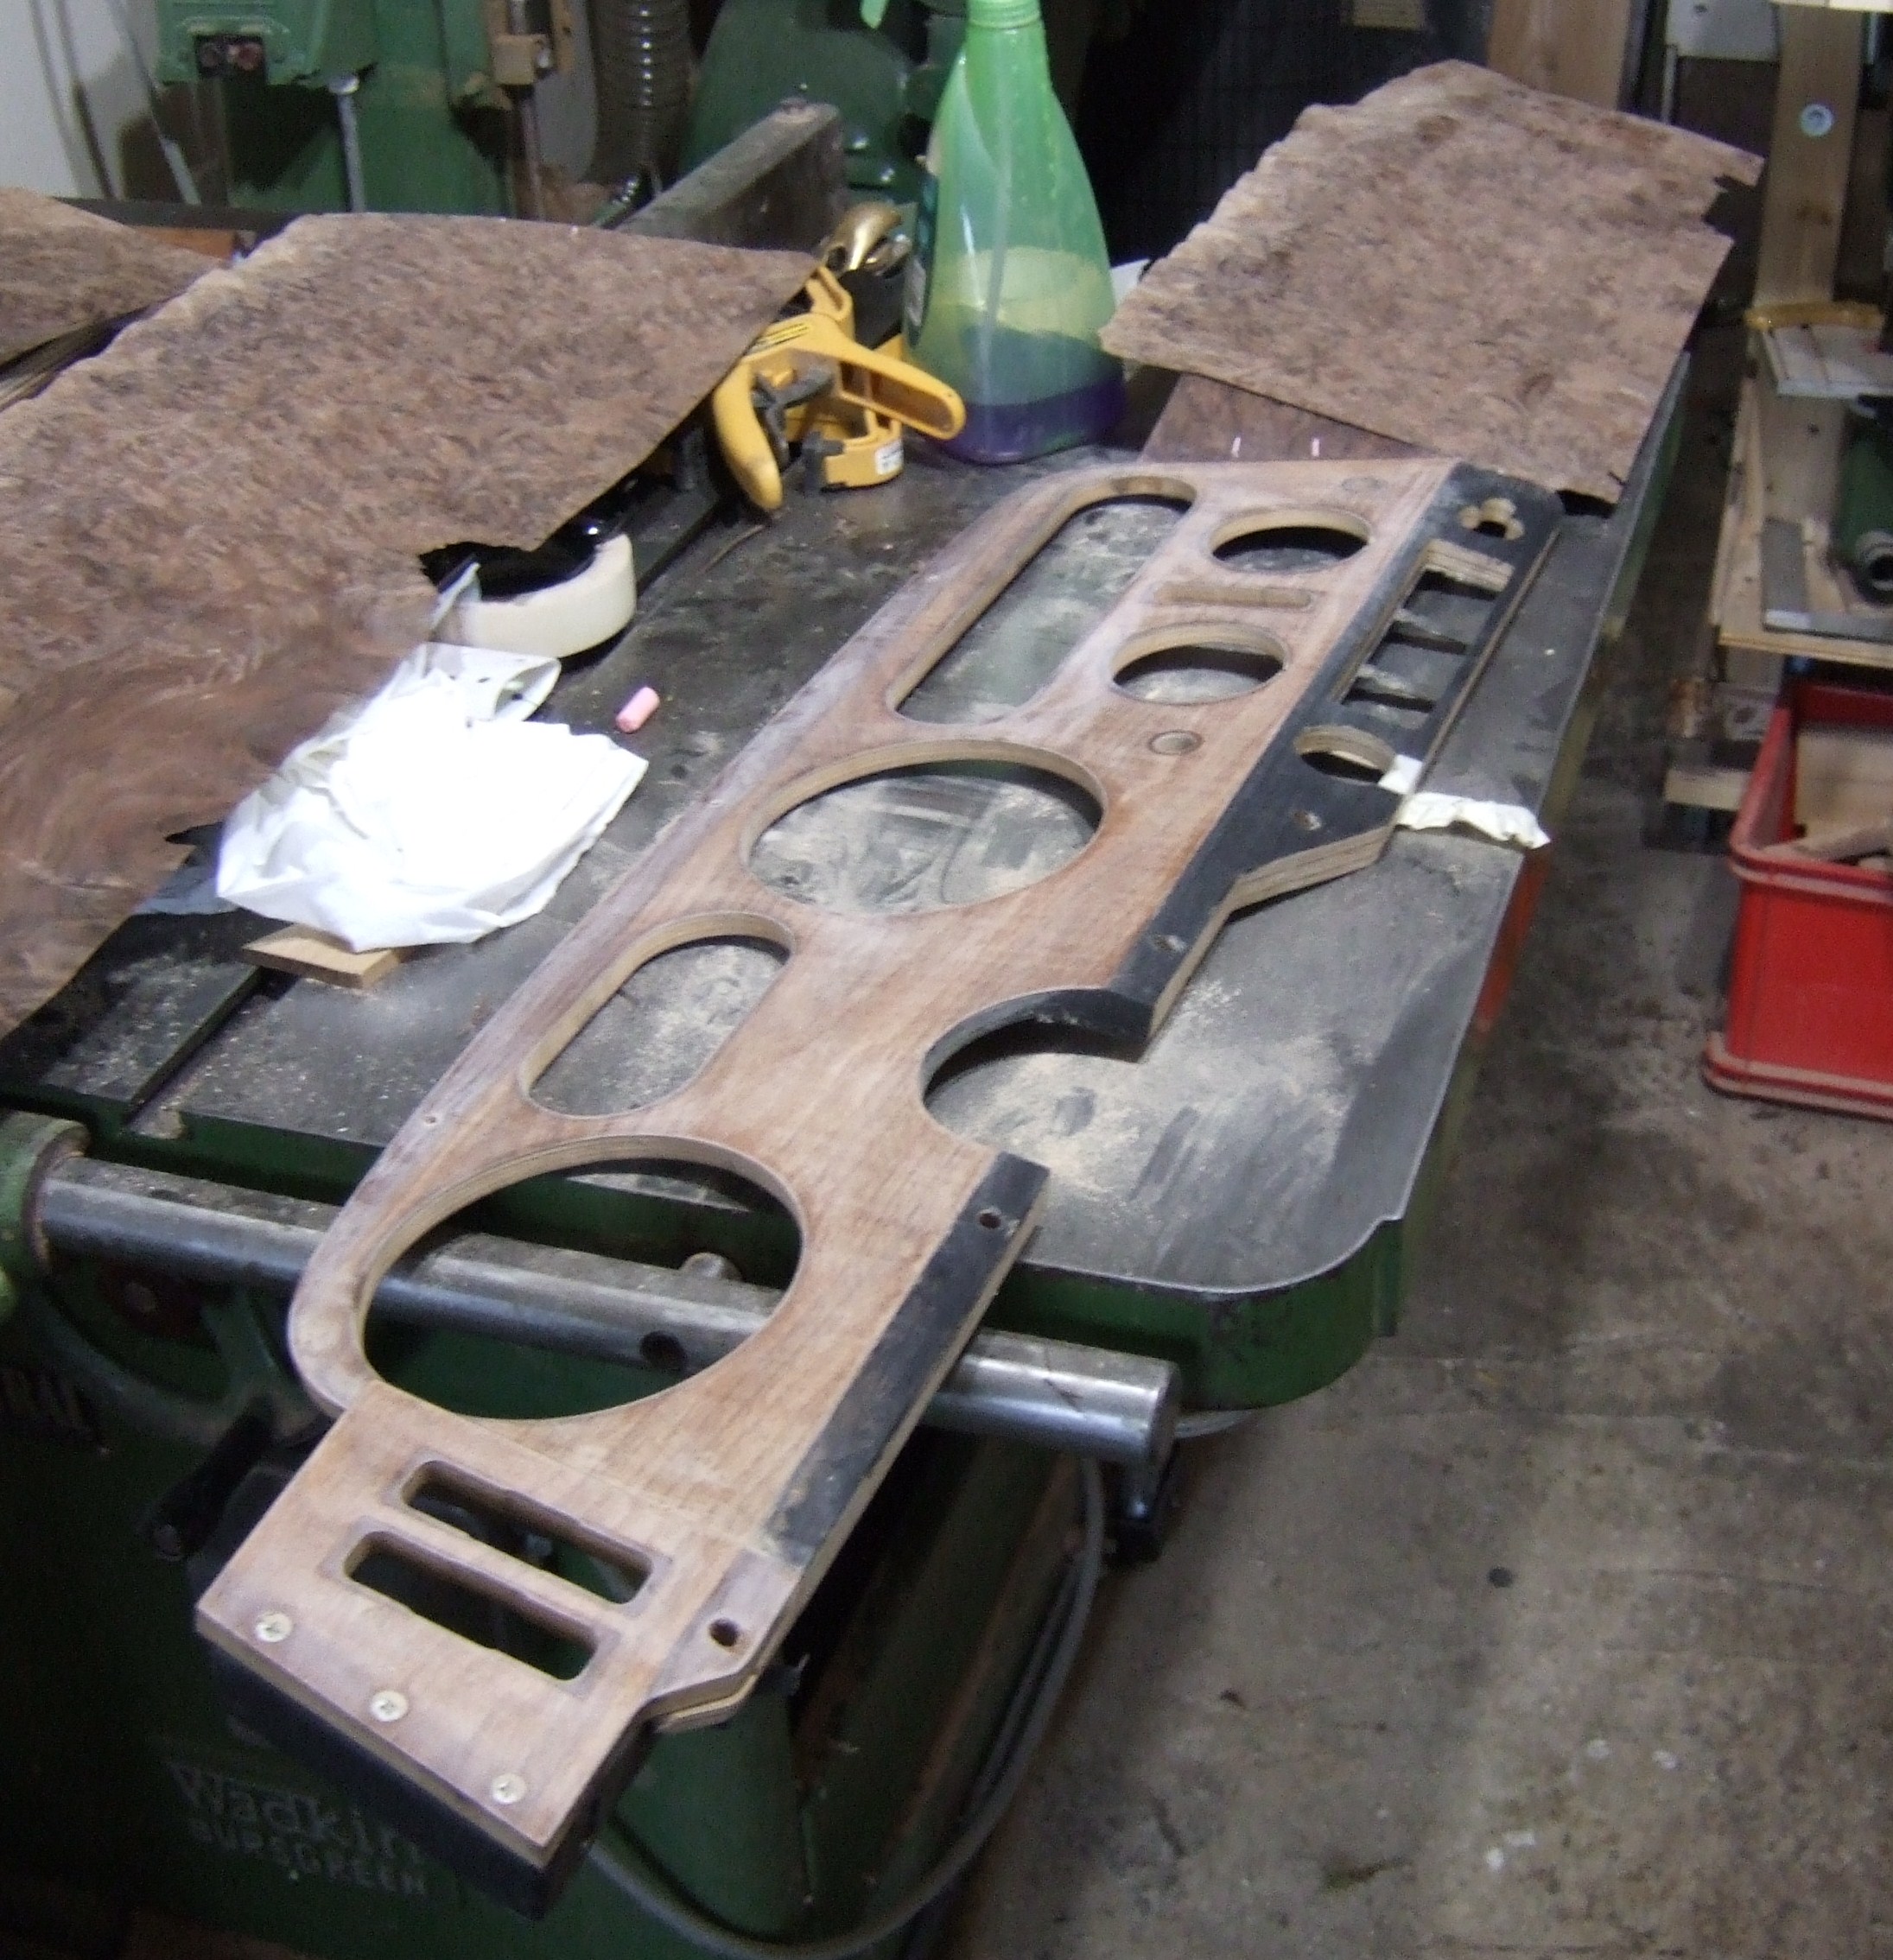
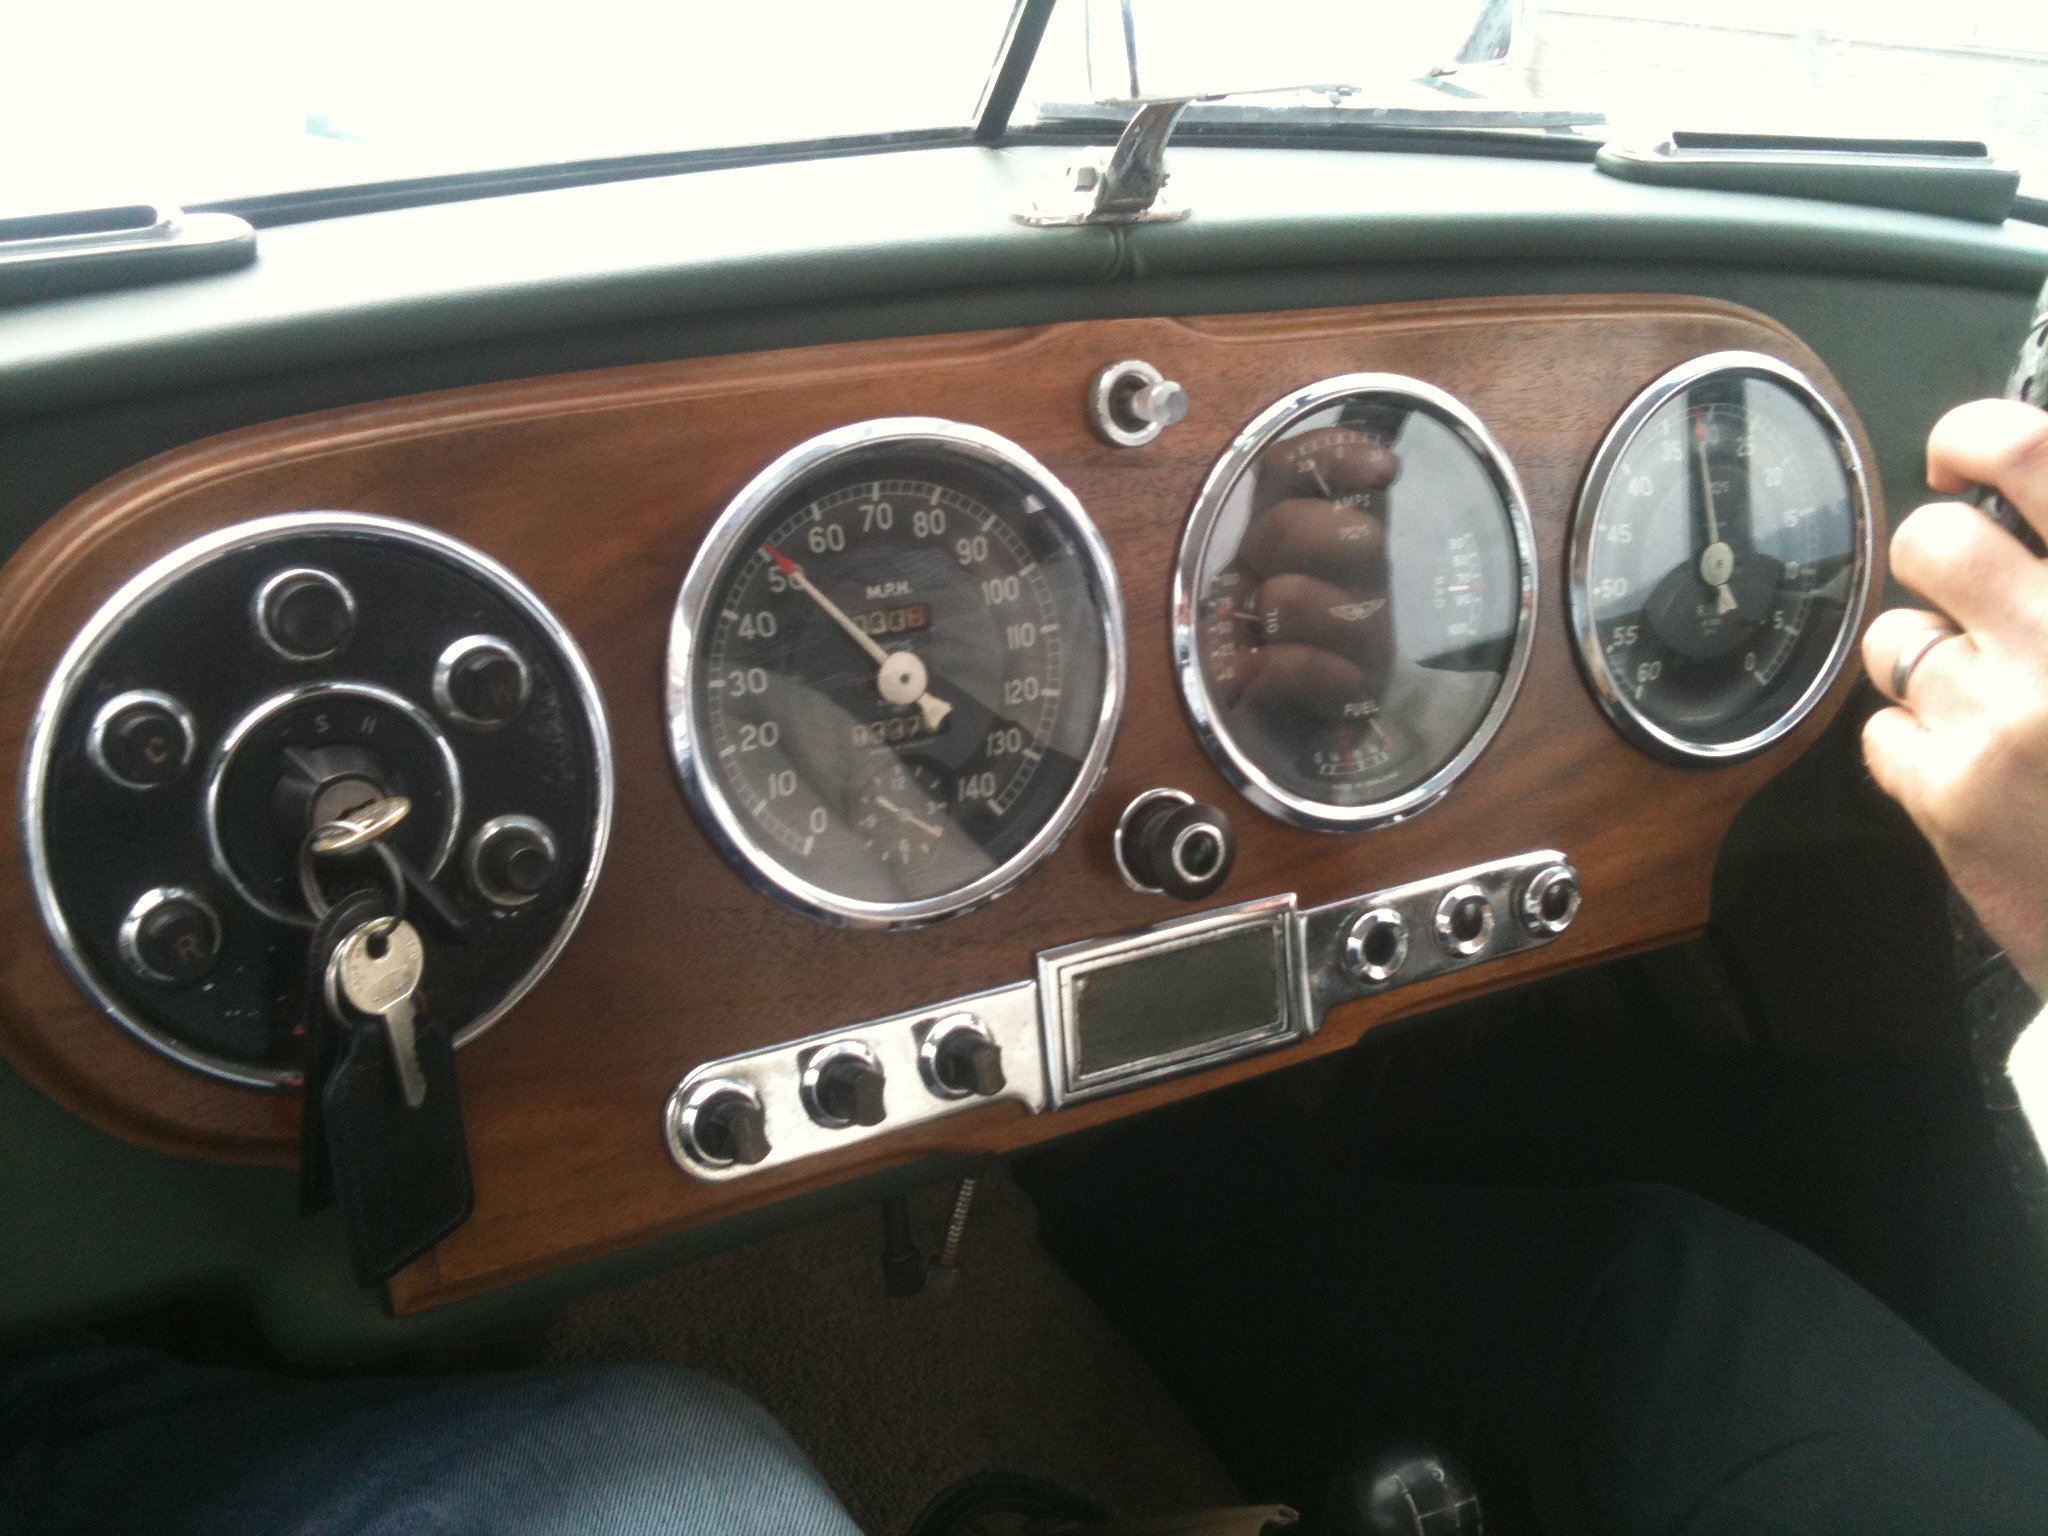
The Dashboard
The original dashboard from 1963 was European
Walnut faced ply. This had aged to a much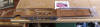 lighter toned wood, more reminiscent of Teak. In fact, examining
photographs of a restoration of a different car that was covered on an
Internet site, it looked like a previous restorer had assumed that the
dashboard was Teak and had coloured it up and sprayed it. Just my
opinion though, I might well be wrong.
lighter toned wood, more reminiscent of Teak. In fact, examining
photographs of a restoration of a different car that was covered on an
Internet site, it looked like a previous restorer had assumed that the
dashboard was Teak and had coloured it up and sprayed it. Just my
opinion though, I might well be wrong.
The new owner wanted a very different look to
the dashboard. The old Ferrari will be be a more relaxed touring car
than when it was a younger GT. As such, the new owner wanted a more
splendid finish to the dashboard. I created 4 sample swatches of veneer
examples that I thought might suit his tastes. 1) Bird's Eye Maple (very
easy to apply and finish) 2) Toned Bird's Eye Maple (a little darker,
easy to apply and a little more difficult to finish without looking
dirty) 3) Burr Walnut (difficult to apply, difficult finish) 4) Aged
Burr Walnut (the most difficult of all).
And of course, the owner chose number 4, the
Aged Burr Walnut. If the dashboard had been a single or series of flat
pieces this might have been relatively straightforward. Alas, the
Italians had chosen to indent the main instrument console with two neat
little triangles making the connections. You can see this in the
photographs. Very nice Sixties look but not ideal for applying one long
sheet of veneer.
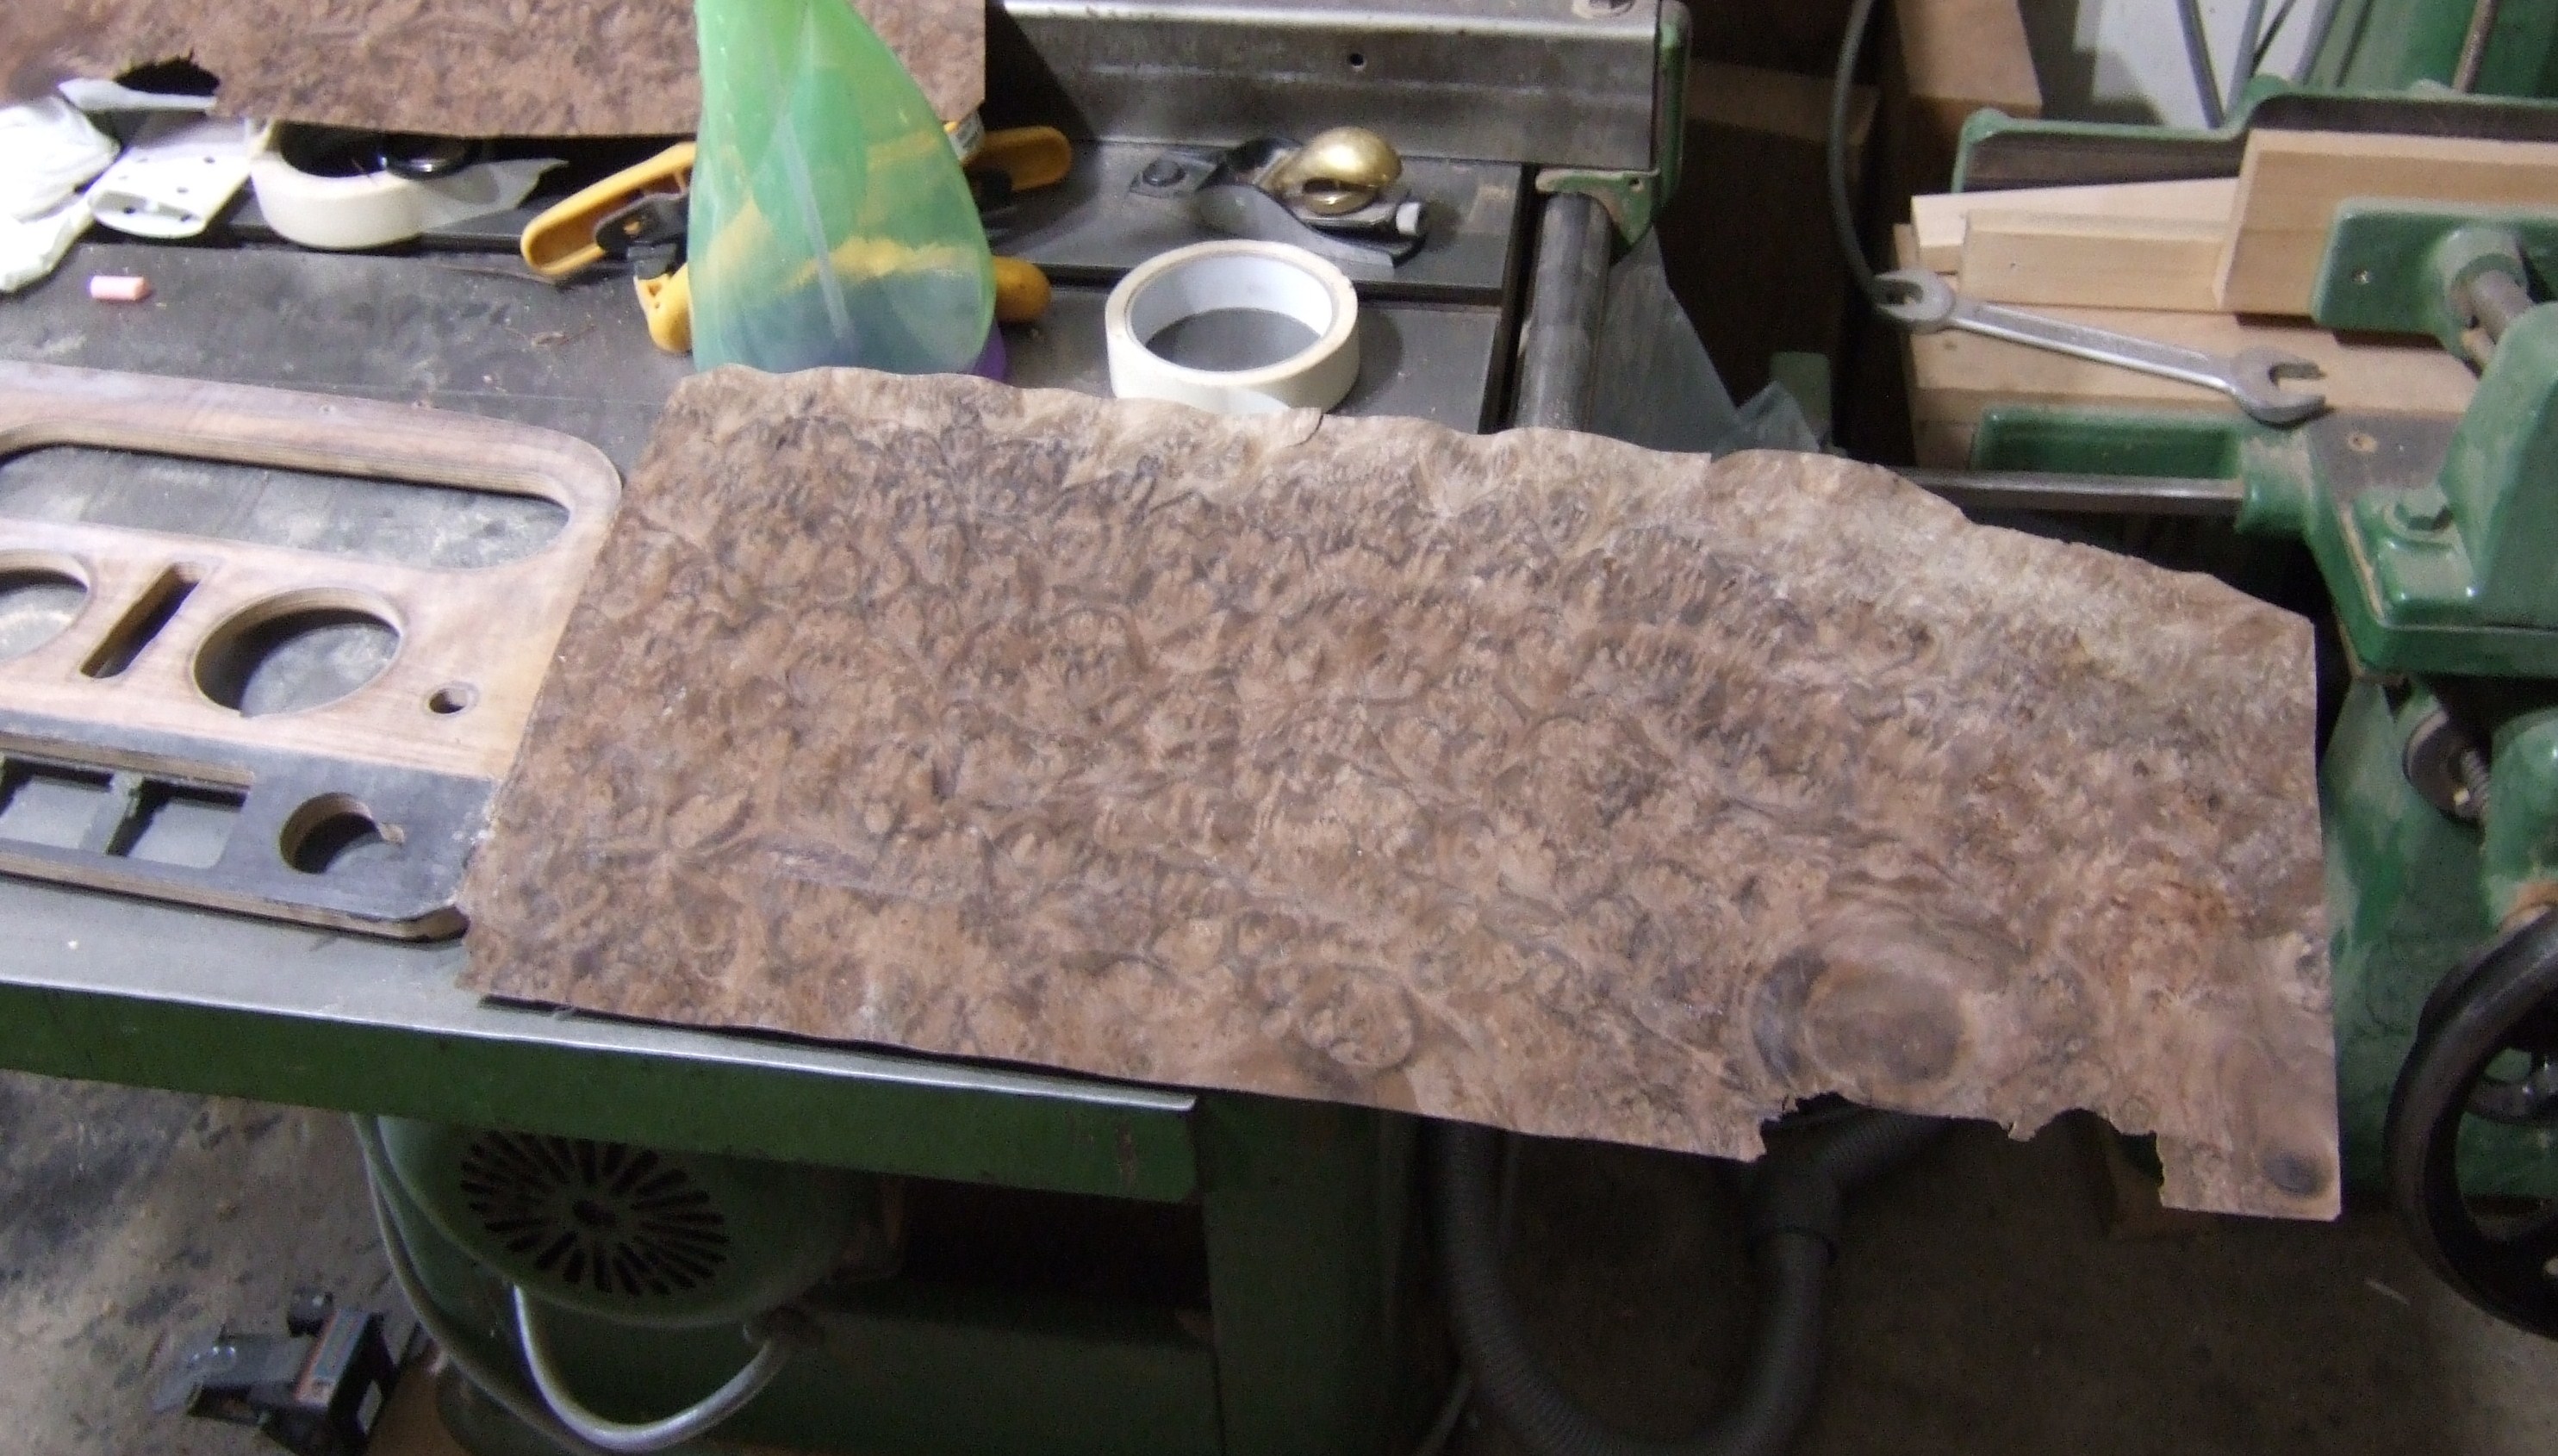
Bu rr Walnut is difficult to lay at the best
of times. The natural swirl of the
burr means that the veneer is very uneven as a surface so it must be
softened to assure that the veneer has no air gaps between it and the
adjoining surface. Additionally, in order to age the Burr Walnut, nitric
acid must be applied very carefully and heated evenly in situ until the
hue changes. Once the hue has reached the right tone the surface needs
to be neutralised very quickly, usually with milk. You can imagine it is
an unpleasant, risky and messy operation. The beauty of a French
Polished, Aged Burr Walnut surface makes it all worth while. rr Walnut is difficult to lay at the best
of times. The natural swirl of the
burr means that the veneer is very uneven as a surface so it must be
softened to assure that the veneer has no air gaps between it and the
adjoining surface. Additionally, in order to age the Burr Walnut, nitric
acid must be applied very carefully and heated evenly in situ until the
hue changes. Once the hue has reached the right tone the surface needs
to be neutralised very quickly, usually with milk. You can imagine it is
an unpleasant, risky and messy operation. The beauty of a French
Polished, Aged Burr Walnut surface makes it all worth while.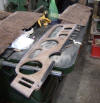
I had toyed with the idea of building a
completely new dashboard from pre-veneered wood but there were too many
other components surrounding the dashboard when fitted inside the car.
These other components had been sent to other specialists and, without
access to them, a 100% replica was unlikely.
It would  have been very easy to slip a
dashboard into a vacuum bag to ensure the veneer glued well have been very easy to slip a
dashboard into a vacuum bag to ensure the veneer glued well and flat. Unfortunately,
the design of this dashboard, with its two kinks would make it very
difficult to be confident that placement of the veneer was perfect and,
since the dashboard was to be covered with a single contiguous sheet of
veneer, to ensure that all component pieces were joined well. The gluing
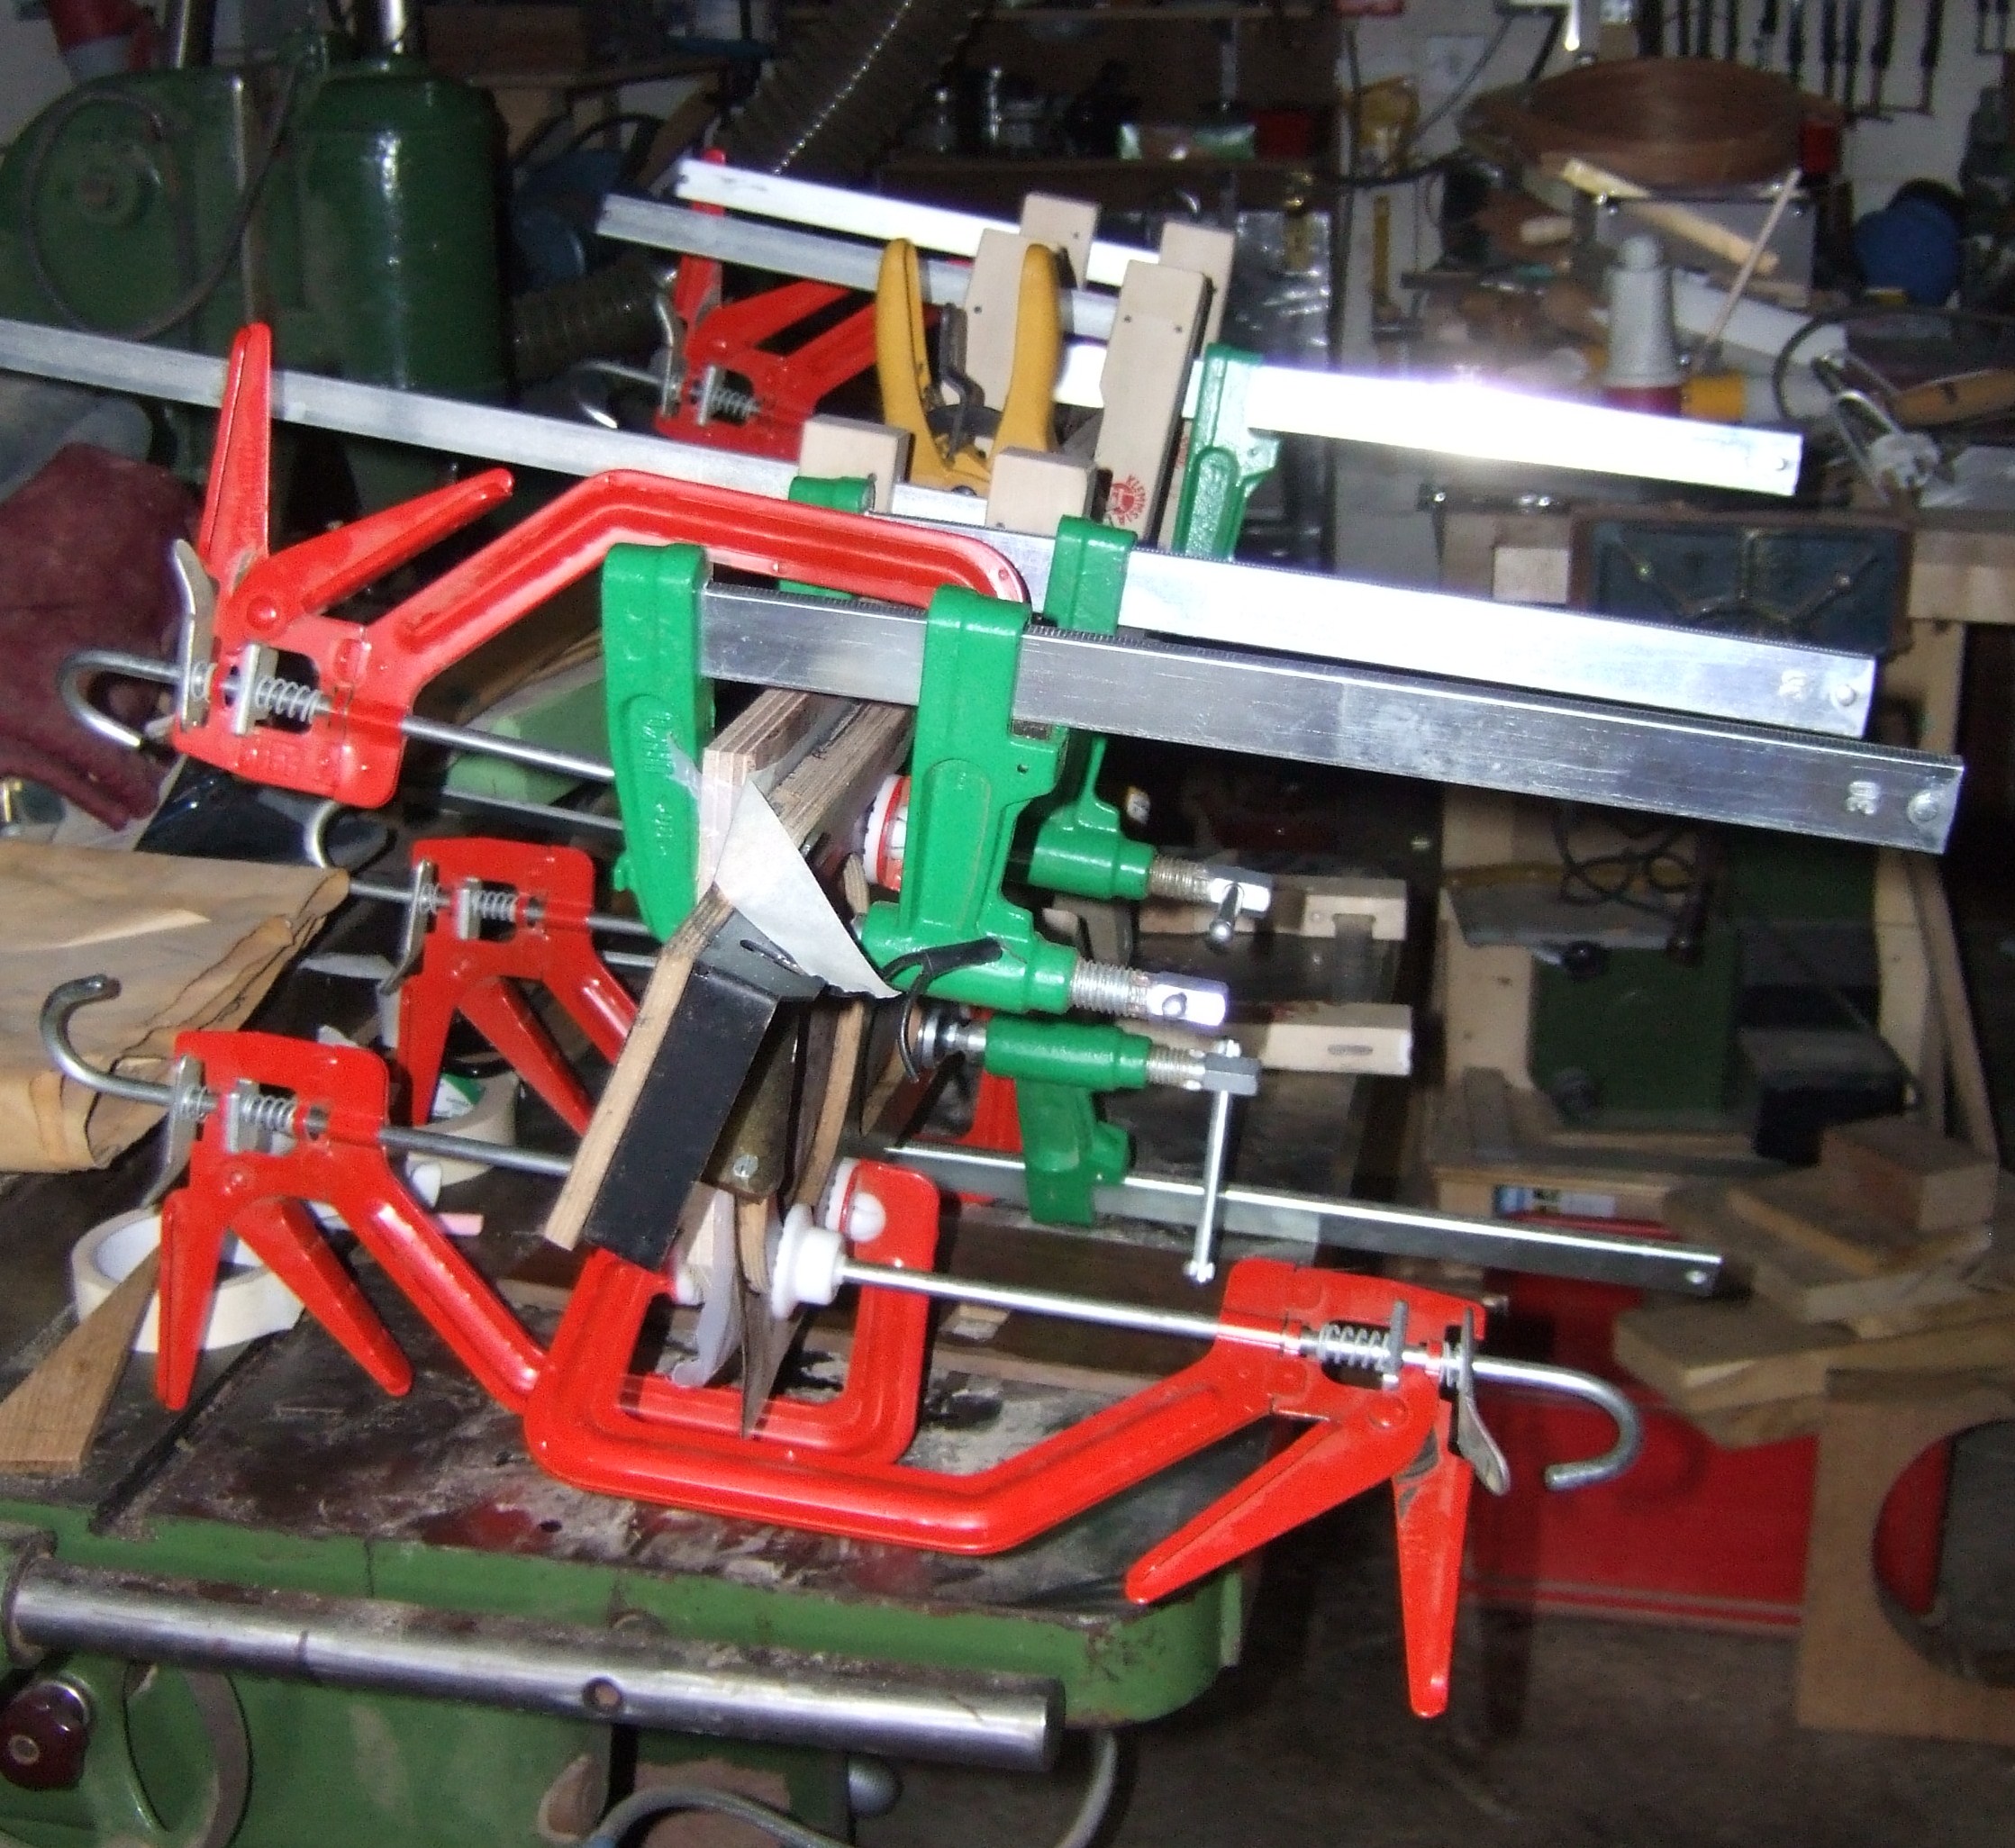
had to be carried out using clamps and formers to ensure position and
flatness were excellent. You can see the rather heavy use of individual
clamps that were required to cover all the small areas of surface that
needed to be glued under significant pressure. There is an old saying in
Cabinet Making, "You can never have enough clamps". In this case I was
darn near using every brand and style of clamps that I owned. In the
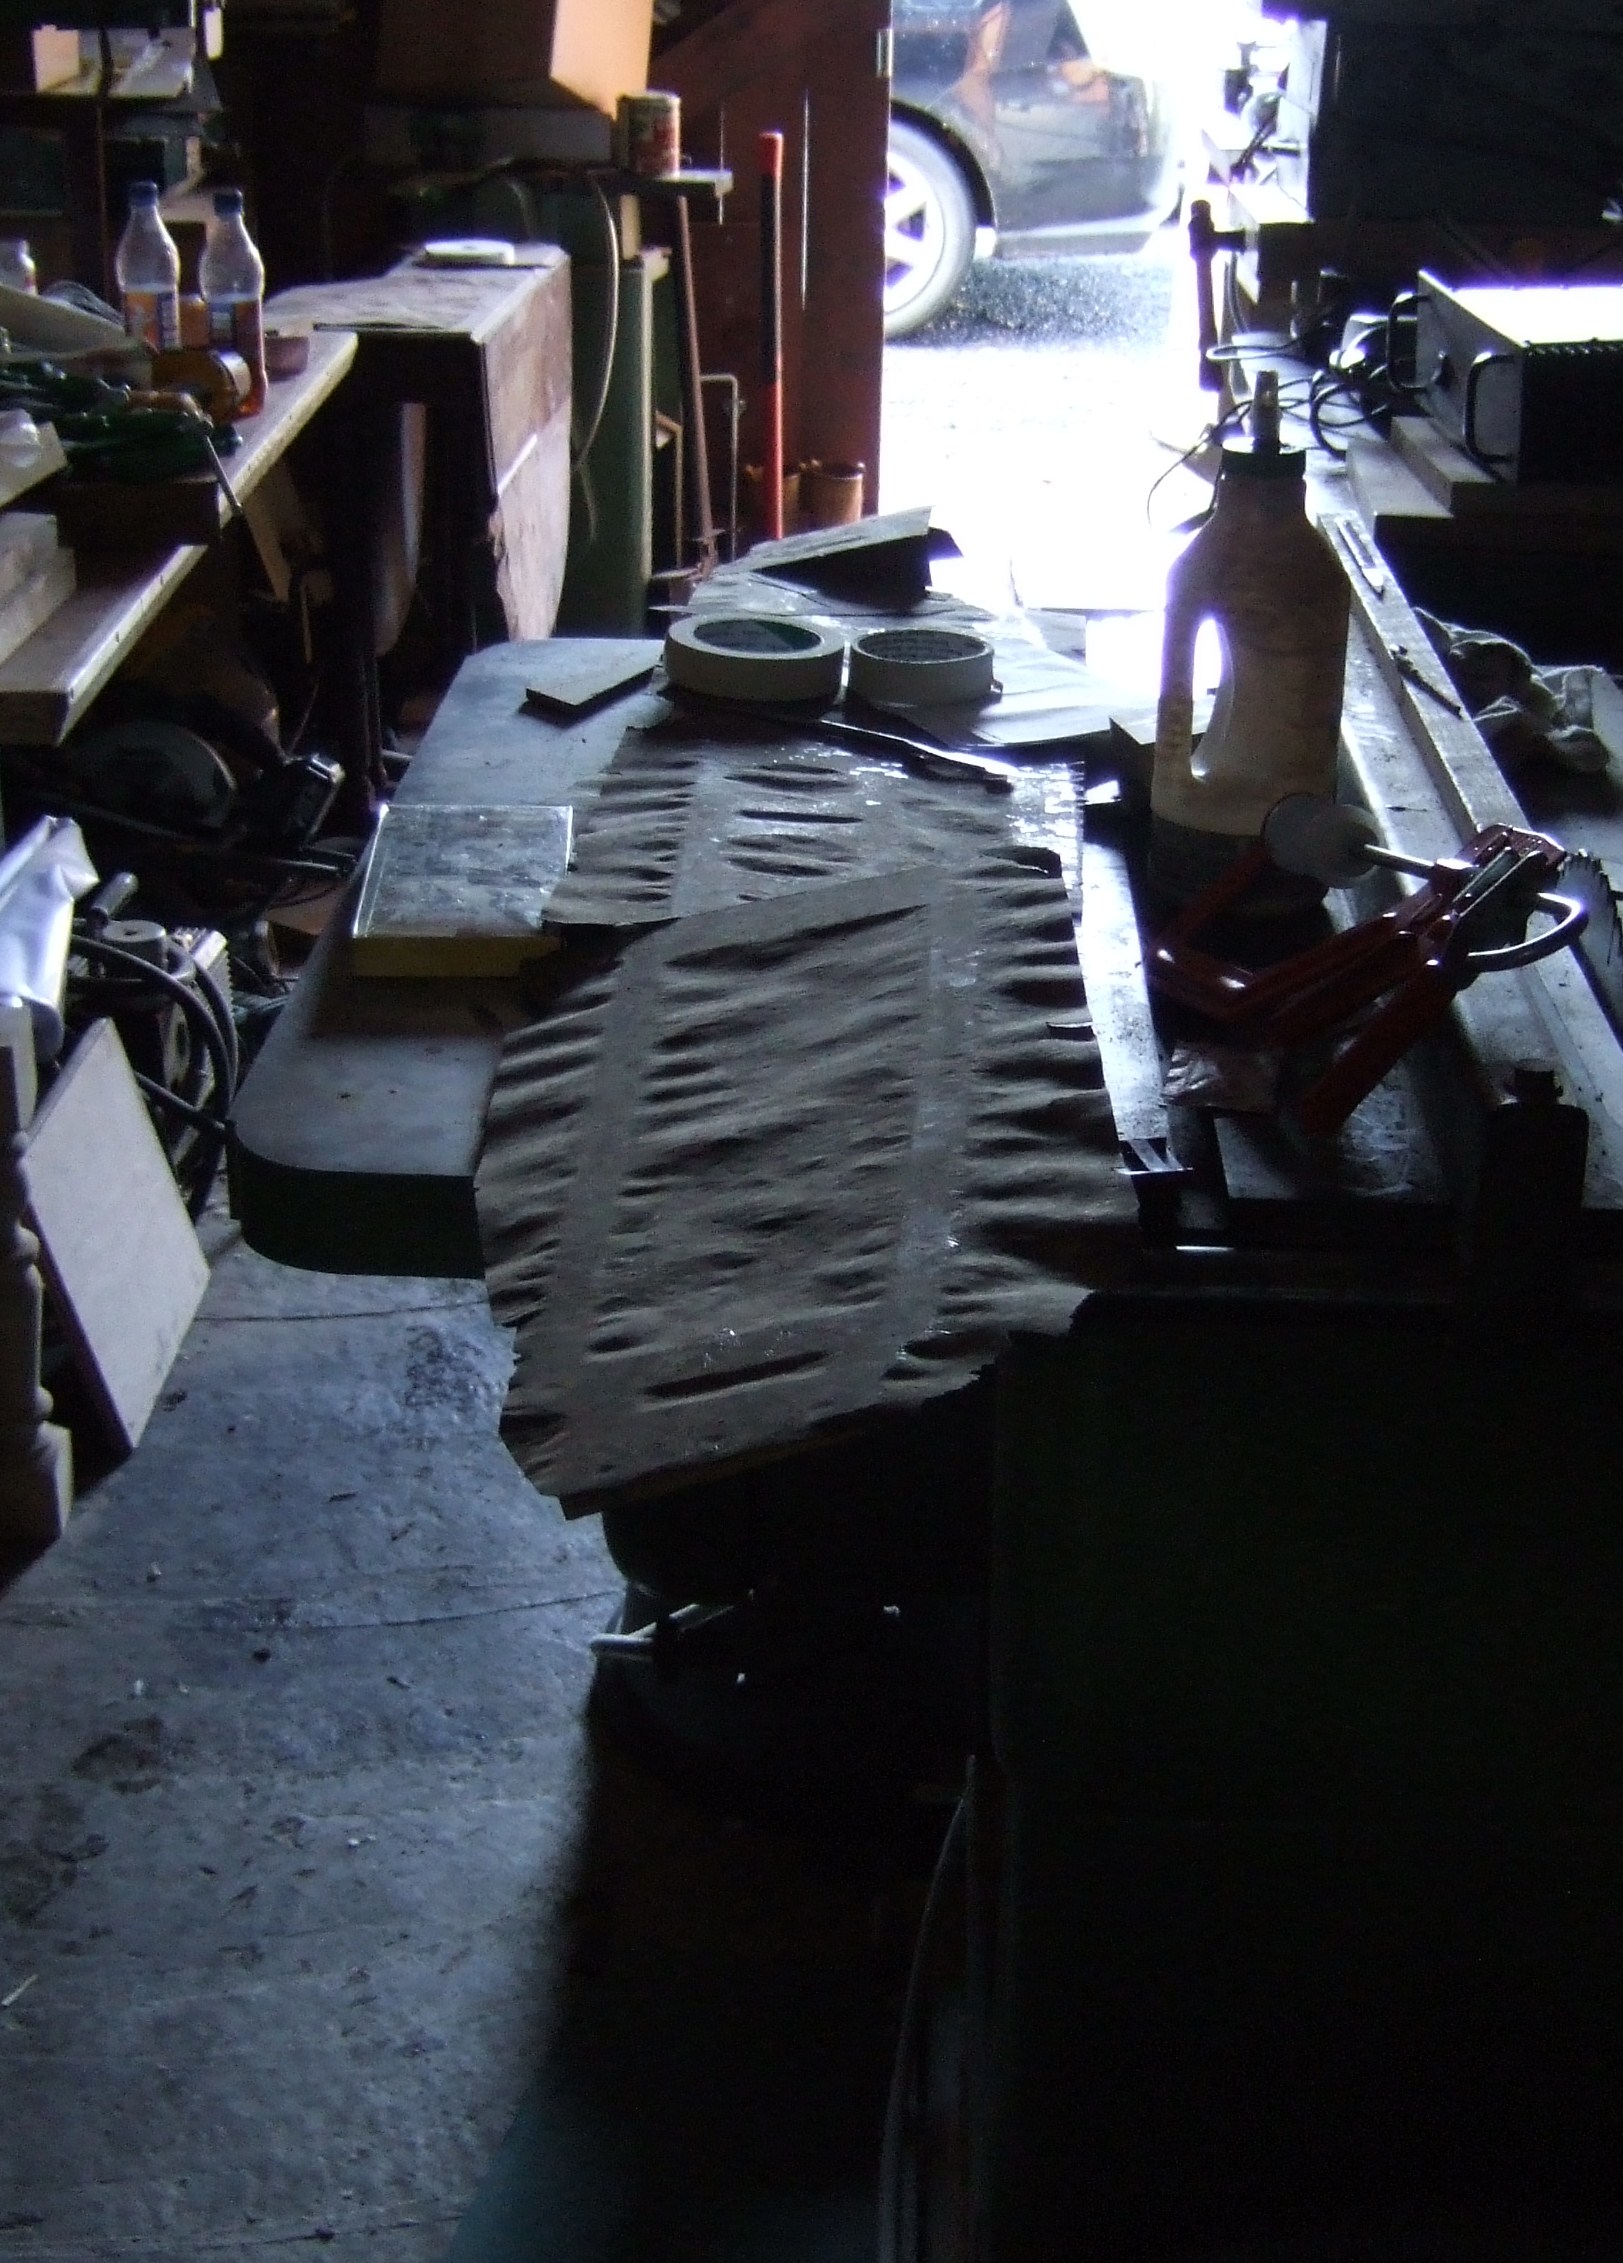
photograph to the right you can see the stark difference between the
veneer that has been flattened to the surface of the dashboard and the
unevenness of the veneer prior to flattening. The Burr Walnut is warped
and twisted in all planes.
and flat. Unfortunately,
the design of this dashboard, with its two kinks would make it very
difficult to be confident that placement of the veneer was perfect and,
since the dashboard was to be covered with a single contiguous sheet of
veneer, to ensure that all component pieces were joined well. The gluing
had to be carried out using clamps and formers to ensure position and
flatness were excellent. You can see the rather heavy use of individual
clamps that were required to cover all the small areas of surface that
needed to be glued under significant pressure. There is an old saying in
Cabinet Making, "You can never have enough clamps". In this case I was
darn near using every brand and style of clamps that I owned. In the
photograph to the right you can see the stark difference between the
veneer that has been flattened to the surface of the dashboard and the
unevenness of the veneer prior to flattening. The Burr Walnut is warped
and twisted in all planes.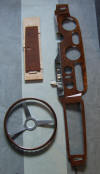
The nature of the joins where the triangles
met the main surfaces meant that the veneer component pieces had to be
mounted progressively over several days. The glove compartment cover was
veneered from the veneer cut from the main dashboard where the hole for
the glove compartment sat. The result is a very long, consistent
presentation of the veneer sheet.
Once mounted, the veneer was flattened,
rubbed down and prepared for French Polishing. The numerous holes for
instruments, the different surfaces and the angle of joins meant that
the French Polish had to be applied very slowly and deliberately.
Pooling and running of the French Polish was a significant risk. The
edges of all the instrument cut-outs, the various smaller holes and, of
course, these dratted triangles made for very careful, thin
applications. The finish was built up over weeks and months to ensure
that good protection will be afforded to the wooden surface.
At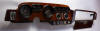 several
points I did ask myself why we hadn't gone for the easy option of
spraying the dashboard with a modern plastic lacquer. The lustre and
elegance of the hand-polished Shellac finish makes for a muc several
points I did ask myself why we hadn't gone for the easy option of
spraying the dashboard with a modern plastic lacquer. The lustre and
elegance of the hand-polished Shellac finish makes for a muc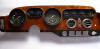 h better
finish in my opinion and so any doubts I had were quashed when I was
able to apply the final coats. The Shellac will harden over the next 2-3
months after which time I shall return to repair any damage and to check
that the s h better
finish in my opinion and so any doubts I had were quashed when I was
able to apply the final coats. The Shellac will harden over the next 2-3
months after which time I shall return to repair any damage and to check
that the s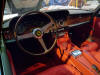 urface has settled properly and rectify any imperfections. urface has settled properly and rectify any imperfections.
The instruments were sent to me for fitting.
These were polished and new marke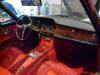 rs painted on to the heating controls.
There were areas of significant bubbling on the surfaces of the fan vents. Machine polishing reduced these significantly. The speedometer
was marked up with MPH indicators to avoid any embarrassing lapses. rs painted on to the heating controls.
There were areas of significant bubbling on the surfaces of the fan vents. Machine polishing reduced these significantly. The speedometer
was marked up with MPH indicators to avoid any embarrassing lapses.
I have enclosed photos of the interior just
prior to complete refinishing.
The Small Mahogany Chest of Drawers with
Glazed Door.
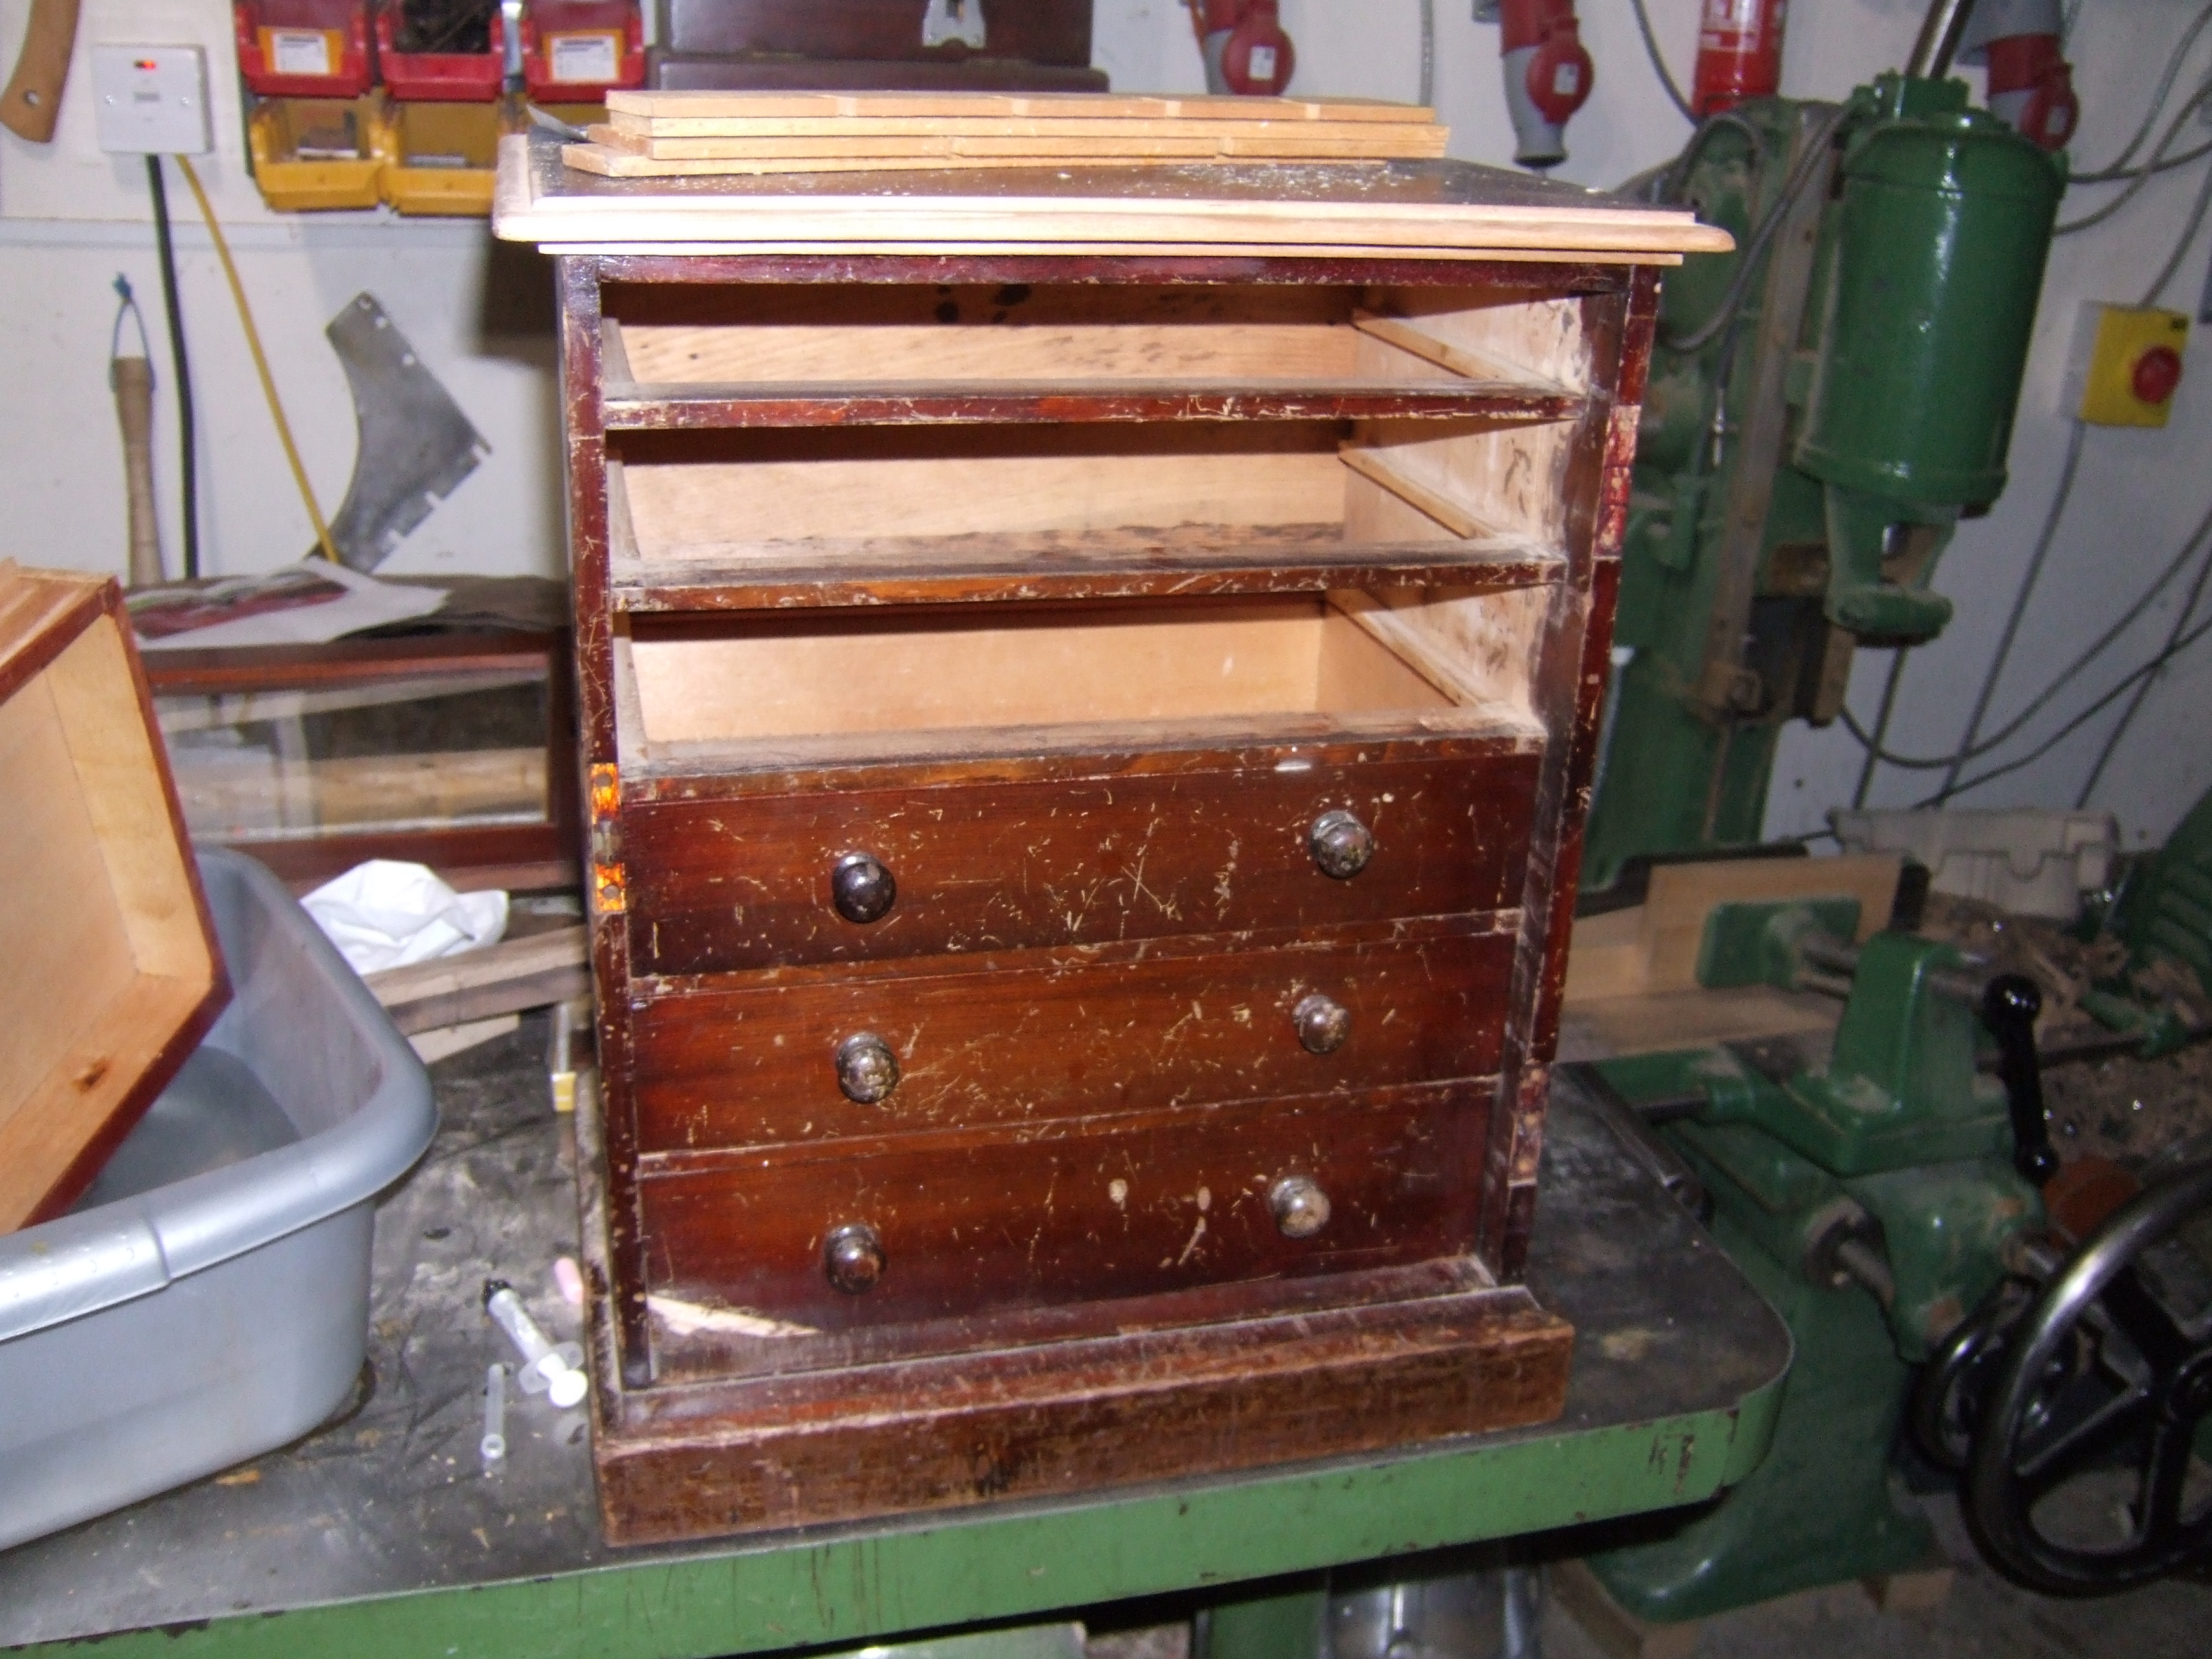
Somebody had given this piece a pretty hard
time. Dating from the Victorian era I assume that this was some kind of
laboratory or specimen chest of drawers. Possibly an apprentice piece.
The top had been destroyed so a replacement
had to be made. Not much care had been tak en
in the placing of the drawer handles and the drawer fronts had been
savaged. The base was similarly badly treated but, given that this was
not covered by a door I felt that major restoration would not be
required to the base, just a freshening up. The sides of the piece were
pretty similar to the drawer fronts and there were numerous deep rub
marks, scratches and cracks. Cracks on a piece of this age are not
unnatural. Generally if a crack is not undermining the stability of the
piece I will merely soften its edges and ensure that no underlying
colour is contrasting against the main surface finish. en
in the placing of the drawer handles and the drawer fronts had been
savaged. The base was similarly badly treated but, given that this was
not covered by a door I felt that major restoration would not be
required to the base, just a freshening up. The sides of the piece were
pretty similar to the drawer fronts and there were numerous deep rub
marks, scratches and cracks. Cracks on a piece of this age are not
unnatural. Generally if a crack is not undermining the stability of the
piece I will merely soften its edges and ensure that no underlying
colour is contrasting against the main surface finish.
I always try to resist the approach of
stripping finish from a piece, scraping the old surface to reveal a
smoother, less imperfect new surface. Not being of too great antiquity
and given the extent of damage to the surfaces I chose to be pretty
vigorous with this piece. The fact that the top required replacing
encouraged me to renew rather than simply restore.
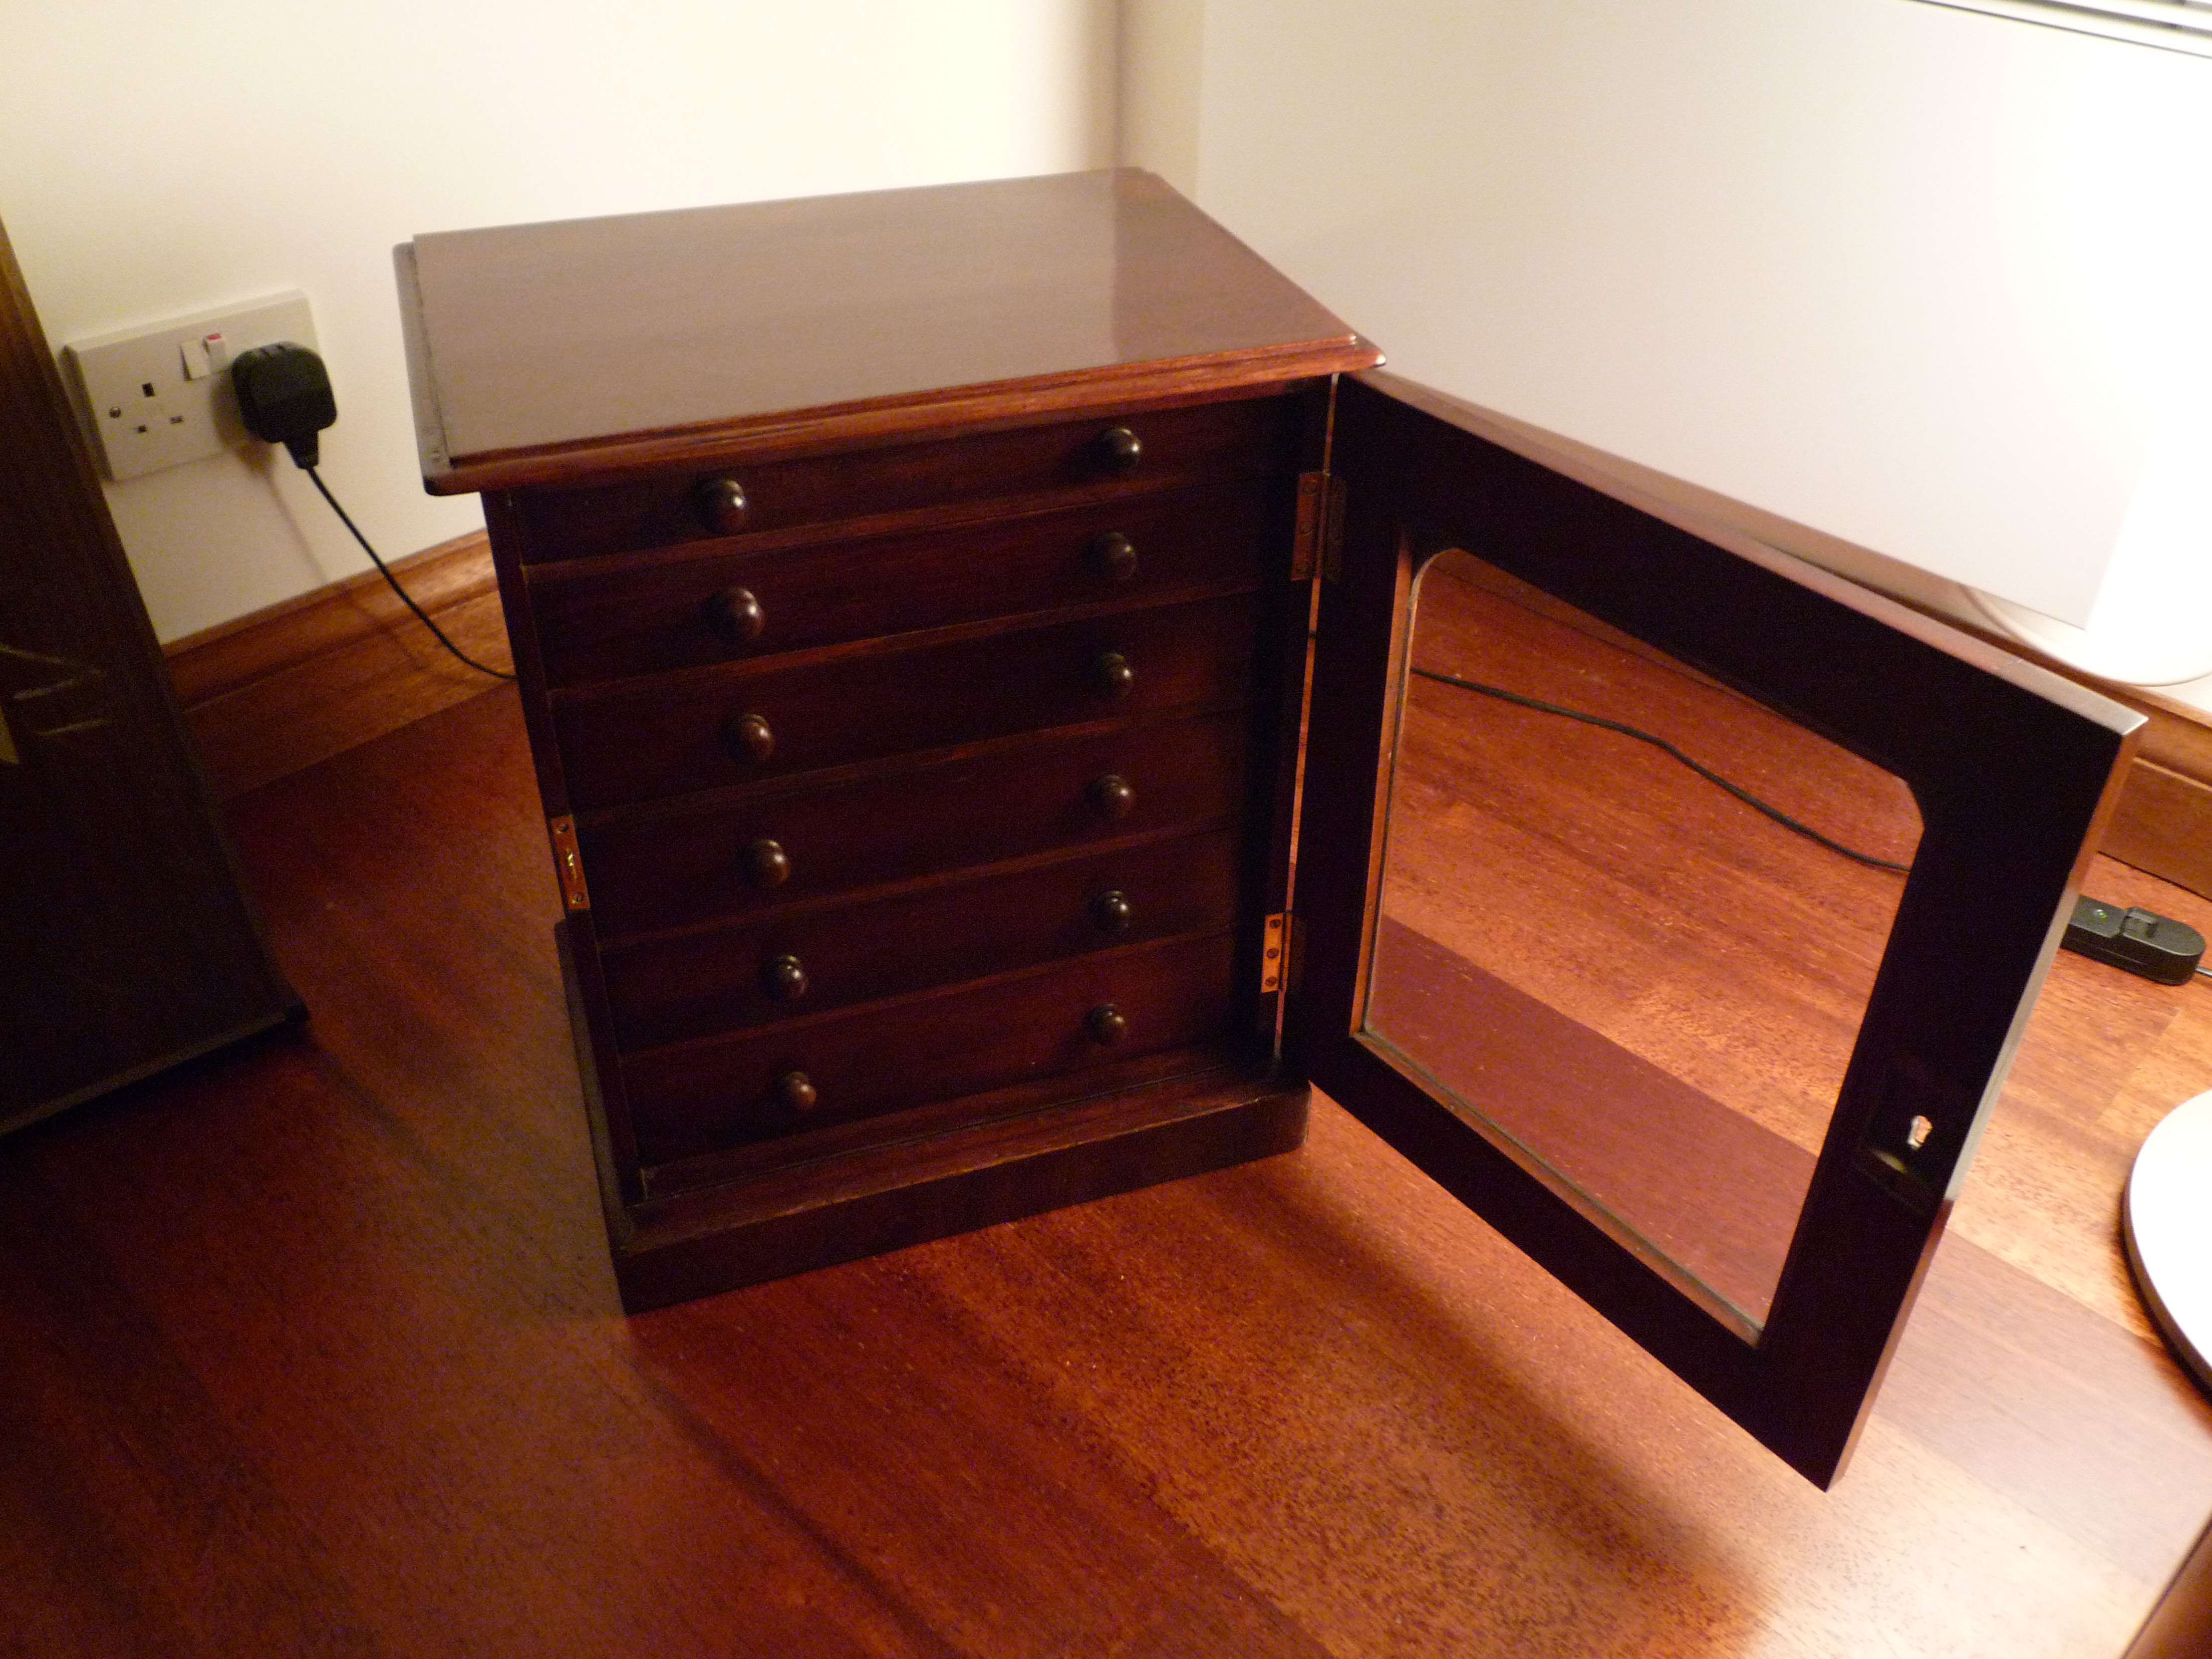
 The
handles have been realigned and placed correctly. The drawer fronts, top
and sides of the chest have been coloured and refinished to a deeper,
more lustrous look than was the case previously. The
handles have been realigned and placed correctly. The drawer fronts, top
and sides of the chest have been coloured and refinished to a deeper,
more lustrous look than was the case previously.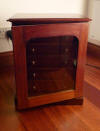 The brass components had been daubed with some terrible coloured varnish
at some point. These were polished back and fitted. They look shiny but
not new. Some tarnishing was left in place to ensure that there was
still some age to the brass.
The brass components had been daubed with some terrible coloured varnish
at some point. These were polished back and fitted. They look shiny but
not new. Some tarnishing was left in place to ensure that there was
still some age to the brass.
The chest does not look new. I would hope
people would consider it to look aged and well cared for. The piece
still shows wear to the visible surfaces but this looks more in line
with the passage of time rather than that of a wooden piece that has
been kicked around a room several times over then hurled down a gravel
path.
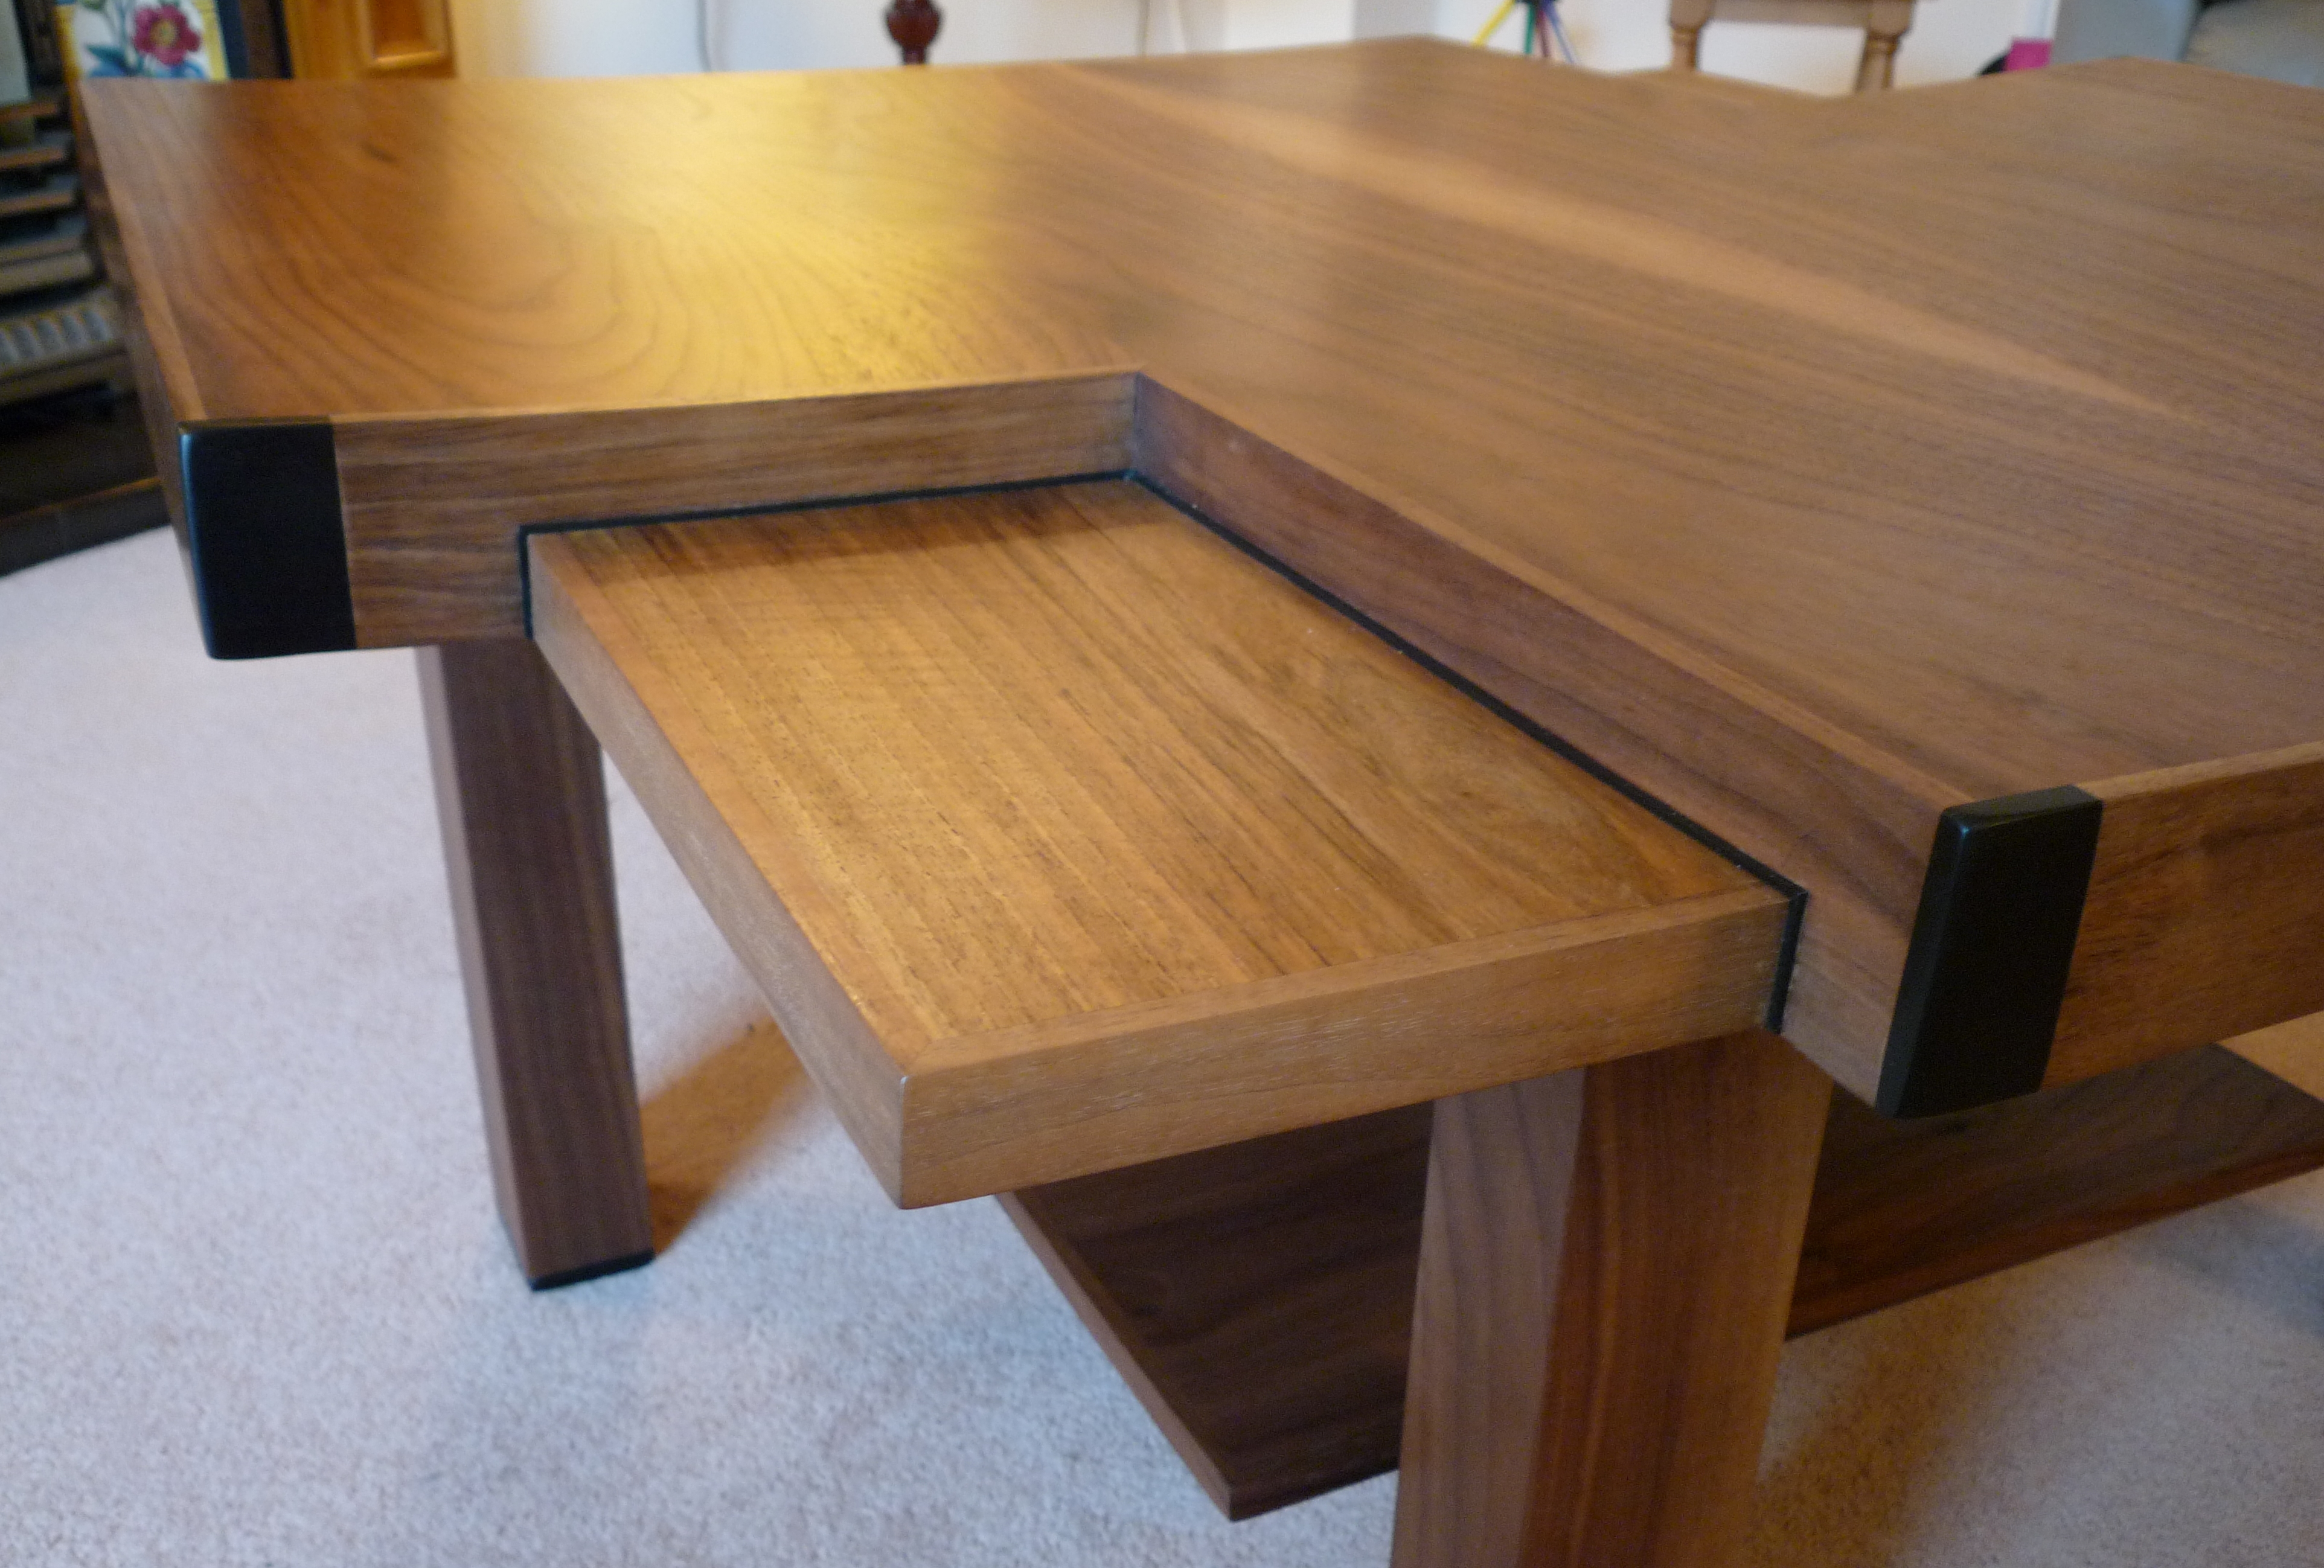
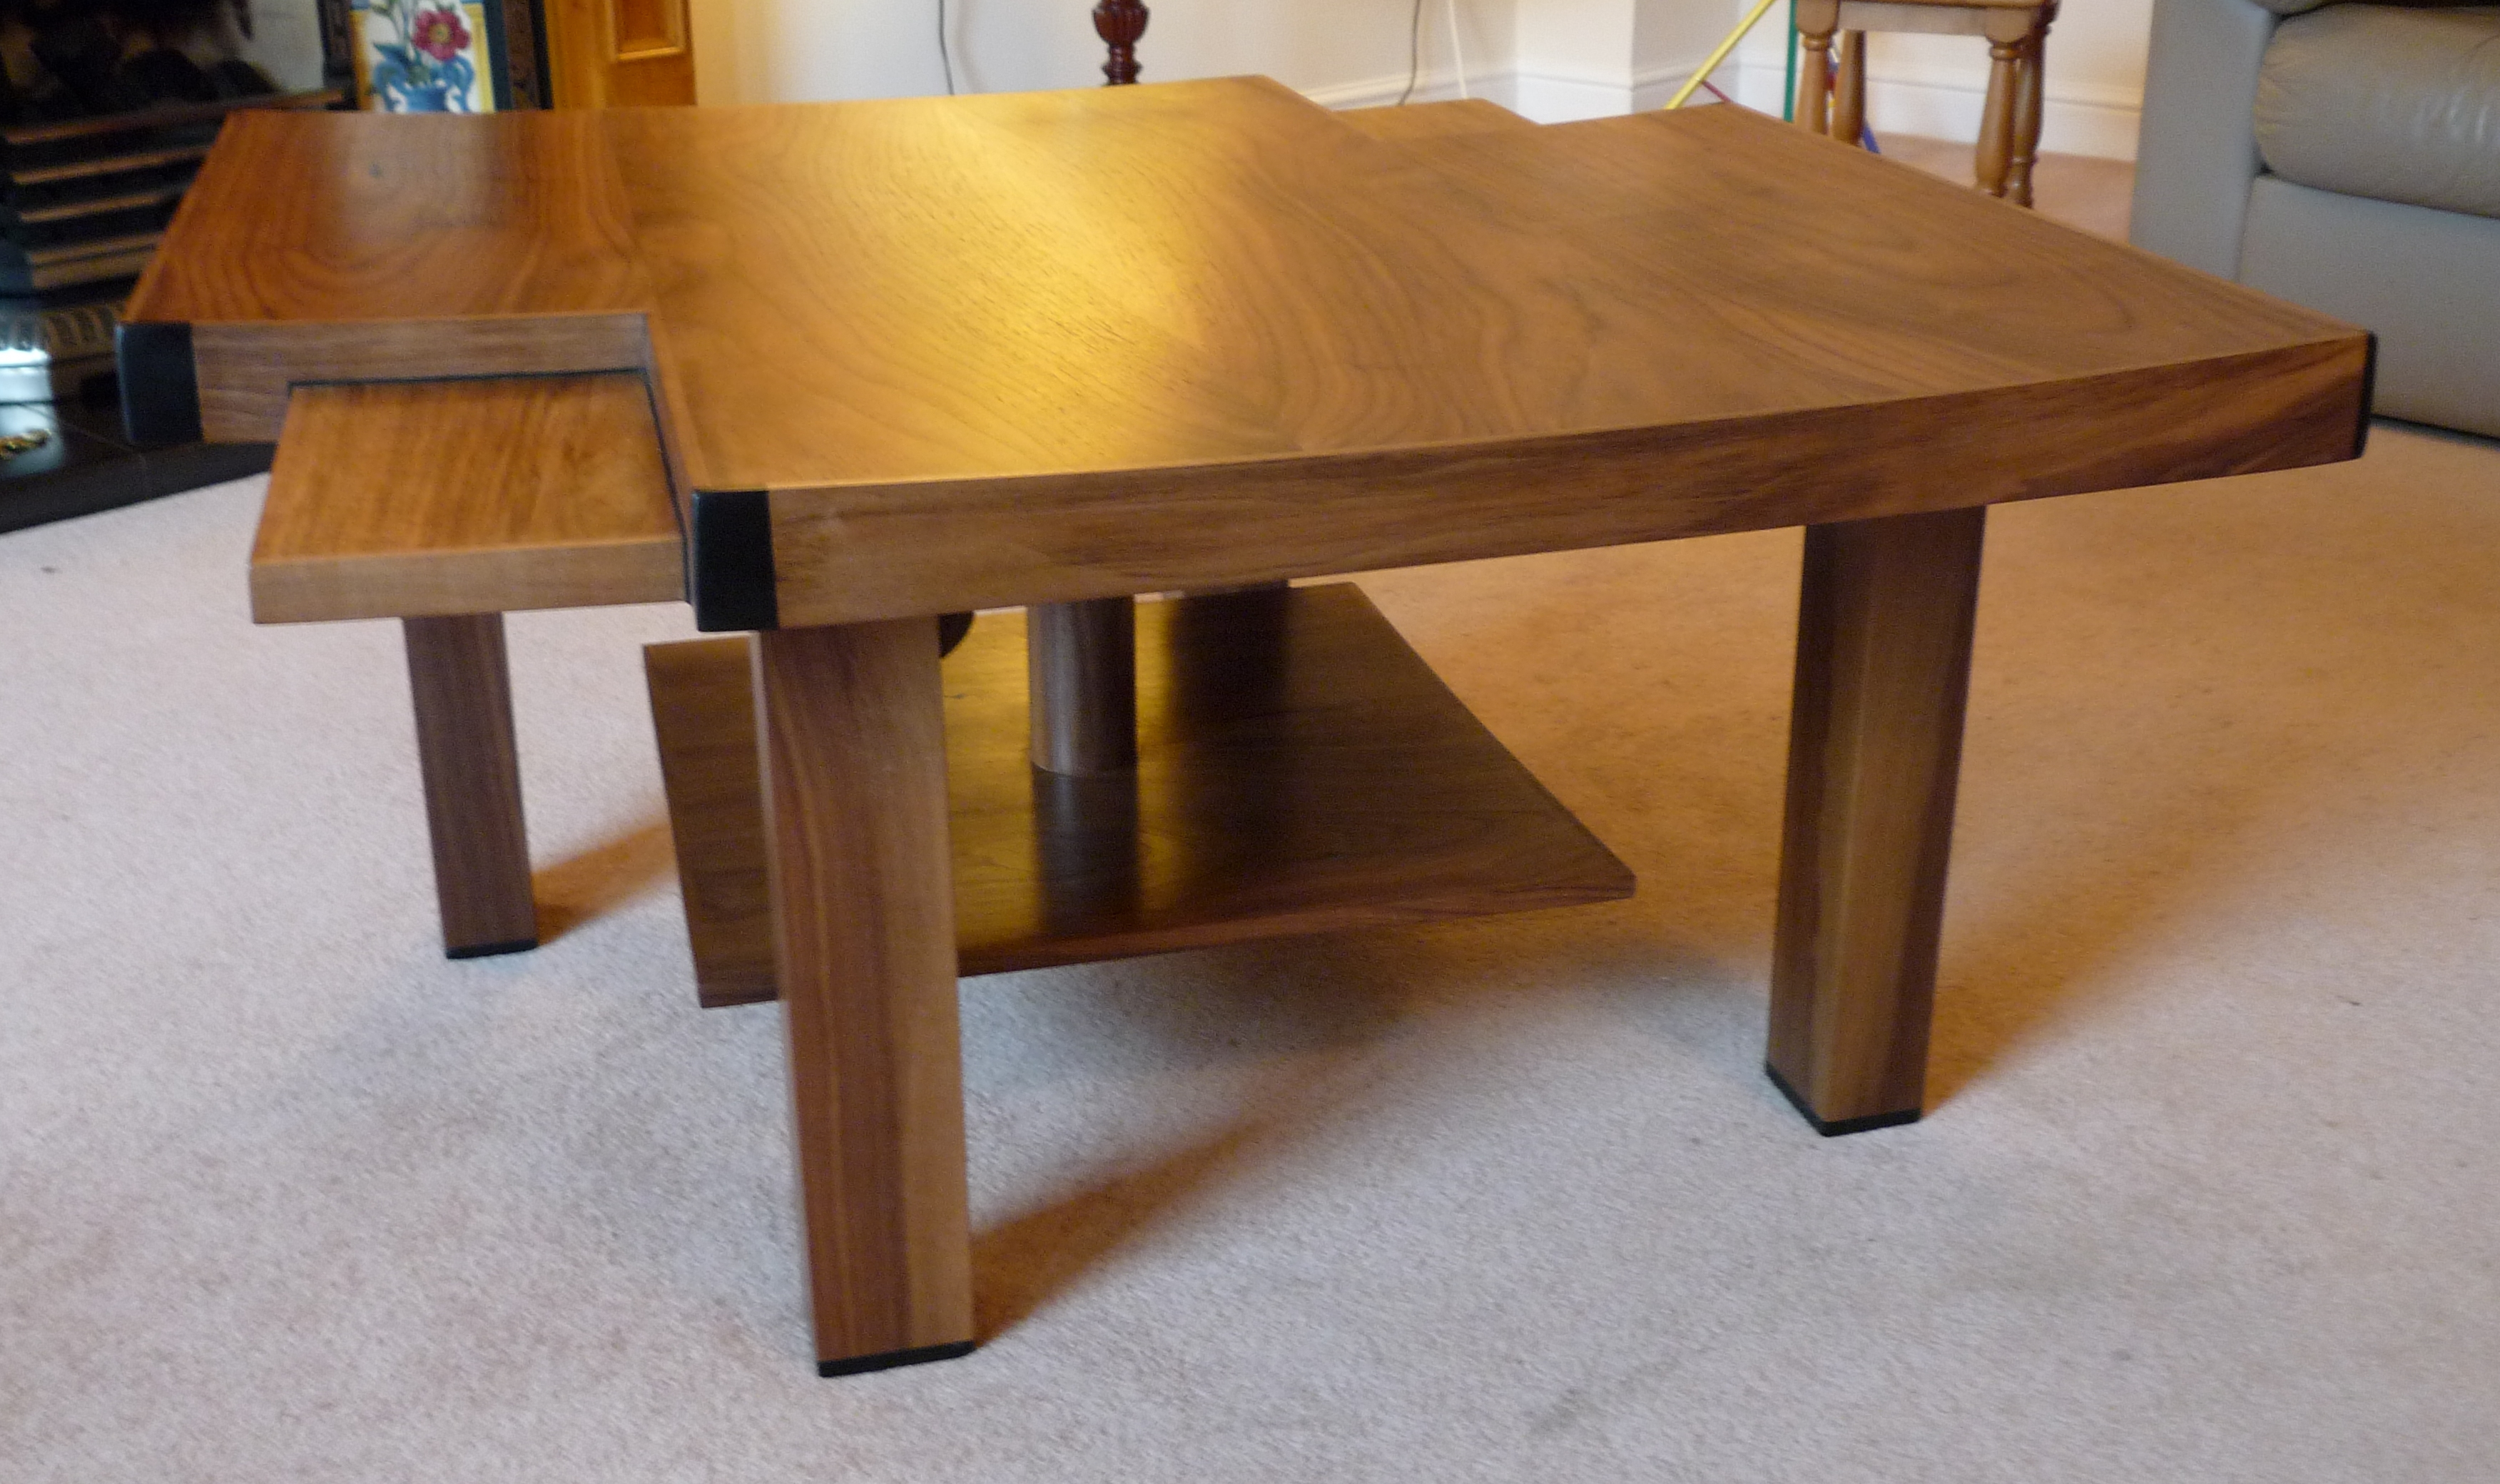
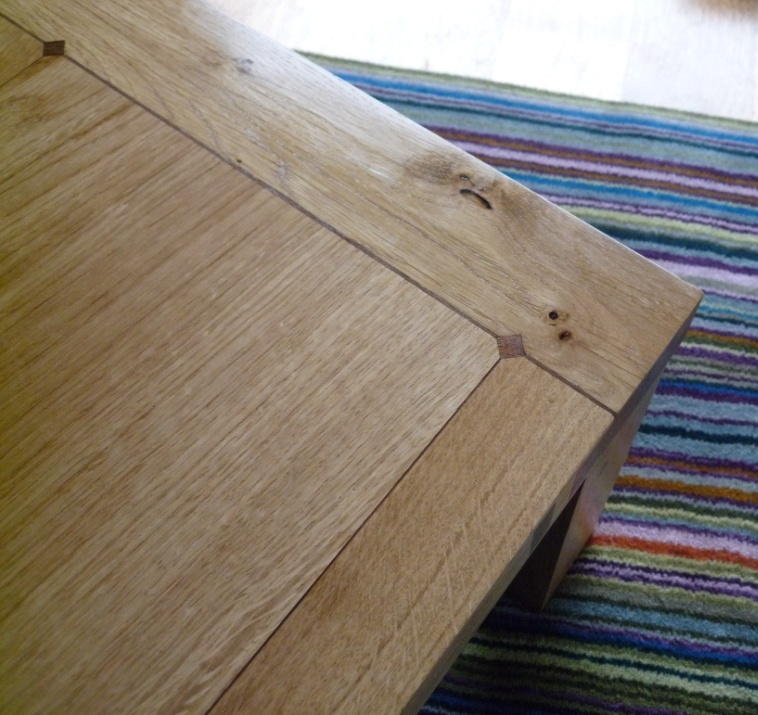
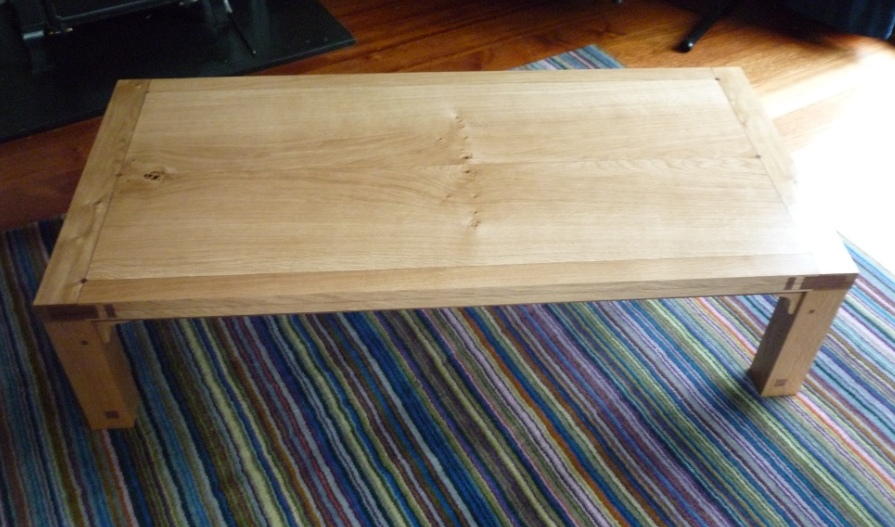
The Contemporary Walnut Low Table with
Floating Shelf
This was a somewhat nerve-wracking piece. I
had discussed my outline thoughts on design with the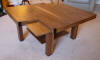 customer and thereafter they simply wanted me to come up with something
unique. I decided to wander far from the traditional track. Walnut was
the chosen wood. Black Walnut and European Walnut was used in the
making. Ebony was used for detailing. Since the piece was to be unique,
I abandoned all tradition of symmetry relying on asymmetry in every part
of the piece. There is a hint of symmetry in the themes that are used
around the piece, the indented shelves
customer and thereafter they simply wanted me to come up with something
unique. I decided to wander far from the traditional track. Walnut was
the chosen wood. Black Walnut and European Walnut was used in the
making. Ebony was used for detailing. Since the piece was to be unique,
I abandoned all tradition of symmetry relying on asymmetry in every part
of the piece. There is a hint of symmetry in the themes that are used
around the piece, the indented shelves
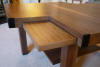 for
instance, the ebony bands and caps, but there is not a mirror image, in
terms of geometry, anywhere. The top is curved gently and banded to
suggest that it is carved from solid. The shelf, designed to have no
corner or stretcher supports, is curved in the opposite axis to the top.
The legs are placed asymmetrically and well within the boundaries of the
table. The legs are angled for
instance, the ebony bands and caps, but there is not a mirror image, in
terms of geometry, anywhere. The top is curved gently and banded to
suggest that it is carved from solid. The shelf, designed to have no
corner or stretcher supports, is curved in the opposite axis to the top.
The legs are placed asymmetrically and well within the boundaries of the
table. The legs are angled
 in
ever so slightly so that the table starts narrow and opens up. The legs,
indented shelves and floating shelf are designed so that the customer is
presented with a view of very different shapes, shading and geometry,
depending where they are sitting or standing adjacent to the table. It
was somewhat experimental and I am pleased to say that the customer is
very happy with the piece. in
ever so slightly so that the table starts narrow and opens up. The legs,
indented shelves and floating shelf are designed so that the customer is
presented with a view of very different shapes, shading and geometry,
depending where they are sitting or standing adjacent to the table. It
was somewhat experimental and I am pleased to say that the customer is
very happy with the piece.
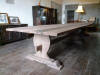
The Incredible 16th Century Catalan Table
A family that I know wanted a 5 metre (yes,
that's pretty big) table in the style of something that might have been
made around the 16th Century in Catalunya. Turns out that a lot of these
tables were popular with the Italians who purchased them as Gothic
tables. The designs and features are certainly very similar. The family
have restored a very old (circa 13th Century) location in the
Collsacabra mountains. The main house is believed to be principally 16th
and 17th Century. They run environmentally-friendly and ecologically
sound agricultural operations and have spent a long time bringing the
buildings into an excellent state of repair. They have cottages for rent
so you might want to take a look. The location is beautiful and
tranquil, excepting the occasional loud swearing and banging from a
woodworking workshop a few miles away along a mountain road. The web
site is www.avenc.com and well worth
a look. There is even a book about it, A Castle in Spain by Matthew
Parris.
I was drafted in to assist in the
construction. My host was a lovely young lady woodworker called
Christina. Very talented and far too humble for her own good. We didn't
know exactly what such a table would look like never mind how we would
make it. I planned to take a week out of my making in Scotland to get
the table into the dining room. The dining room had been waiting for
this table for a good few years and we had hoped to take 2 weeks out but
I had other work to deliver in Scotland. We had an outline design in
mind that appealed to our sense of what a chunky refectory table should
look like but this was modified significantly when we met with a local
historian and a local retired wood craftsman in a village in the
foothills. Our first evening was spent laying out the wood and looking
at it for a long time. I always find it useful to look at wood for a
long time before a build. We identified the wood we would use for the
top. The top was our priority before we moved onto the trestles. We
visited the historian and craftsman and discovered just what such a
table could look like and, what's more, how it would have been made.
The family had wanted dark Walnut wood. Oak
would have been more in period but it was felt that it would not fit so
well with the aesthetics of the room. Walnut would look dark immediately
with no chemical ageing treatments. The dimensions of the table were set
at 112 cm wide and 5 metres long. 4.8 metres was all we could muster
with the available wood and so a compromise was established.
The build was a bit of a roller-coaster. We
discovered the Walnut was actually Spalted Walnut when we had to split
the boards to make the top thinner. Tabletops of that period were not
particularly thick and we had made a wrong call when the boards were
bought. We had to plane carefully to make sure that the tops of the
boards remained as dark as possible without the spalt showing through.
We could never hope to obtain the width of boards that would allow us to
make a two board table top so we set about joining the boards using
floating tenons and pegging them in place with the Oak pegs we had made.
This technique may not have been of the period but it was the most
natural and effective method that we reckoned would give good stability
and tame the boards that were a little tiresome in their habit of moving
and bowing. We trued the board edges by hand, wrote our secret messages
on the Oak tenons and brought the top together in two halves. We got to
know the wood pretty well over the course of the week. There were some
pretty odd characters amongst the boards.
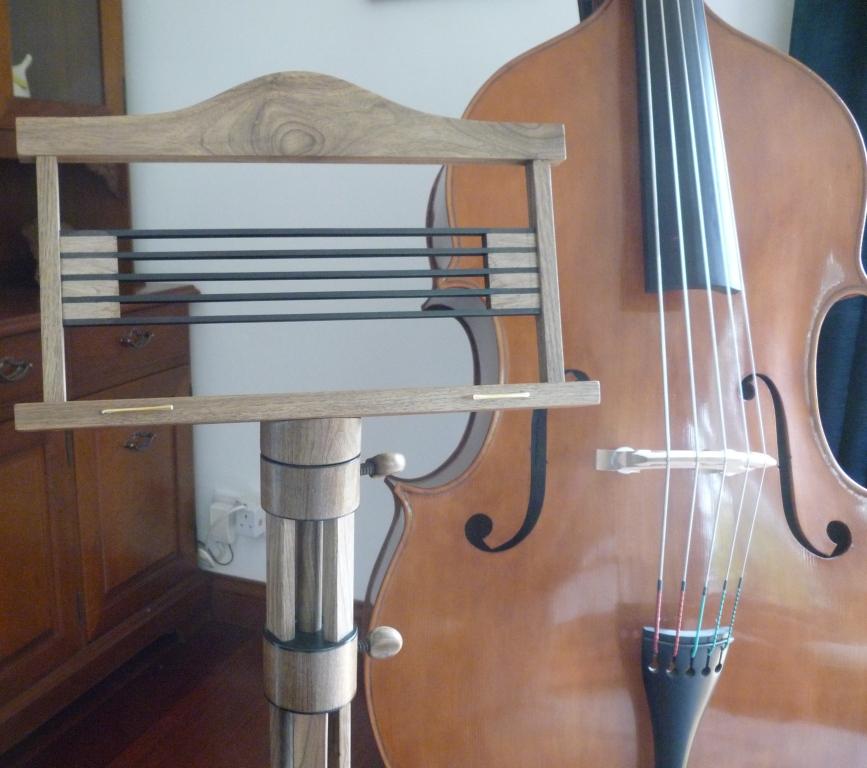
The trestles were less troublesome. They
required some joining of wood to attain the necessary width. Morticed
and tenoned into place, the lyre inspired motif looked very happy
between the traditionally carved trestles.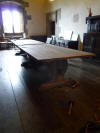
The various components were transported late
one evening along the mountain road to the main house. Upper bearers and
a very long lower stretcher system brought the trestles into a stable
form on the night before I was due to fly home. The top was put in
position with the help of the family. Joining keys were used between the
two top halves. We couldn't use any other type of joining system without
losing length. The keys
 aren't
the prettiest method but they will be covered with a centre cap to hide
the "engineering" work. The trestles are located in the top using
sliding dovetails. Some of the table has been distressed to give it an
air of antiquity. Mostly carried out by myself, it would seem that
damaging wood seems to fall quite naturally to me. Slightly worrying I
feel. aren't
the prettiest method but they will be covered with a centre cap to hide
the "engineering" work. The trestles are located in the top using
sliding dovetails. Some of the table has been distressed to give it an
air of antiquity. Mostly carried out by myself, it would seem that
damaging wood seems to fall quite naturally to me. Slightly worrying I
feel.
Overall, the effect of the table, in my
humble opinion, is fantastic. It was a good job that we made the top in
two halves as the floor of the ancient room is bowed. Our central join
accommodates the bow comfortably. The room looks much happier with the
table in situ. The family are very happy. The table is settling for a
few weeks before it is polished but that should be happening soon. I
understand that the first meal it will host will be on the 8th of May
for a family birthday.
It was a great challenge and adventure. At a
couple of points duri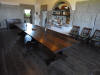 ng the week I didn't think we would
have the table installed in time for my plane departure. Successful
completion was assured when Christina, on the penultimate night, told me
that the wood supplier had told her and her father that there was no way
that such a table could be made in a week. Never tell a Scotsman that
something can't be done. You will only be proved wrong. As was the case,
I am pleased to say, on this occasion. ng the week I didn't think we would
have the table installed in time for my plane departure. Successful
completion was assured when Christina, on the penultimate night, told me
that the wood supplier had told her and her father that there was no way
that such a table could be made in a week. Never tell a Scotsman that
something can't be done. You will only be proved wrong. As was the case,
I am pleased to say, on this occasion.
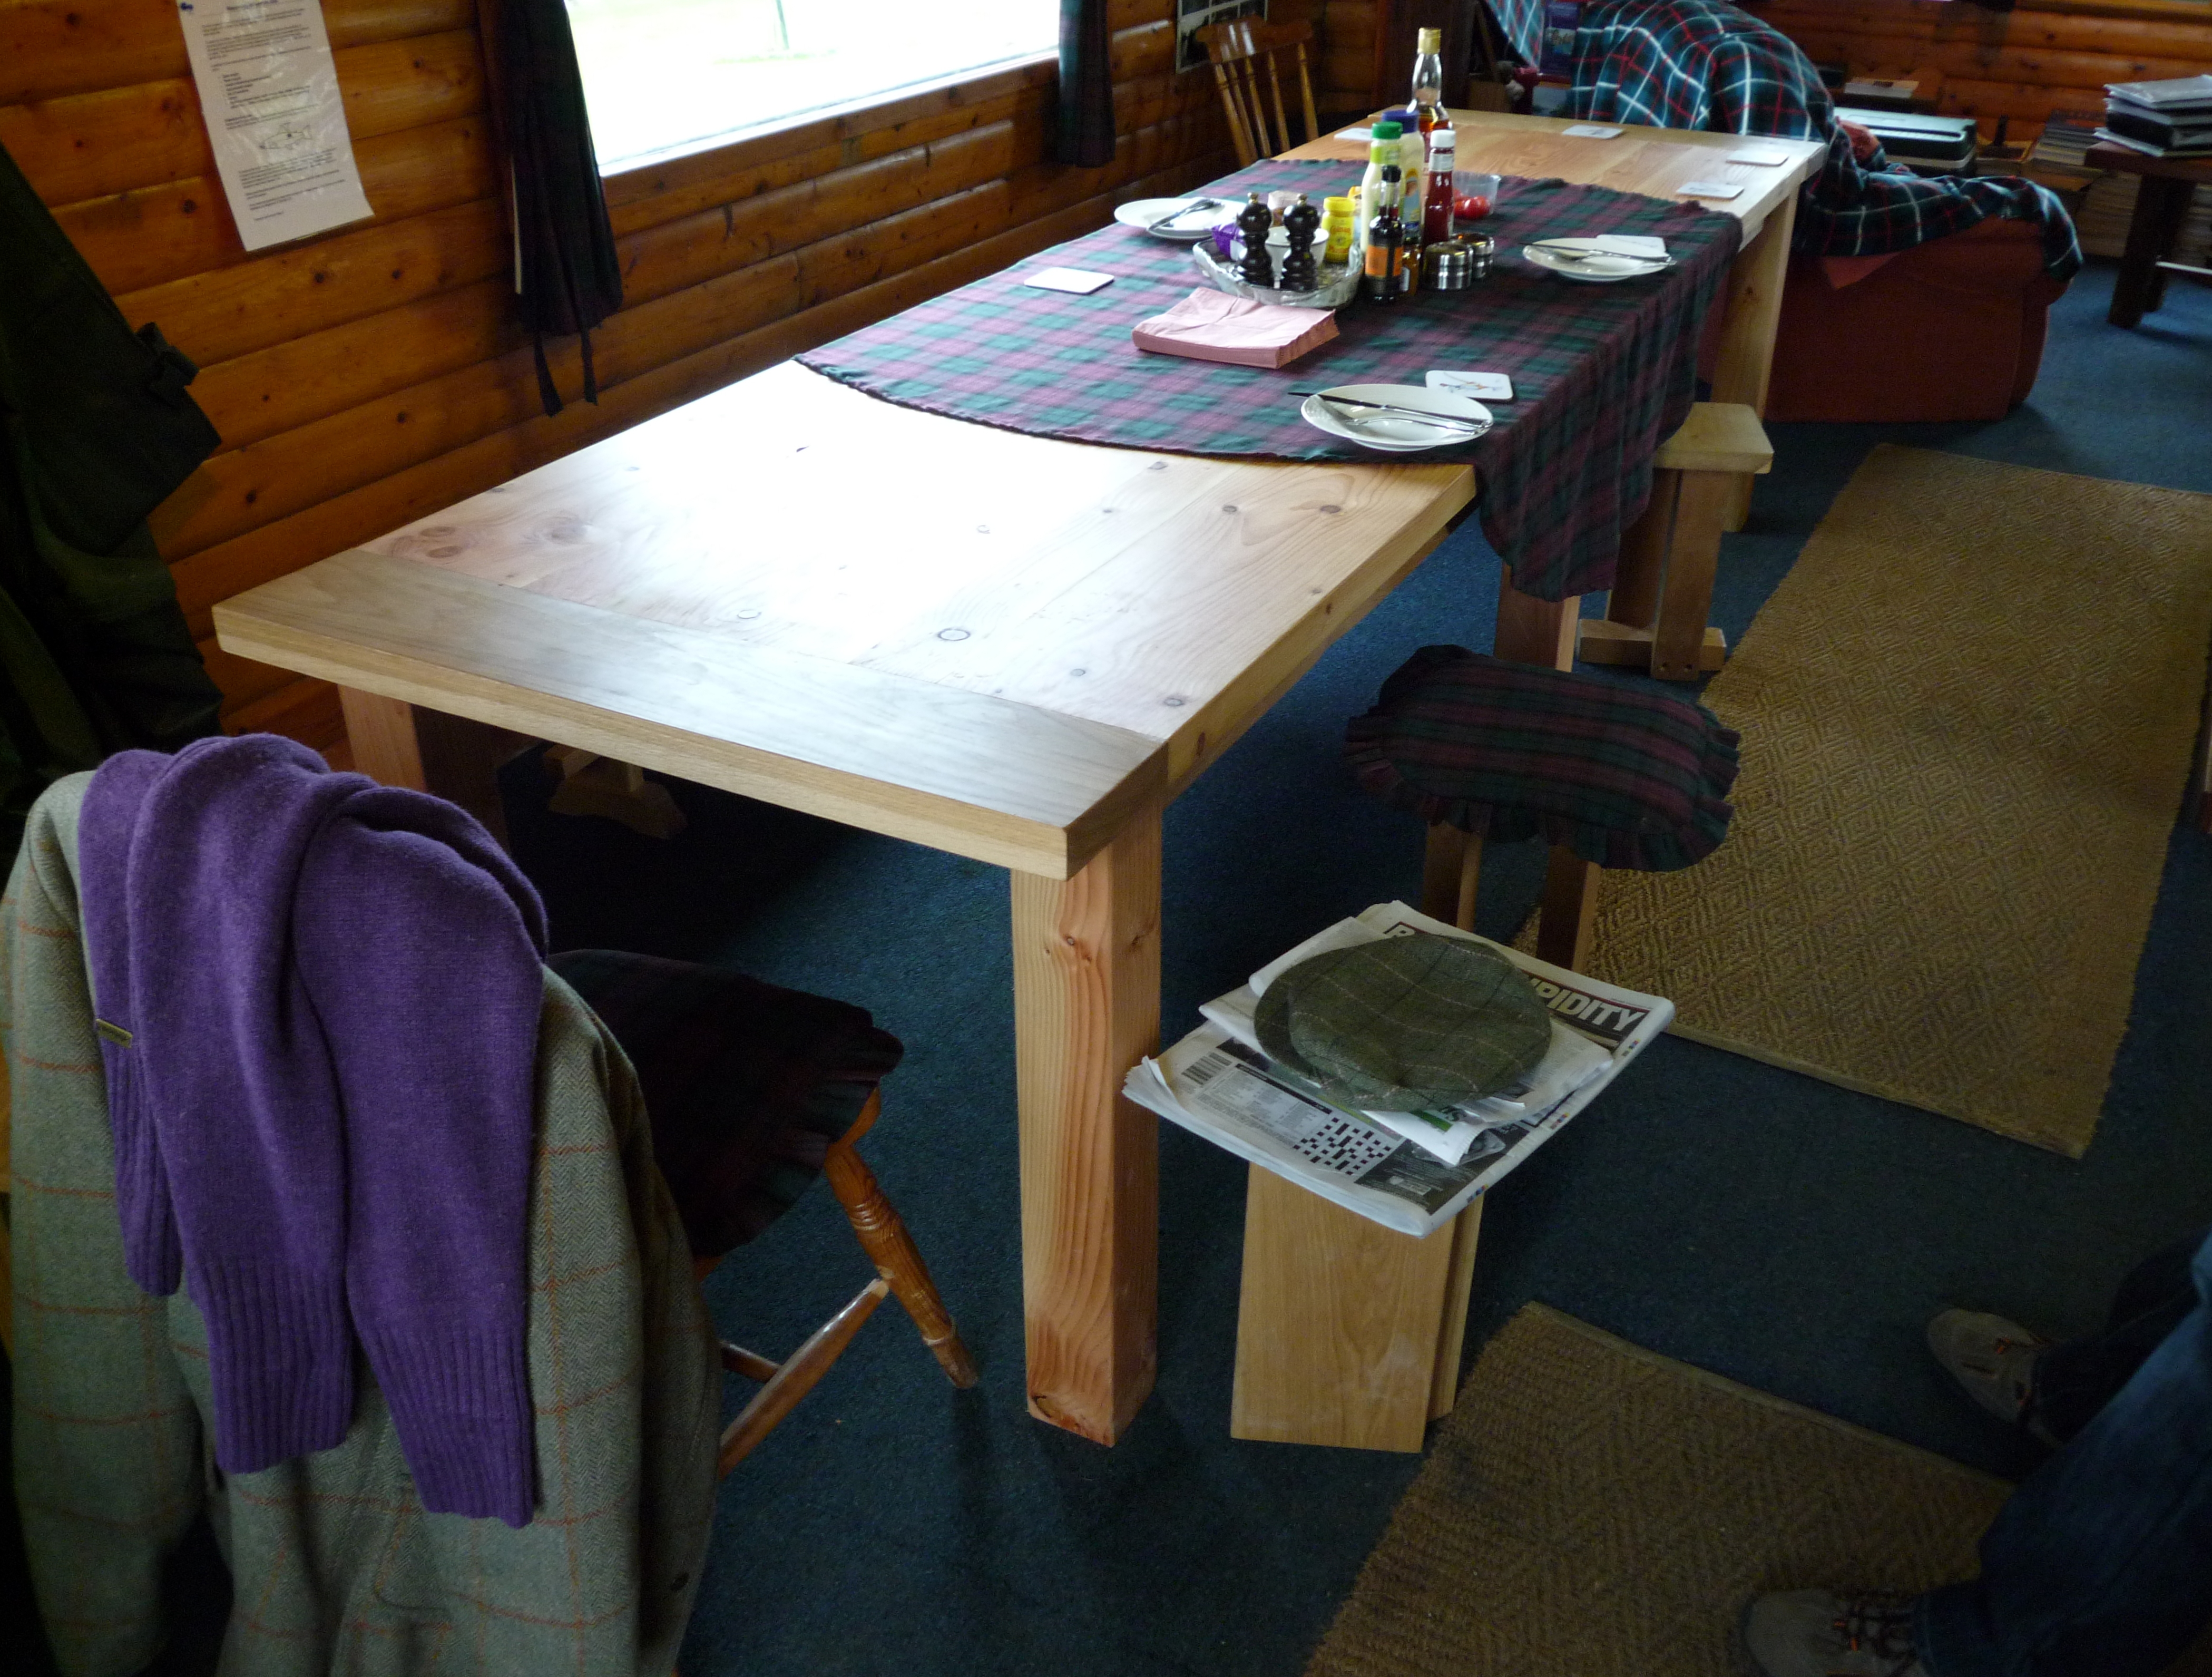
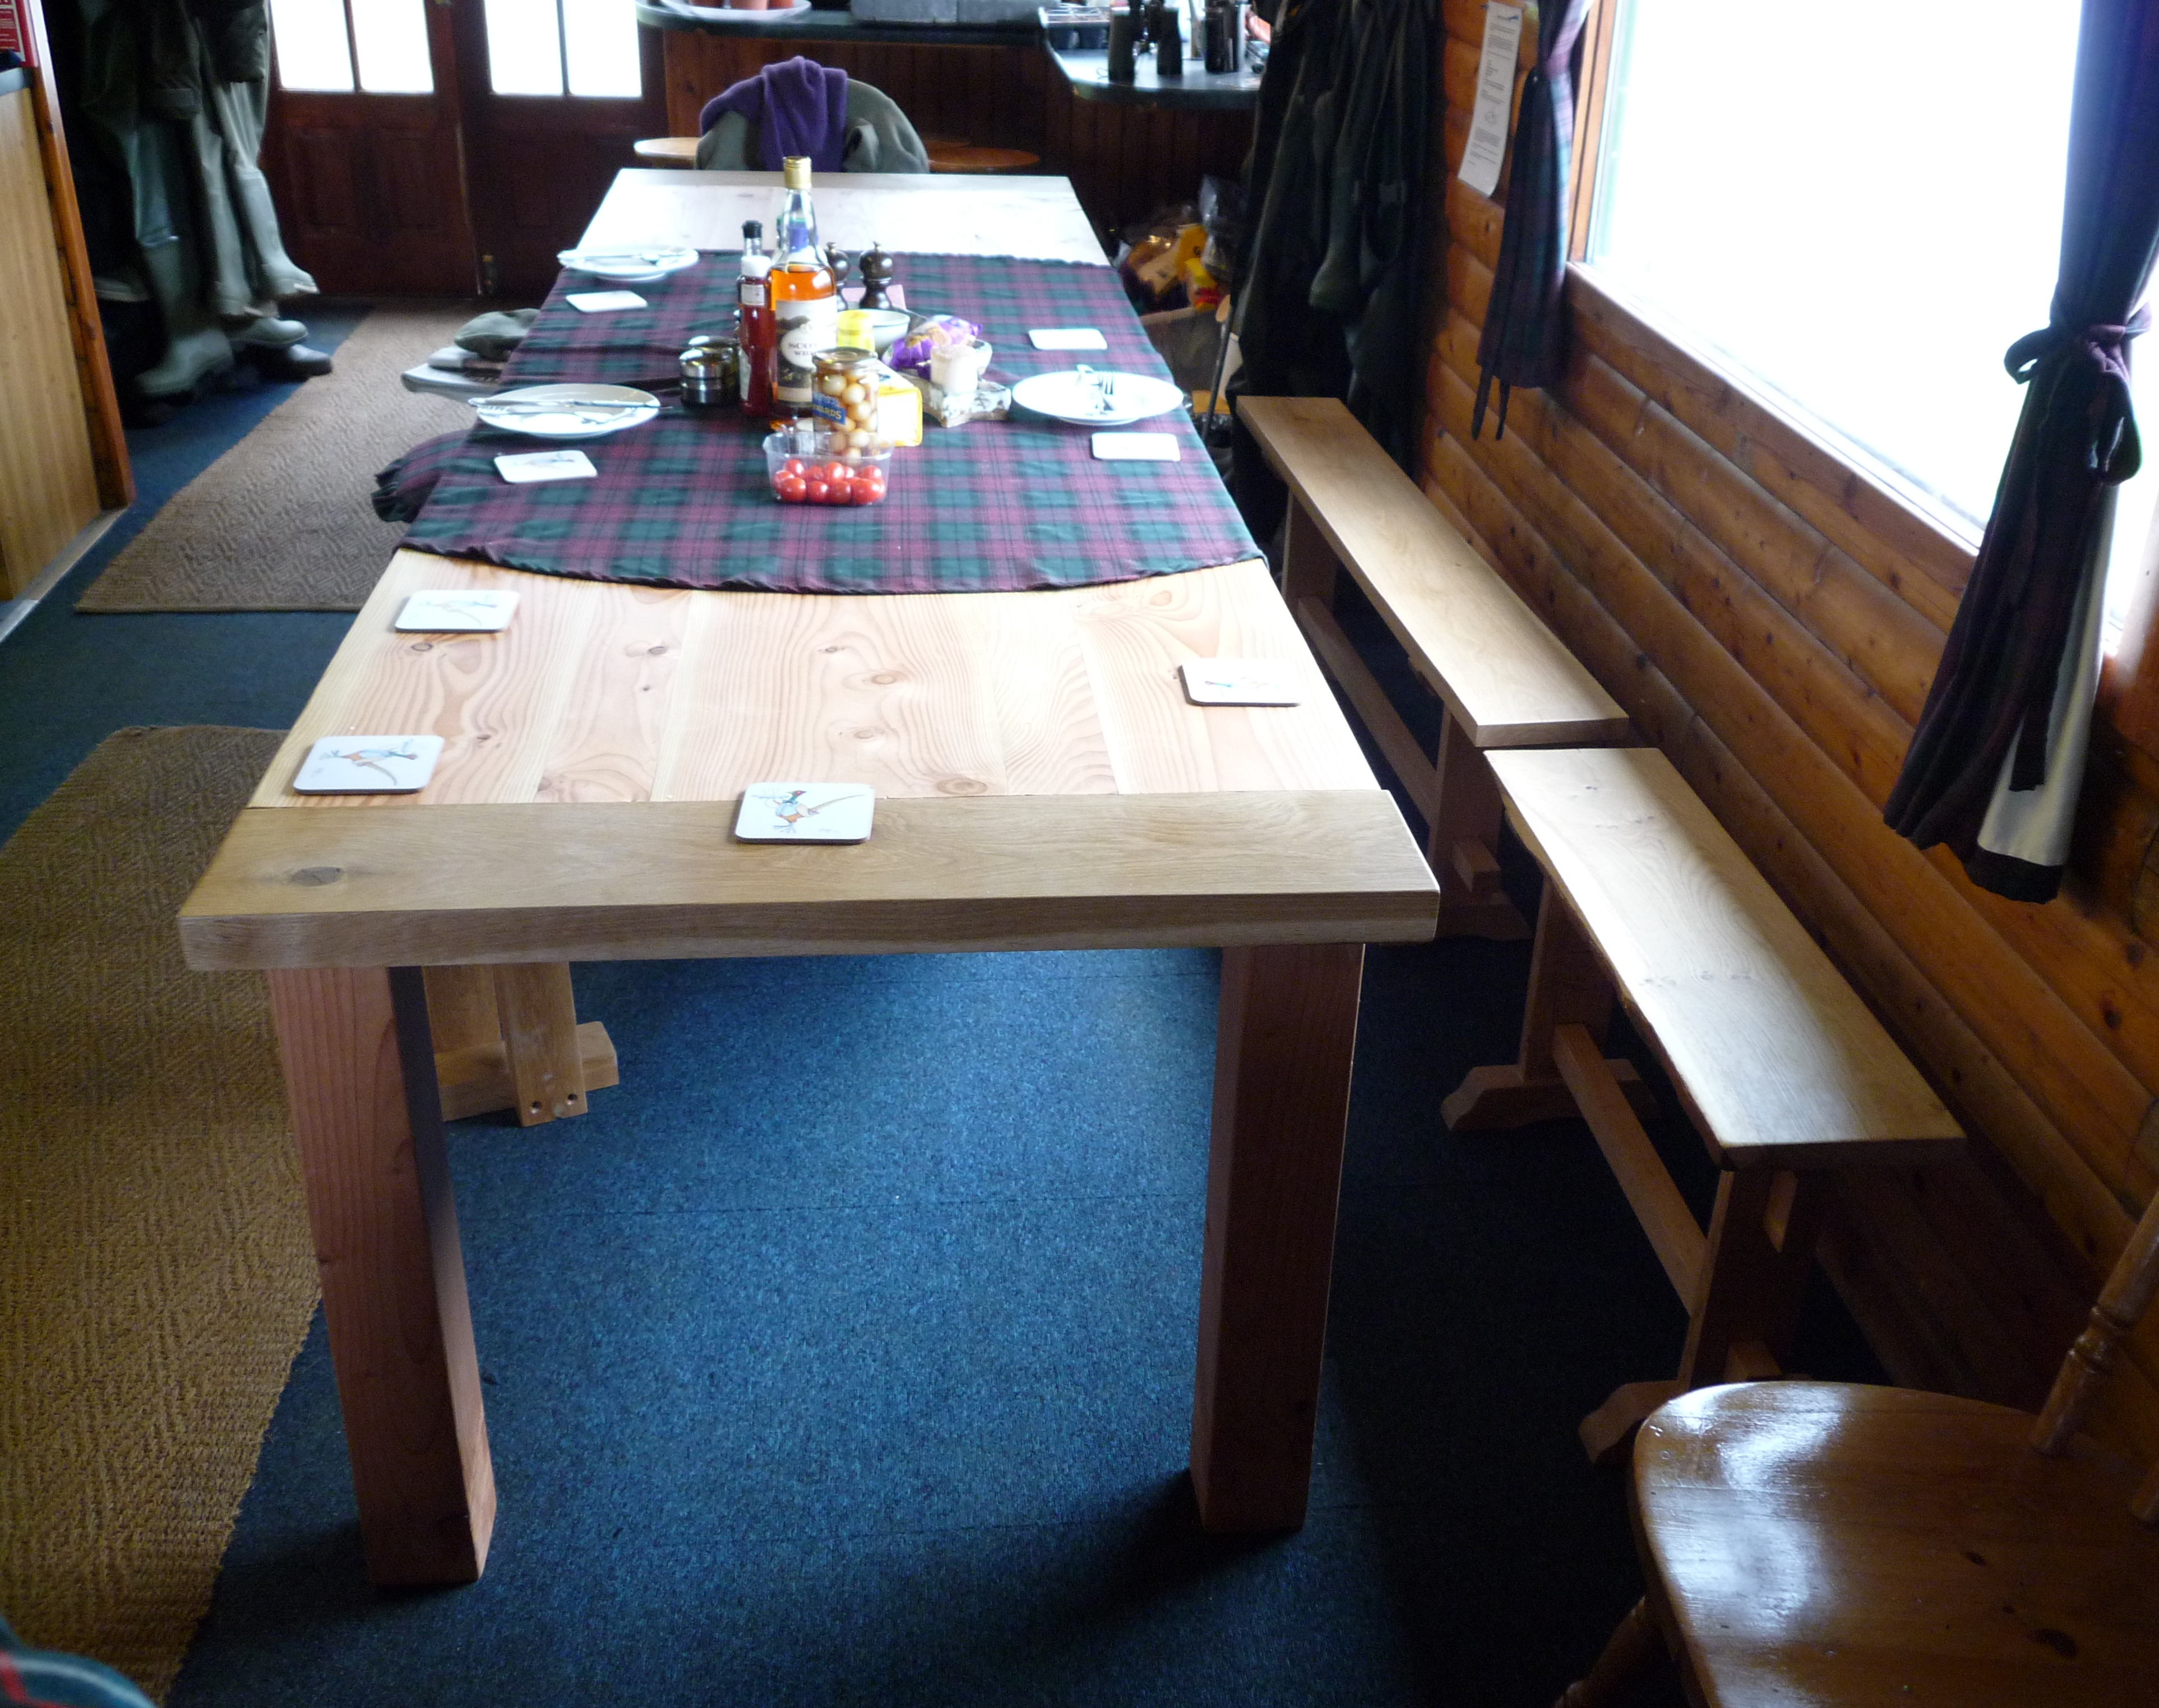
The Fishing Bothy Table
Small fry compared to the Catalan table at a
mere 10 foot. All the same the table had to be transported to the
location by the river in 4 sections and assembled inside the Bothy. The
Bothy table is made from Douglas Fir with Oak end cappings and centre. I
chose Douglas Fir as I am hoping to see only a small amount of movement
in the table once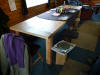 the wood has settled down. The climate inside the Bothy changes very
significantly and so the end caps and centre have the capacity to let
the Douglas Fir expand and shrink. The tabletop has already shrunk
during the hotter and drier weather and the outside of the end caps will
be trimmed to suit. The legs and stretchers have been made from Douglas
Fir also. The Douglas Fir has a beautiful grain to it. The initial
finish on the Douglas Fir is the gentle pink of the heartwood but this
will gradually fade to a more mellow brown/tan colour
the wood has settled down. The climate inside the Bothy changes very
significantly and so the end caps and centre have the capacity to let
the Douglas Fir expand and shrink. The tabletop has already shrunk
during the hotter and drier weather and the outside of the end caps will
be trimmed to suit. The legs and stretchers have been made from Douglas
Fir also. The Douglas Fir has a beautiful grain to it. The initial
finish on the Douglas Fir is the gentle pink of the heartwood but this
will gradually fade to a more mellow brown/tan colour .
A number of utility benches and stools were made also. These are all
solid Oak and some can be seen in the background of the photographs, you
can even see the Ghillie's feet. Work is still in progress on two Oak
chairs and a large bench. photographs of these will follow also. The
finish on the table surface is a hardwax/oil combination but this will
be being supplemented by Tung oil as the wear and tear on the table
surface has been much more than had been expected and once the Bothy is
quiet during the off season the oil finish will be built up gradually. .
A number of utility benches and stools were made also. These are all
solid Oak and some can be seen in the background of the photographs, you
can even see the Ghillie's feet. Work is still in progress on two Oak
chairs and a large bench. photographs of these will follow also. The
finish on the table surface is a hardwax/oil combination but this will
be being supplemented by Tung oil as the wear and tear on the table
surface has been much more than had been expected and once the Bothy is
quiet during the off season the oil finish will be built up gradually.
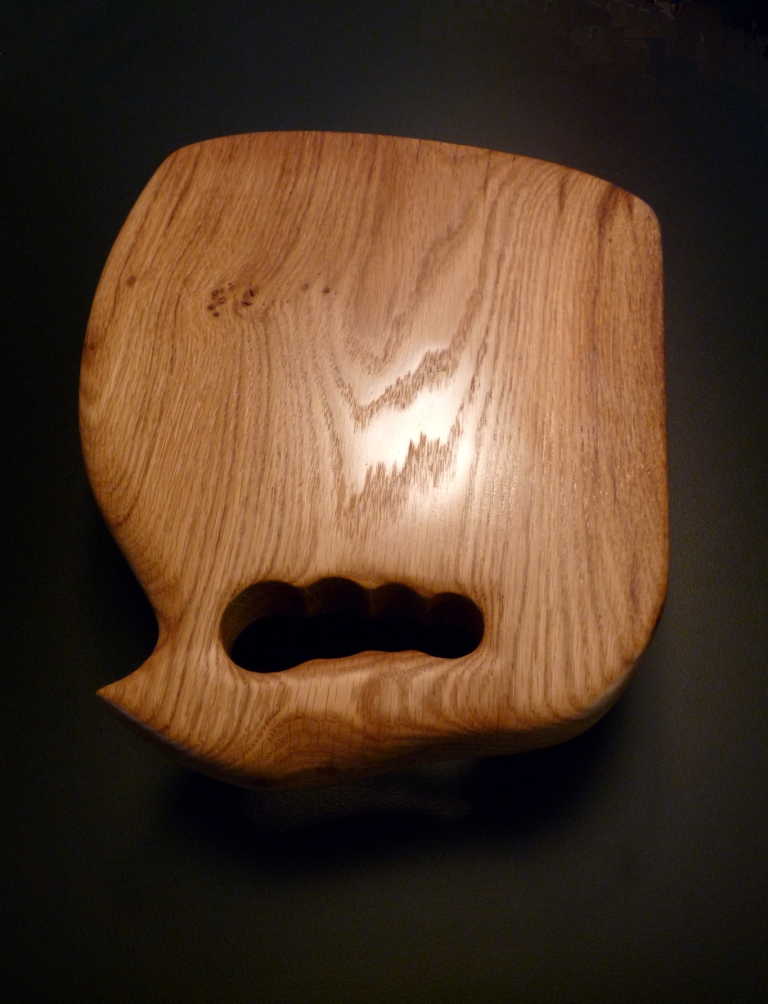
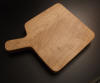
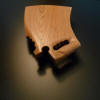
More Chopping and Cheese Boards
I have got quite carried away with producin g
a whole series of new chopping boards recently. I have been working on a big project of restoration and repairs. To keep my hand in I have spent
some spare (ho ho) time making more ergonomic and, let's face it, quirky
chopping and cheese boards. g
a whole series of new chopping boards recently. I have been working on a big project of restoration and repairs. To keep my hand in I have spent
some spare (ho ho) time making more ergonomic and, let's face it, quirky
chopping and cheese boards.
These are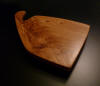 all solid Oak and take some
inspiration from all solid Oak and take some
inspiration from
 a more ergonomic approach to the handling of boards,
especially when you want to tip the contents into some container or
other. they are generally made to fit my hand, as I am the only model
available usually, but I reckon I could produce more custom versions. a more ergonomic approach to the handling of boards,
especially when you want to tip the contents into some container or
other. they are generally made to fit my hand, as I am the only model
available usually, but I reckon I could produce more custom versions.
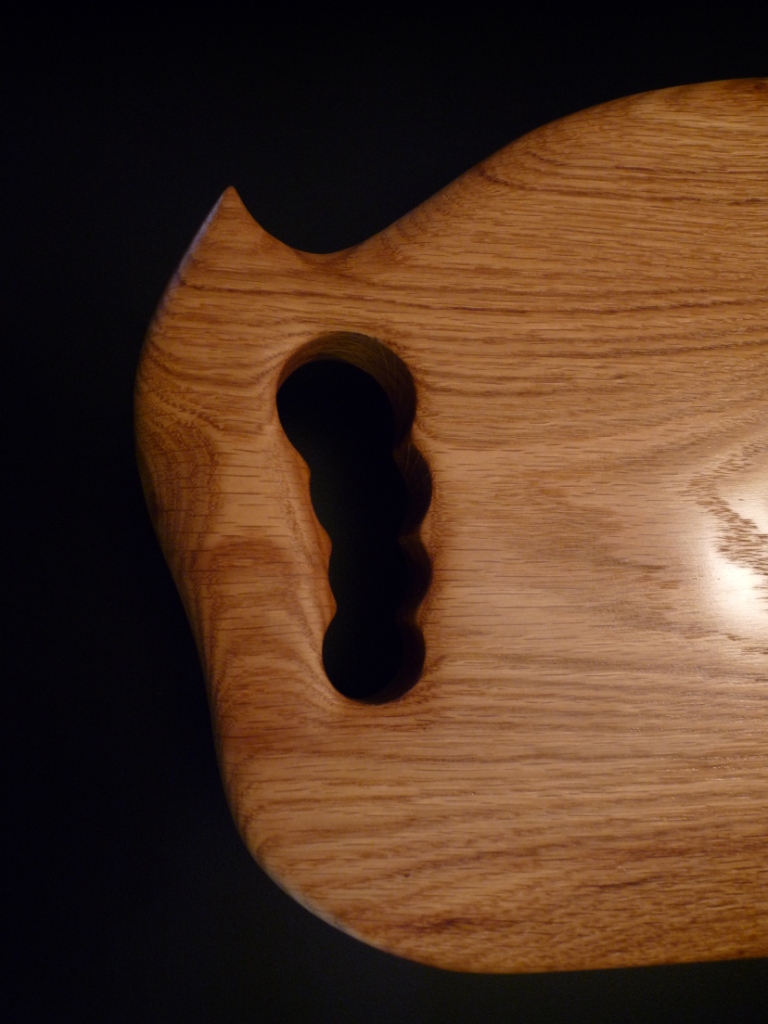
I
have to admit th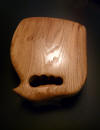 at I do enjoy making th at I do enjoy making th em. Working with a nice, chunky
piece of wood, shaping it in 3 dimensions is very pleasing. em. Working with a nice, chunky
piece of wood, shaping it in 3 dimensions is very pleasing.
All of the Oak boards are finished with Olive
oil which needs to be replenished regularly if the boards are not to
warp or crack too badly.
I am also now producing boards which can be
handled so that both sides can be used, giving them a better shelf life.
My prior boards tended to have the grips moulded so that they were
comfortab le
to be held when using one side only. I should also prob le
to be held when using one side only. I should also prob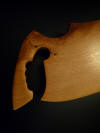 ably
make them ambidextrous. ably
make them ambidextrous.
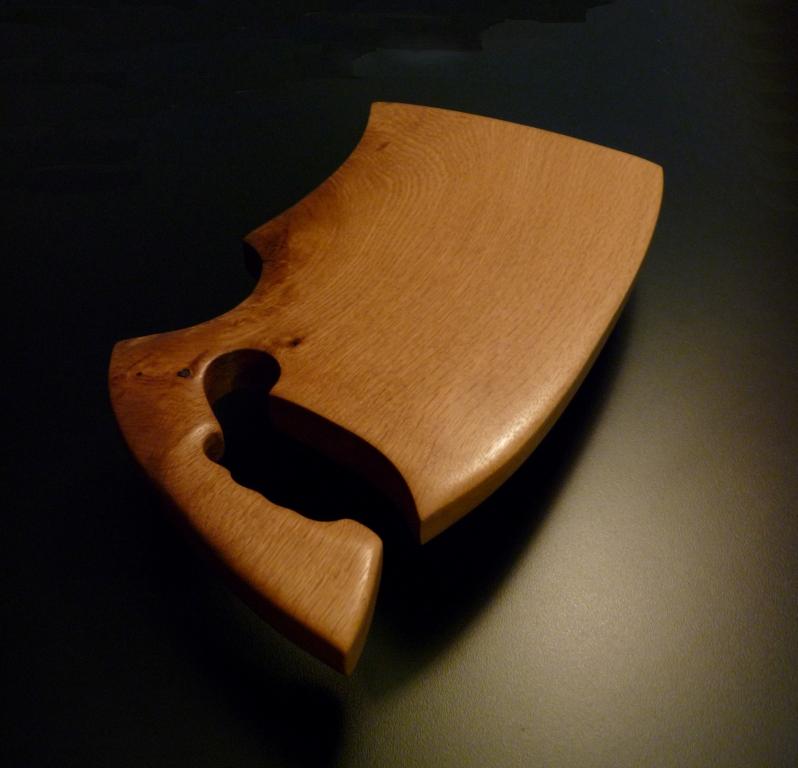
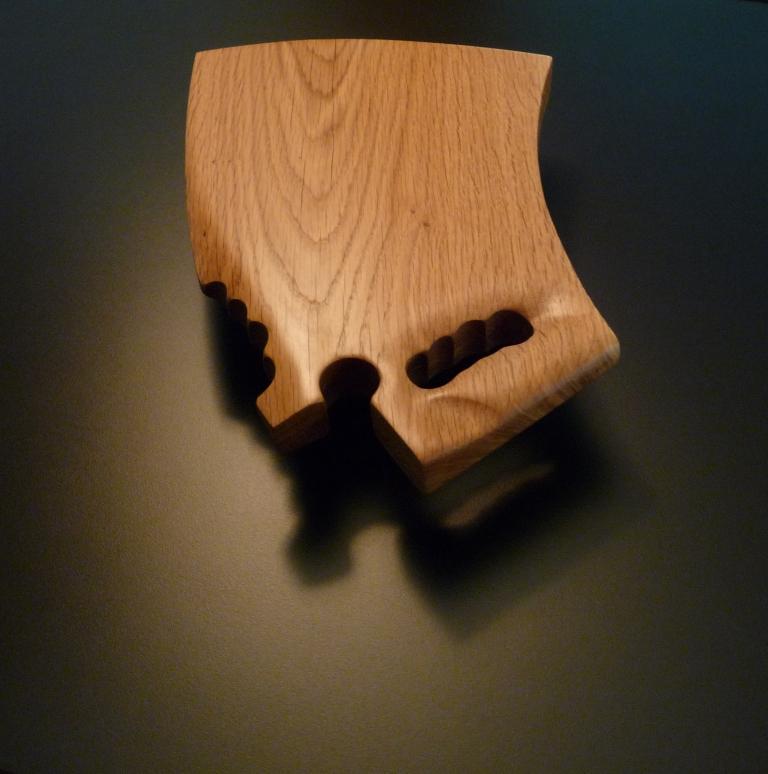
I have more boards planned in the pipeline,
using slightly different themes and woods. I have some nice old Pine
which I am tempted to use for a series of large cheeseboards. And when I
say large I
mean large.
 Currently all the boards with their handles
lie in the one plane but I am hoping to have some examples where the
boards are formed from larger pieces of solid. This would mean I would Currently all the boards with their handles
lie in the one plane but I am hoping to have some examples where the
boards are formed from larger pieces of solid. This would mean I would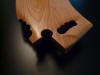 be able to have handles that are clear of the working surfaces that the
boards are used on. Probably much more interesting and possibly more
practical I think.
be able to have handles that are clear of the working surfaces that the
boards are used on. Probably much more interesting and possibly more
practical I think.
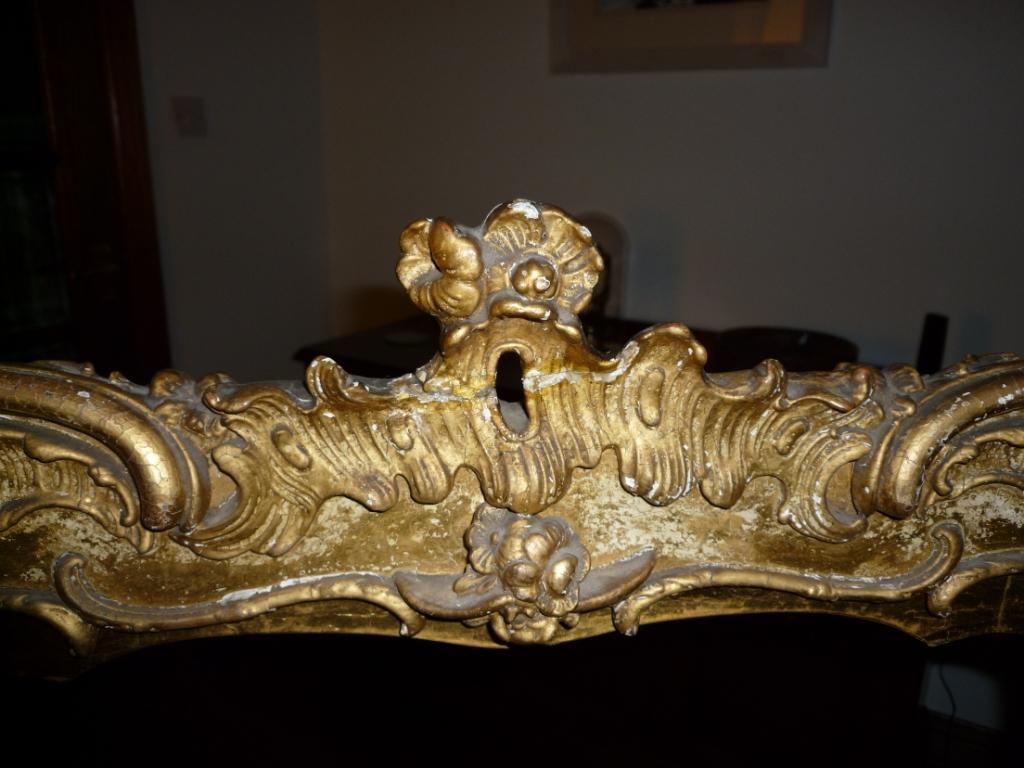
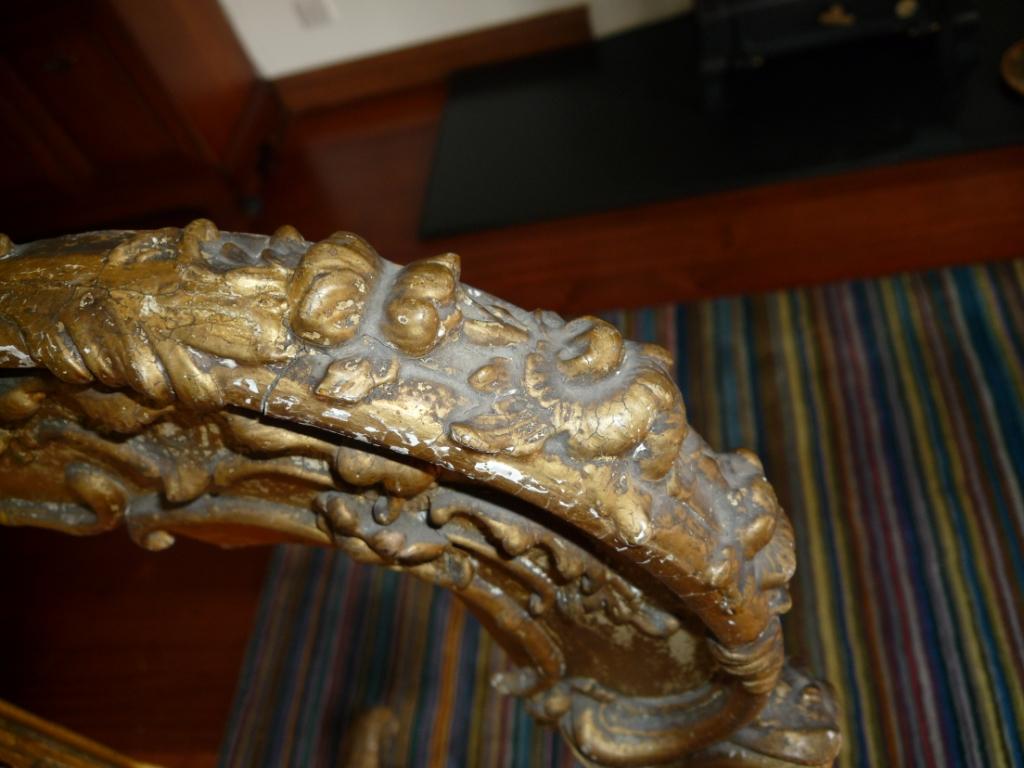
The Gilded Fire Screen
I worked on this on behalf of another company
who were manufacturing a new screen for the frame. I can't b e
absolutely sure on age but this piece had received a good bit of rough
treatment over the years. There was a lot of cracking, bits e
absolutely sure on age but this piece had received a good bit of rough
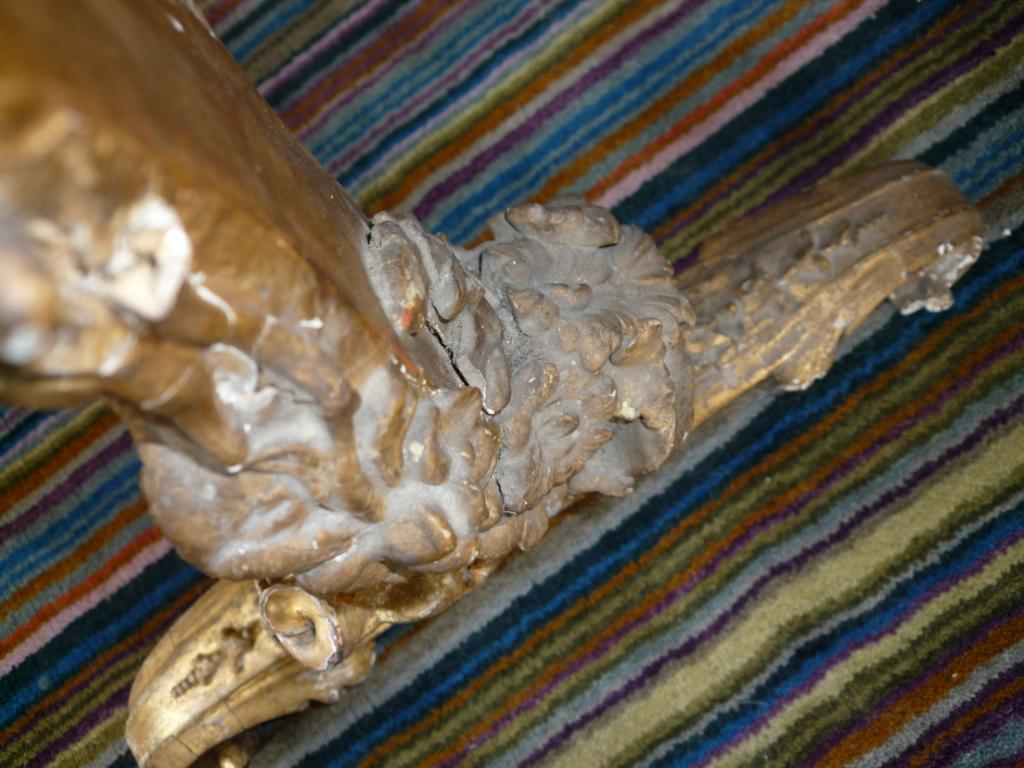
treatment over the years. There was a lot of cracking, bits
 had
fallen off, bits were in the process of falling off and most of the
lacquer had long since flaked off or had turned brown and was hiding the
gold leaf beneath. Dirt was well established across the surfaces and
into every nook and cranny. You can see some of the damage and dirt in
the photographs. had
fallen off, bits were in the process of falling off and most of the
lacquer had long since flaked off or had turned brown and was hiding the
gold leaf beneath. Dirt was well established across the surfaces and
into every nook and cranny. You can see some of the damage and dirt in
the photographs.
It is always difficult to judge on what are
appropriate repairs to a gilded piece. Anything I do is typically
reversible and whenever I can I use traditional materials.
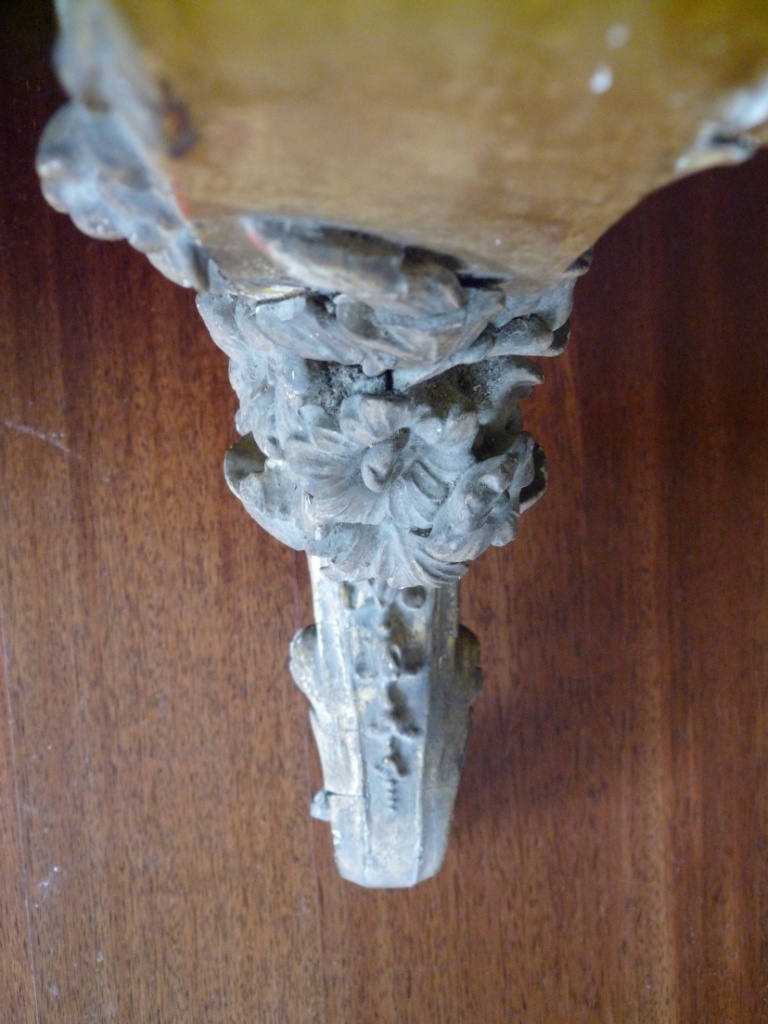
 In
order to eliminate the damage to the piece from the temperature and
humidity changes over the years, it requires new Gesso to be inserted
and coloured size (Bole) to In
order to eliminate the damage to the piece from the temperature and
humidity changes over the years, it requires new Gesso to be inserted
and coloured size (Bole) to
 be
painted over the wounds. The new gold leaf is then applied. Sometimes it
is necessary to strip the gesso right back to the carving, apply new
Gesso, carve into the Gesso and apply bole and the gold leaf as new.
Both of these approaches are at the middle to high end of very
expensive. In this case the remit was to tidy the piece up, stabilise
the applied carvings, cover up a recent repair and stabilise the gold
leaf surface. be
painted over the wounds. The new gold leaf is then applied. Sometimes it
is necessary to strip the gesso right back to the carving, apply new
Gesso, carve into the Gesso and apply bole and the gold leaf as new.
Both of these approaches are at the middle to high end of very
expensive. In this case the remit was to tidy the piece up, stabilise
the applied carvings, cover up a recent repair and stabilise the gold
leaf surface.
I applied new leaf to the recent repair and
distressed it so as n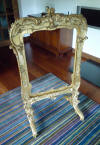 ot
to look too alien alongside the existing finish. The frame was glued up
and the carvings repaired and stabilised. I chose to clean the surfaces,
something that requires great care. The gold leaf adheres to the frame
using a water based glue/size. It is only too easy to wet the surface
and watch the gold leaf, literally, disappear before one's eyes.
Hundreds of cotton buds are required, a load of patience and a good
piece of music in the background. The dirt is slowly rolled off the
surface. Unfortunately there are always areas that will not let go of
the dirt but most of the surface will look brighter and less depressed.
In this case most of the dirt came free with the exception of the nooks
and crannies that were too difficult to clean given the fragility of the
surrounding gilded surfaces. I chose to finish the piece with a very
light and dilute shellac. This can be removed easily using methylated
spirits if further repair is undertaken. A water-based size would have
carried the risk of dissolving the surface that it was meant to protect.
The shellac gives a lustre back to the gilding, with high points shining
and protects the surface from any abuse. Altogether it looked a lot
cheerier. ot
to look too alien alongside the existing finish. The frame was glued up
and the carvings repaired and stabilised. I chose to clean the surfaces,
something that requires great care. The gold leaf adheres to the frame
using a water based glue/size. It is only too easy to wet the surface
and watch the gold leaf, literally, disappear before one's eyes.
Hundreds of cotton buds are required, a load of patience and a good
piece of music in the background. The dirt is slowly rolled off the
surface. Unfortunately there are always areas that will not let go of
the dirt but most of the surface will look brighter and less depressed.
In this case most of the dirt came free with the exception of the nooks
and crannies that were too difficult to clean given the fragility of the
surrounding gilded surfaces. I chose to finish the piece with a very
light and dilute shellac. This can be removed easily using methylated
spirits if further repair is undertaken. A water-based size would have
carried the risk of dissolving the surface that it was meant to protect.
The shellac gives a lustre back to the gilding, with high points shining
and protects the surface from any abuse. Altogether it looked a lot
cheerier.
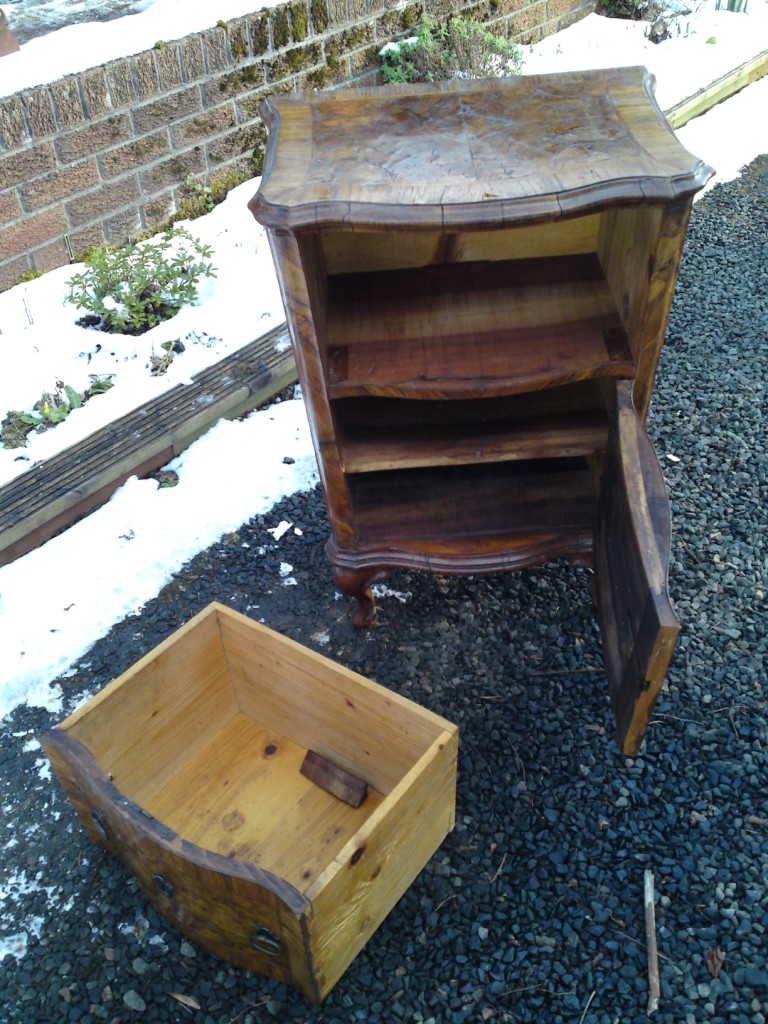
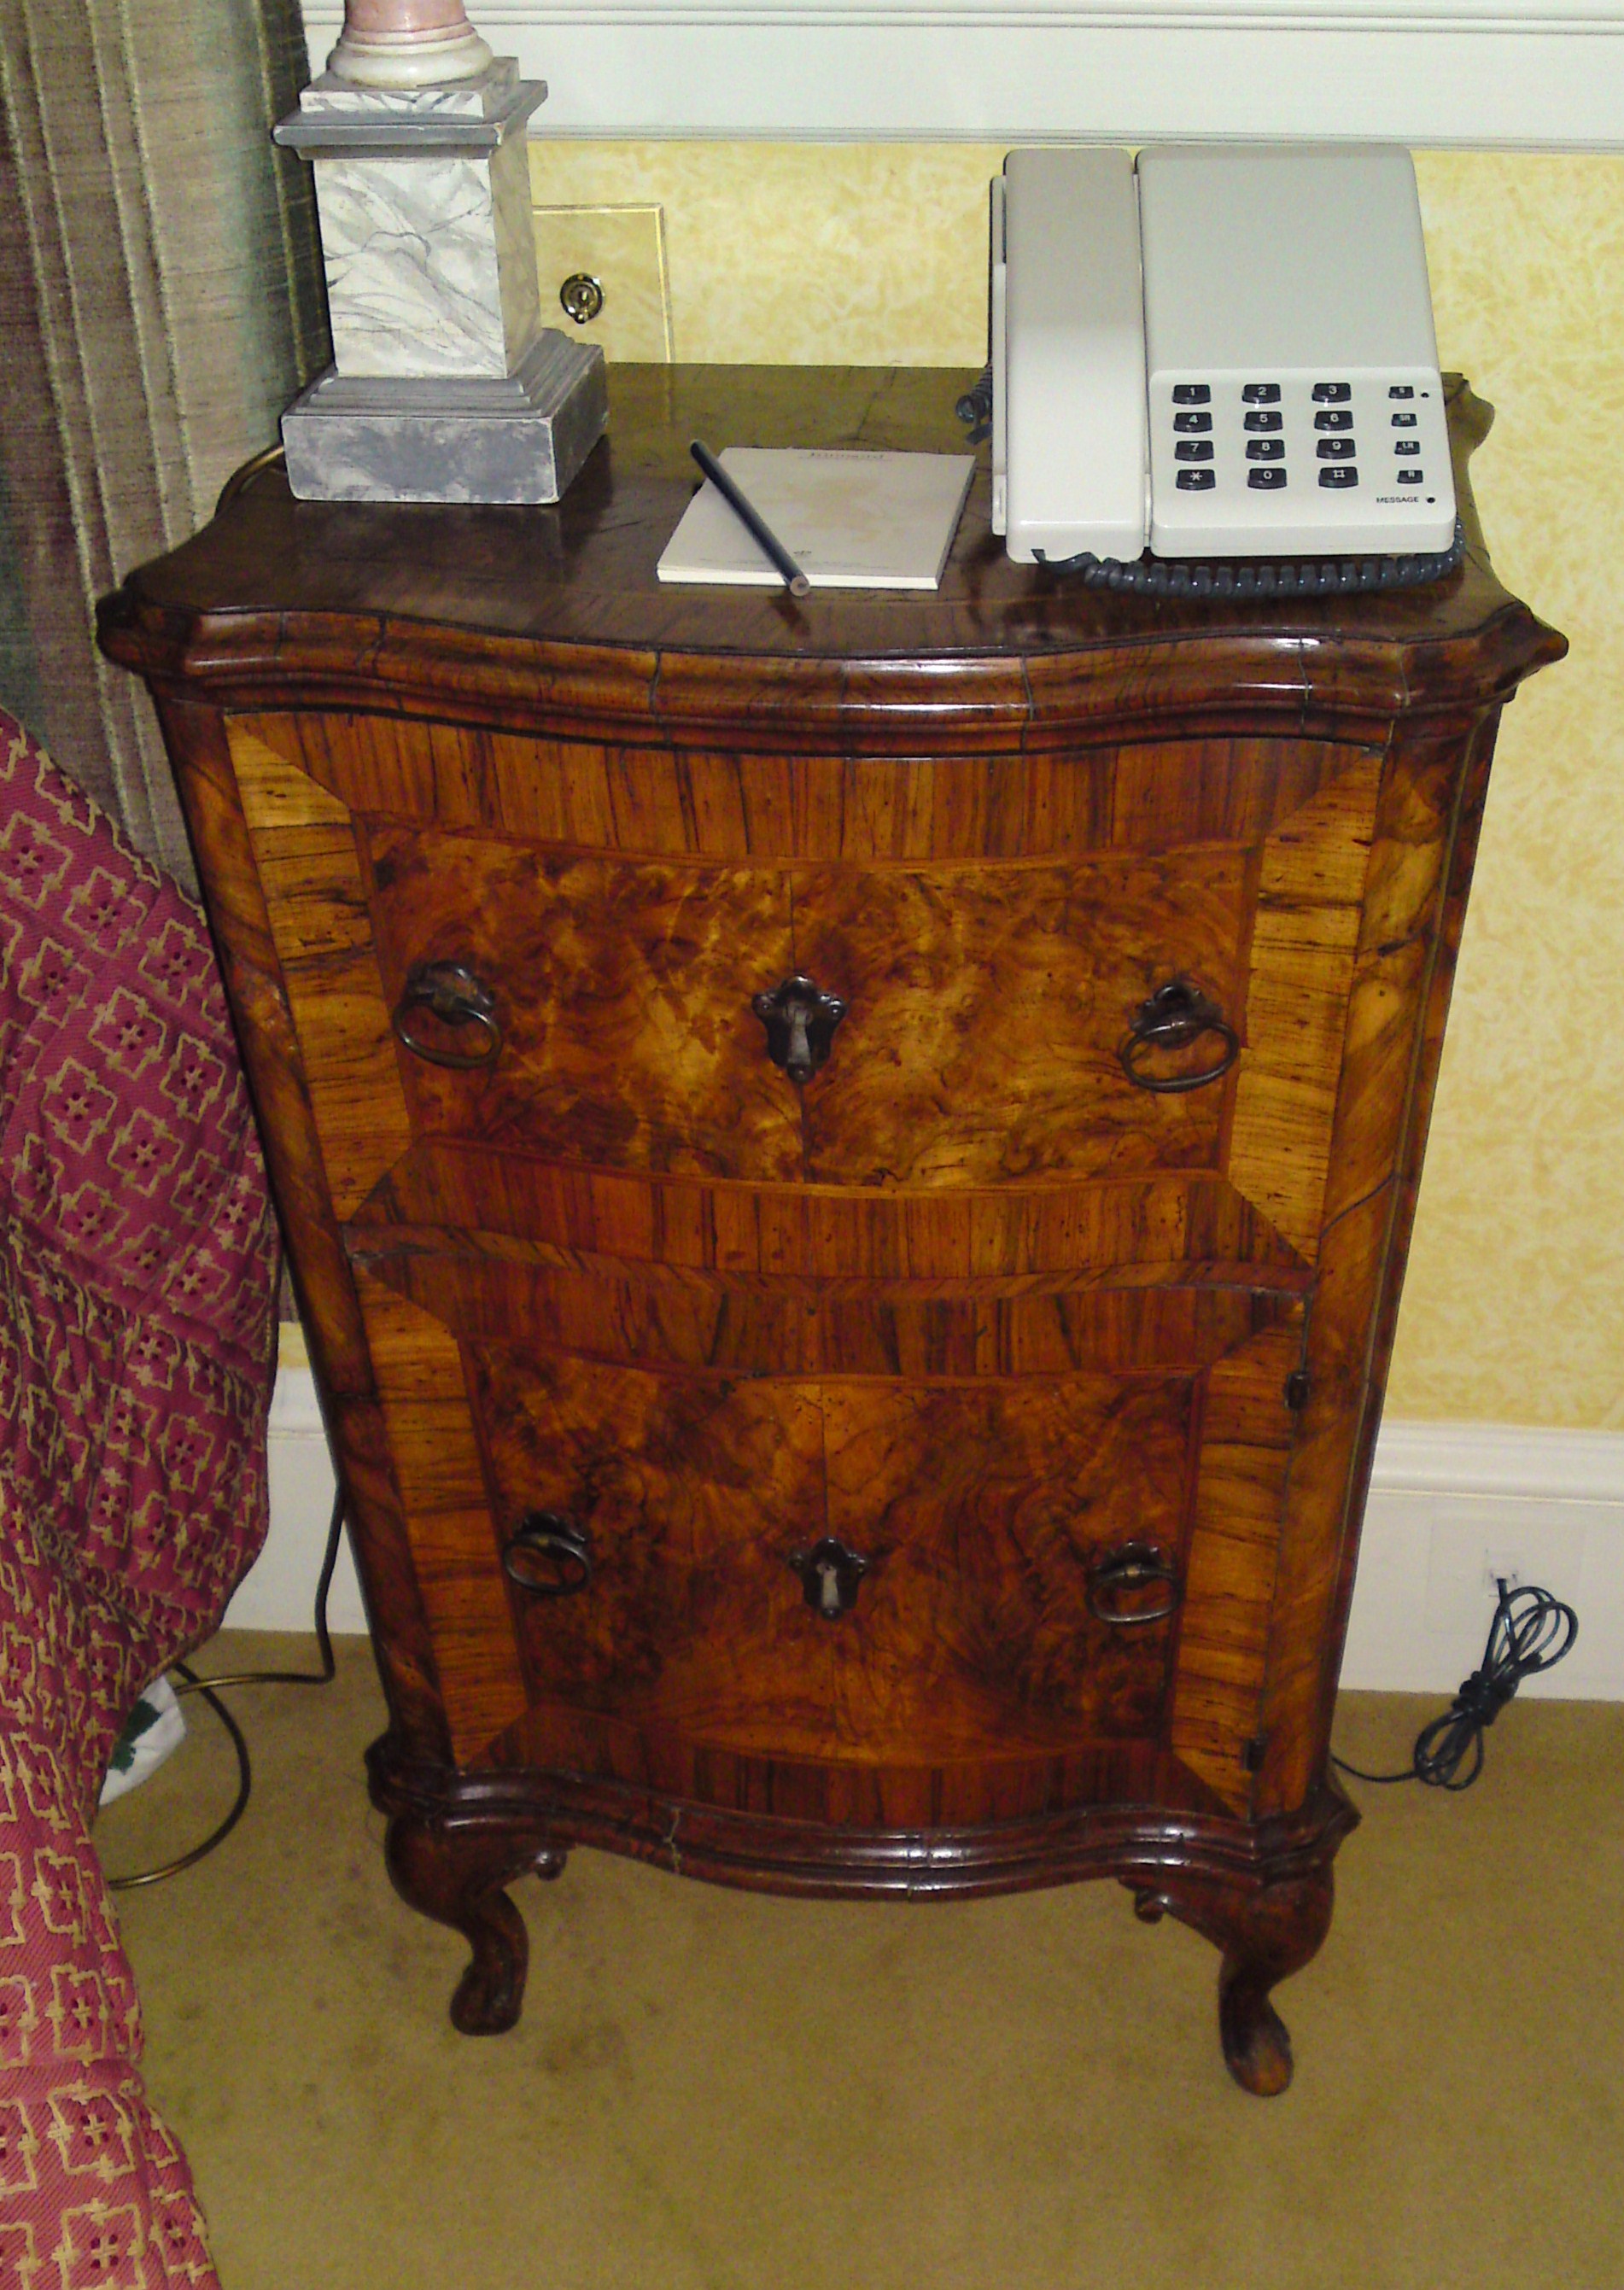
The Venetian Serpentine Walnut Commodes
A pair of slightly controversial commodes.
They have been dated as 19th Century but based on the so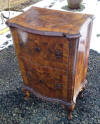 me
of the component parts I reckon they originate in the 18th Century and
were repurposed in the 19th Century. Having worked on them I reckon I
know better. me
of the component parts I reckon they originate in the 18th Century and
were repurposed in the 19th Century. Having worked on them I reckon I
know better.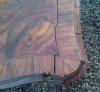
These were in a slightly unreasonable state
of repair when I was commissioned to repair and restore them. The
surfaces were tired and the polish was worn in many places. They had
been used as bedside cabinets and had suffered at the hands of glasses
of water and the occasional mug of Horlicks I suspect. The Walnut top
had cracked open and the edging and ba nding
had cra nding
had cra cked
and fallen off in several places. Some of the Walnut was missing. The
door on one of the pieces was perched quite badly on the hinges and was
not closing properly. The door frame had been damaged as a result. The
veneer on the sides had lifted in many places, woodworm had had a feast
on the underside and had nibbled the front off the foot of one of the
cabriole legs. cked
and fallen off in several places. Some of the Walnut was missing. The
door on one of the pieces was perched quite badly on the hinges and was
not closing properly. The door frame had been damaged as a result. The
veneer on the sides had lifted in many places, woodworm had had a feast
on the underside and had nibbled the front off the foot of one of the
cabriole legs.
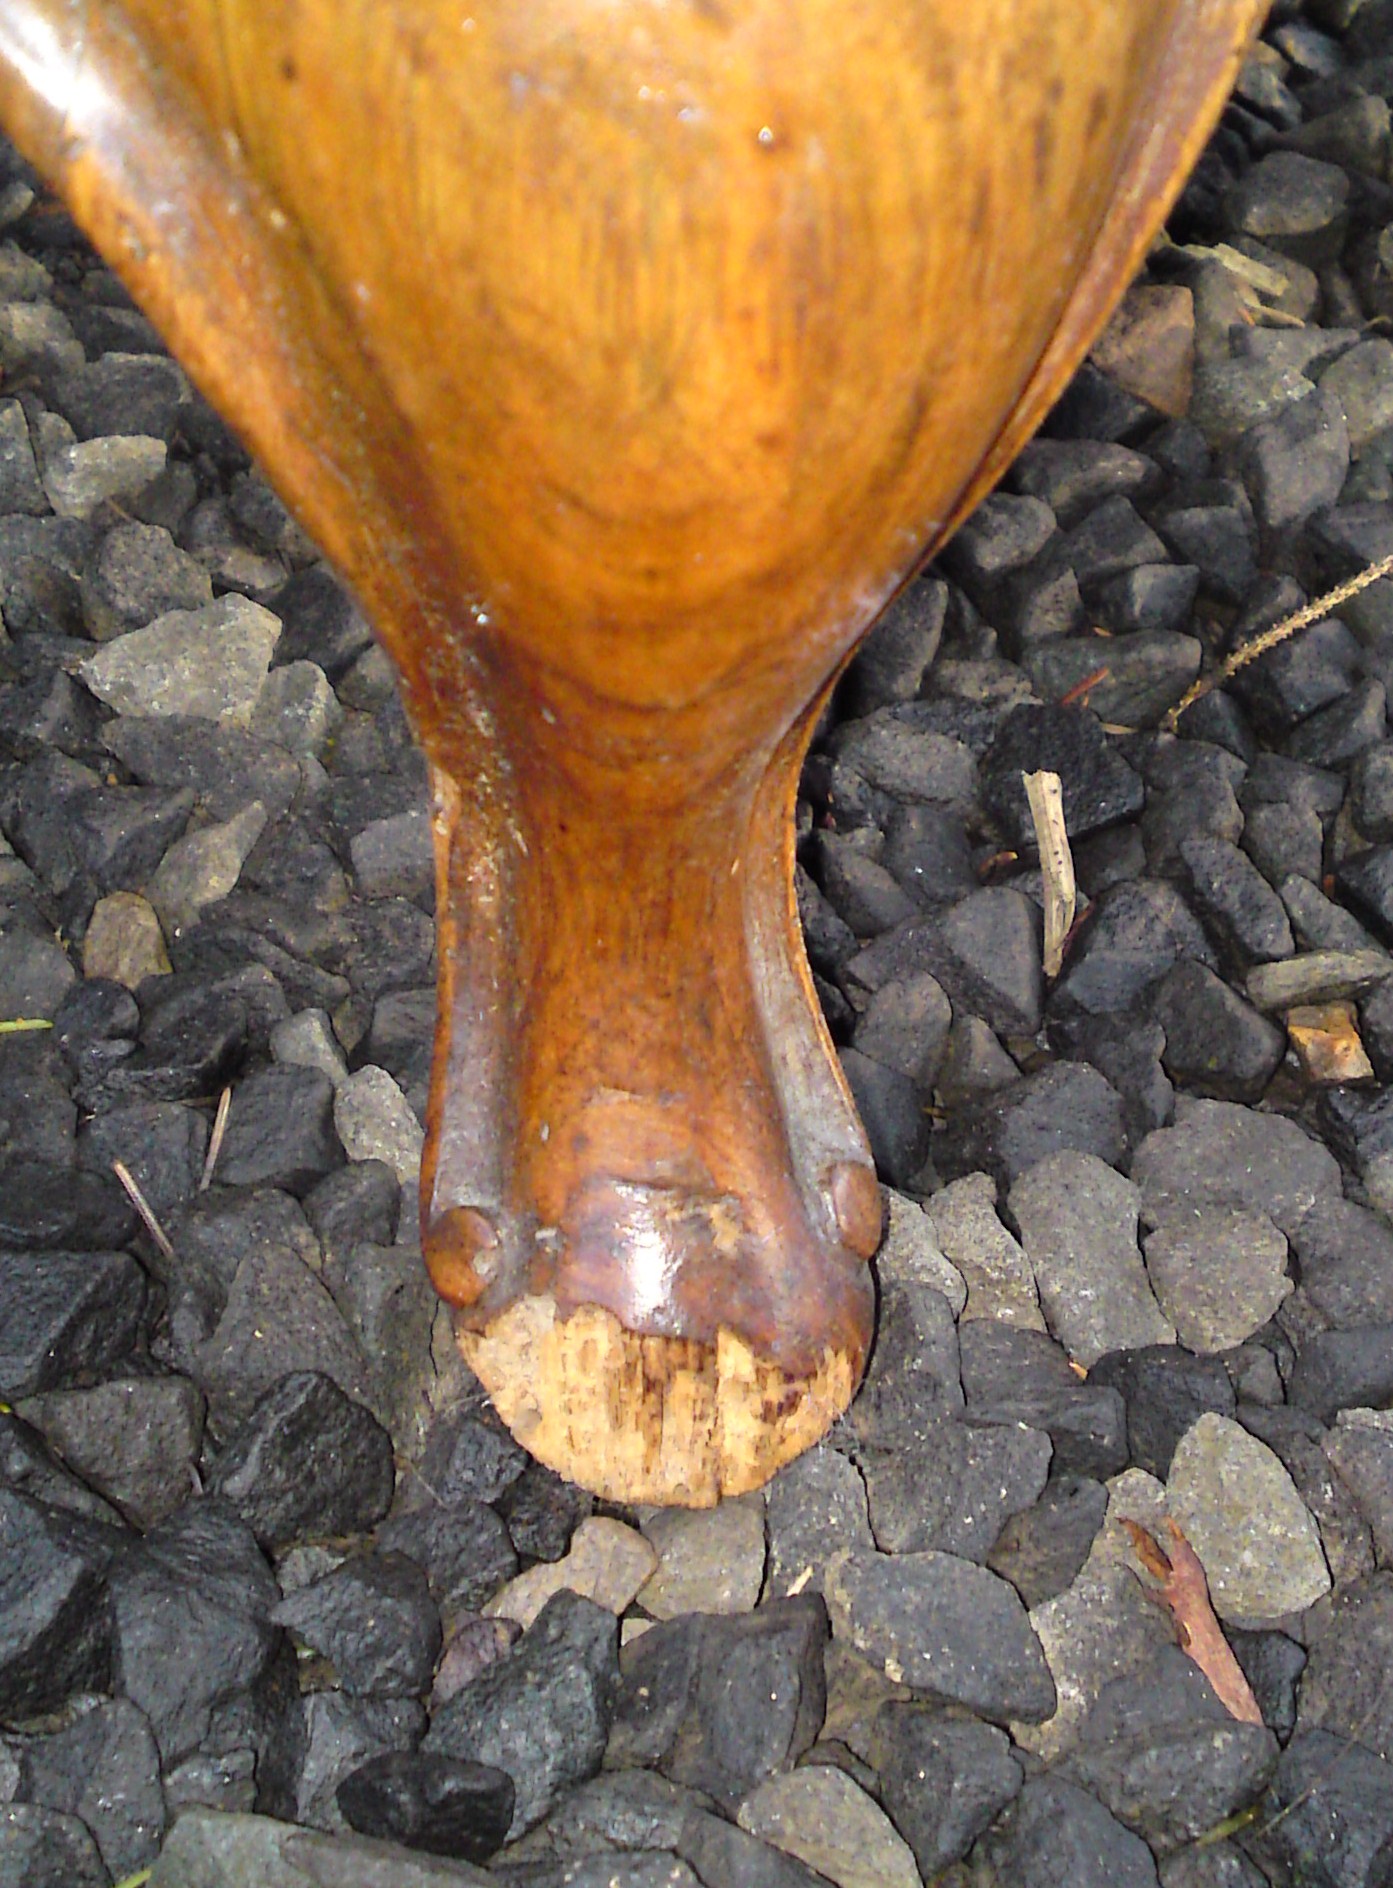
The commodes were treated for woodworm. I use
a particularly gentle treatment that ensures no problems from insects,
fungus and rot for up to 5 years between treatments. New Walnut was f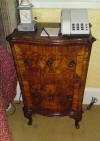 ormed
to shape and aged before being fitted where Walnut had once been but was
no longer. The delaminated veneer and veneer bubbles were eased back
into place. The door wa ormed
to shape and aged before being fitted where Walnut had once been but was
no longer. The delaminated veneer and veneer bubbles were eased back
into place. The door wa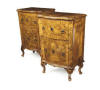 s
modified such that it opened and shut correctly and the door frame was
repaired with new (old) wood being laid in to replace the damaged area.
The cracks were repaired, either drawn together and glued, or
filled with hard wax. A new front of foot was carved and glued into
place. The tops were re-polished lightly with shellac and waxed with a
particularly good beeswax. Once back in
situ the overall effect was delightful. The pair were later sold at
auction for £12,000. s
modified such that it opened and shut correctly and the door frame was
repaired with new (old) wood being laid in to replace the damaged area.
The cracks were repaired, either drawn together and glued, or
filled with hard wax. A new front of foot was carved and glued into
place. The tops were re-polished lightly with shellac and waxed with a
particularly good beeswax. Once back in
situ the overall effect was delightful. The pair were later sold at
auction for £12,000.
The Aston Martin DB2 Dashboard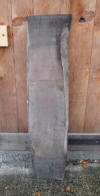
I was pre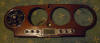 sented
with a very tired and partly burnt DB2 dashboard to re-polish. It wasn't
particularly impressive, being principally plywood. I suggested that it
might be a bit more decorative and compliment the car's restoration if I
was to make a replica from solid Walnut. The original will stay with the
car anyway. sented
with a very tired and partly burnt DB2 dashboard to re-polish. It wasn't
particularly impressive, being principally plywood. I suggested that it
might be a bit more decorative and compliment the car's restoration if I
was to make a replica from solid Walnut. The original will stay with the
car anyway.
As ever,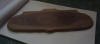 I quoted an impressively affordable
price and work commenced. When you agree to make a replica it can go two
ways. The first, which has happened on another project that remains
underway, is that you realise that you have totally
underestimated how complex the making will be. The secon I quoted an impressively affordable
price and work commenced. When you agree to make a replica it can go two
ways. The first, which has happened on another project that remains
underway, is that you realise that you have totally
underestimated how complex the making will be. The secon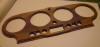 d way is that,
despite the fact that you notice little difficult details after you have
committed to the quote, the whole thing just falls into place. This
project went the second way. d way is that,
despite the fact that you notice little difficult details after you have
committed to the quote, the whole thing just falls into place. This
project went the second way.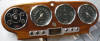
The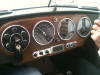 dimensions were mostly fairly straightforward but there were a few
elements that required a little more thought and handiwork than I had
first imagined. The subtle little curves along the top
and the geometric alignment of curves and dead straight edges along the
bottom. Some of the hand crafting was a bit nerve wracking as it was
quite a journey from the logged plank to the finished article and I
really didn't want to have to do any of it over again. The client was
delighted, which makes it all worth while.
dimensions were mostly fairly straightforward but there were a few
elements that required a little more thought and handiwork than I had
first imagined. The subtle little curves along the top
and the geometric alignment of curves and dead straight edges along the
bottom. Some of the hand crafting was a bit nerve wracking as it was
quite a journey from the logged plank to the finished article and I
really didn't want to have to do any of it over again. The client was
delighted, which makes it all worth while.
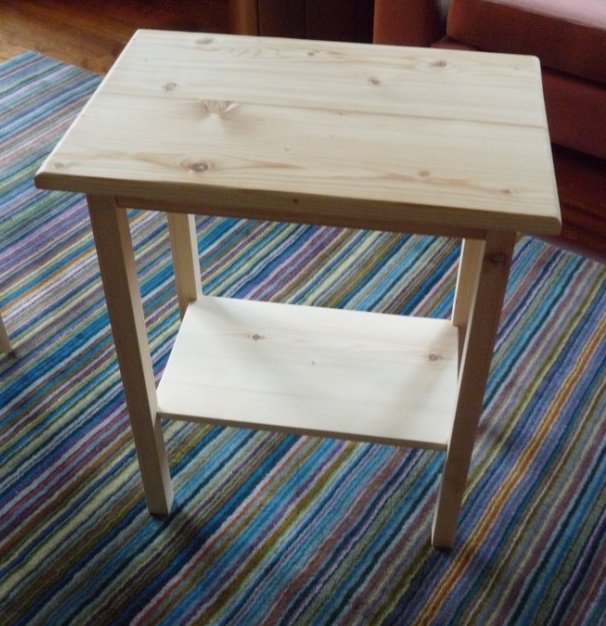
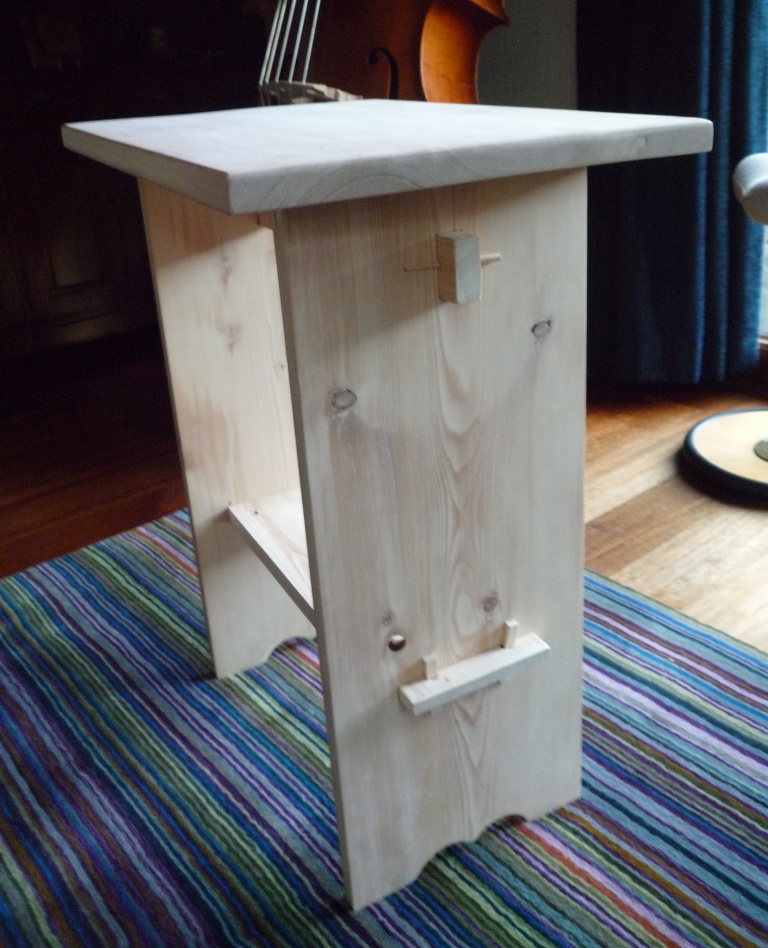
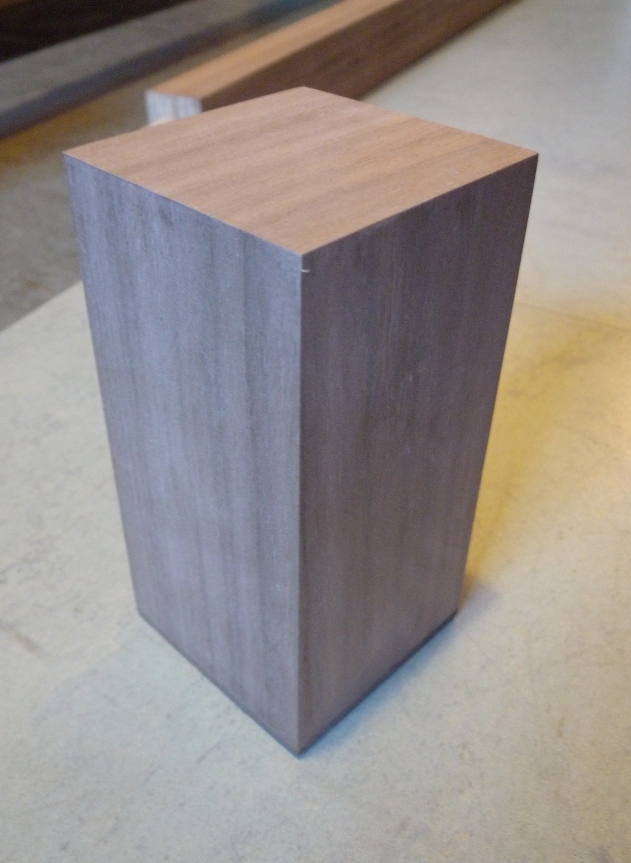
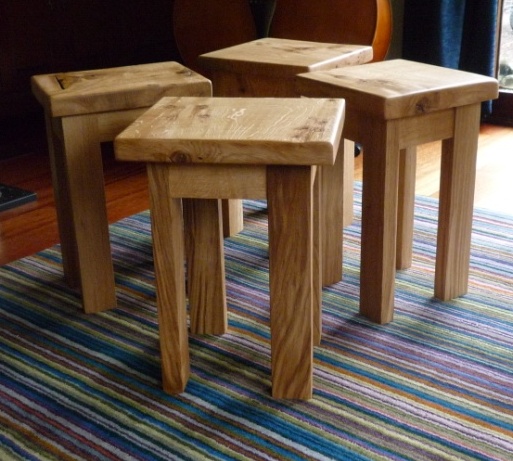
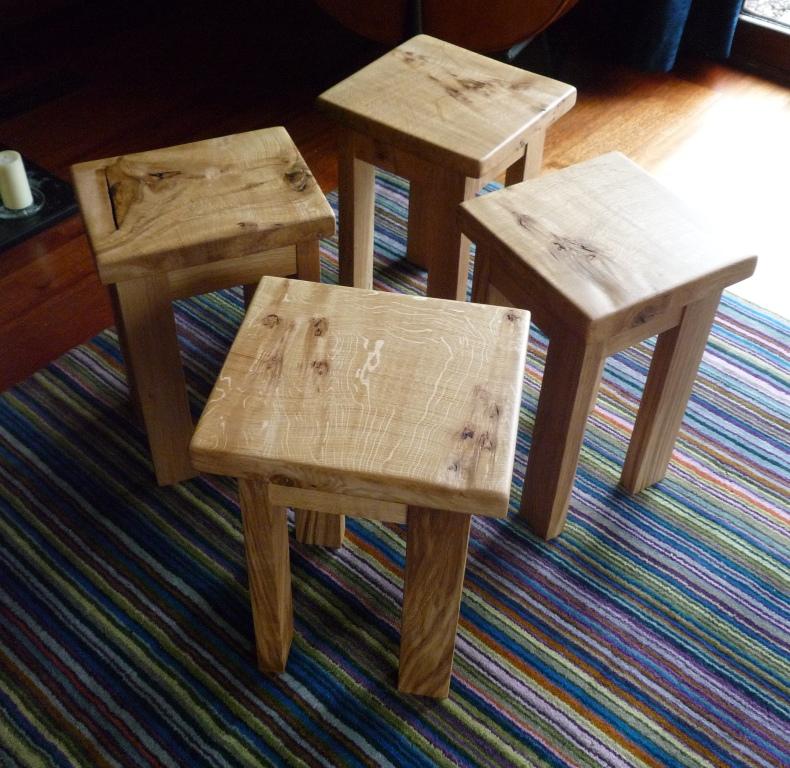
The Little Pine Tables
I have a l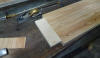 arge
stock of Victorian and Edwardian Siberian, Baltic and Pitch Pine. I was
asked to build a couple o arge
stock of Victorian and Edwardian Siberian, Baltic and Pitch Pine. I was
asked to build a couple o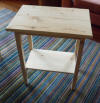 f
prototype chalet tables using it. The wood is particularly good quality. f
prototype chalet tables using it. The wood is particularly good quality.
The grain is very straight and there is some
very nice figuring in some of the wood with pleasant caramel shading.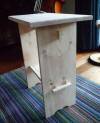
These tables were simple designs but, every
once in a while, it is nice just to make something that is
straightforward and pretty with it. That said, the lower shelf on the
thin legged table was to be rebated into the legs. Chisel work in a soft
wood like Pine is never very much fun and can go dreadfully wrong if you
look the wrong way. The tables were delivered to the client with no
finish applied. That's why the tables look a little pale. I hope you
like them.
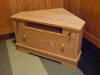
The Pitch Pine Television Unit
This one was for my brother, bless him.
Family commissions can often be the most difficult for all the wrong
reasons. This one went something like this. "I need a television unit,
it doesn't need to be good wood because we are going to paint it". How
could I refuse? Despite coming up with incredibly complex, unobtrusive
and expensive designs that
 would
keep everything hidden until, at the touch of a button, the various
pieces of technology would emerge and rise into action, I was persuaded
to keep it simple, as cost was a significant limiting factor. I met him
somewhere in the middle. I used the most delicious Pitch Pine I have and
I used materials carefully and constructed the corner piece to be able
to be dismantled by him in the future so that the wood can be stripped
back again and re-purposed. Its not as easy as it sounds, making
something that you can take apart again without smashing it up.
Meanwhile, I expect the somewhat garish finish is now well covered with
a thick coat of emulsion. I would have used Milk paint but I am not sure
that the budget would stretch. would
keep everything hidden until, at the touch of a button, the various
pieces of technology would emerge and rise into action, I was persuaded
to keep it simple, as cost was a significant limiting factor. I met him
somewhere in the middle. I used the most delicious Pitch Pine I have and
I used materials carefully and constructed the corner piece to be able
to be dismantled by him in the future so that the wood can be stripped
back again and re-purposed. Its not as easy as it sounds, making
something that you can take apart again without smashing it up.
Meanwhile, I expect the somewhat garish finish is now well covered with
a thick coat of emulsion. I would have used Milk paint but I am not sure
that the budget would stretch.
The Jaguar Mascot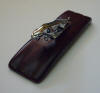
A Jaguar bonnet mascot had been acquired at
an autojumble but had no where to sit. A piece of hard African hardwood
was carved to give it a worthy stand. The design was in the Art Deco
mould, an abstract of the lines of the 1950 Jaguars. Probably the
prettiest era for Jaguars in my opinion.
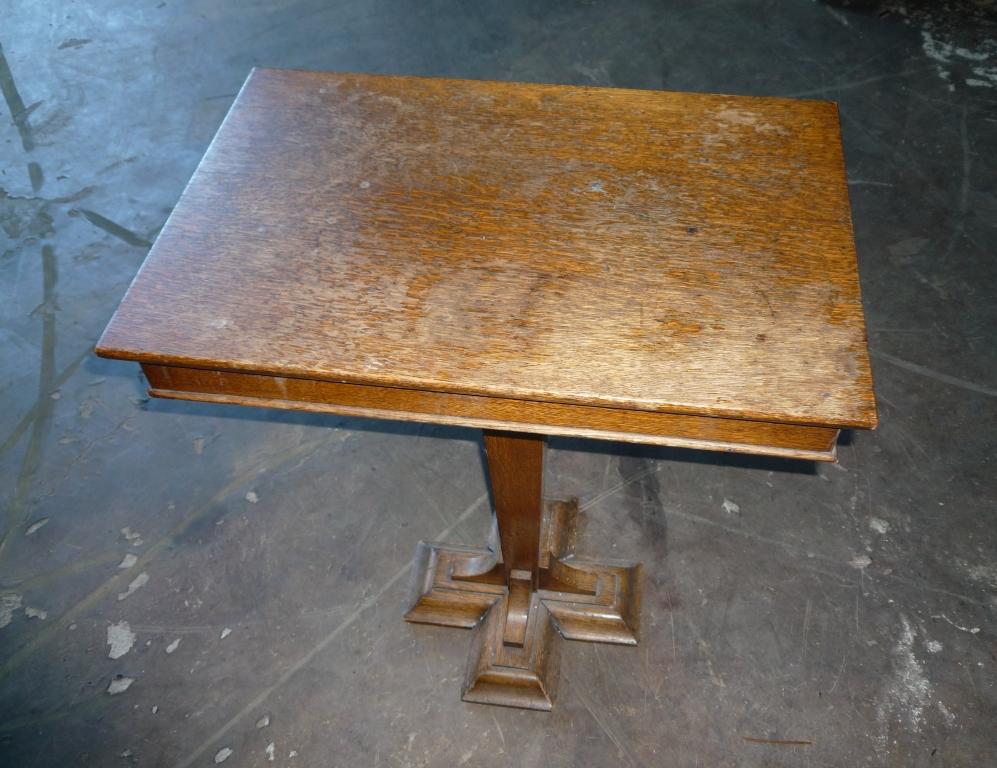
The Oak Pedestal Tables
These tables originated in a large court
house in Scotland. The plinth-like piece had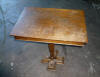 been ravaged by the cleaner's mop and the top h
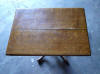 ad
been neglected. The corners of the top frame were splitting and the glue
had long since given up its holding power. The quadrapod table had a
full width crack in the top and the top join had been reinforced with
iron angle brackets. One of the legs had been broken and had been
repaired with little sympathy. The repair was holding well but the legs
had loosened in the joints into the pedestal. ad
been neglected. The corners of the top frame were splitting and the glue
had long since given up its holding power. The quadrapod table had a
full width crack in the top and the top join had been reinforced with
iron angle brackets. One of the legs had been broken and had been
repaired with little sympathy. The repair was holding well but the legs
had loosened in the joints into the pedestal.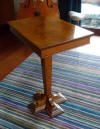
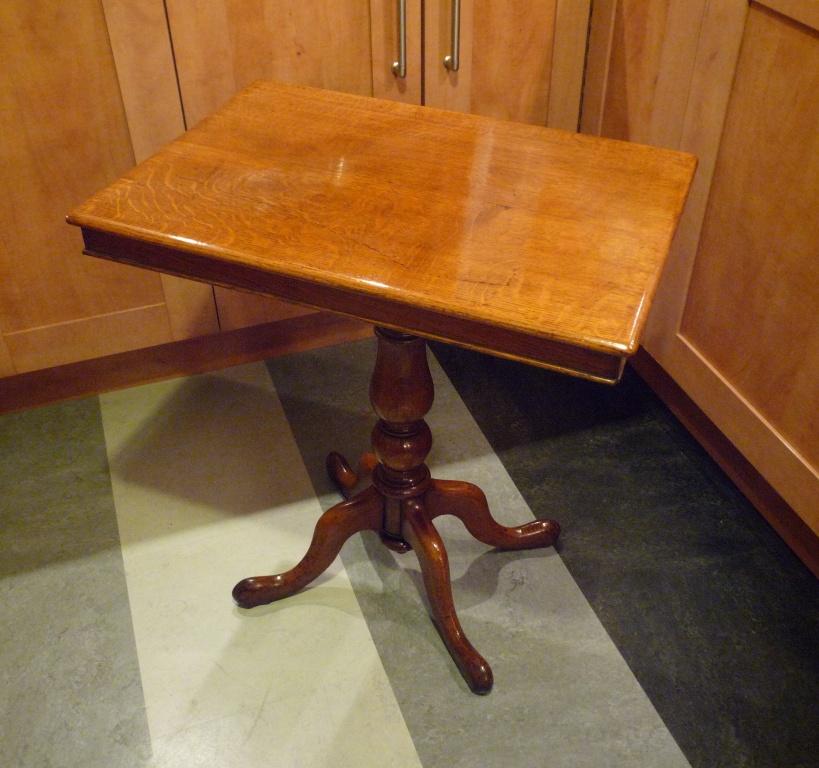
The most straightforward piece was the plinth
piece. The wood repairs were simple and new, albeit old-style animal
glue, glue was used to repair the frame parts. The top was revived and
received a number of coats of French Polish. This made the colour more
vivacious but didn't overwhelm the natural beauty of the wide pores and
figure of the Oak. The piece received two thorough waxing coats after
the finish had settled for some six weeks.
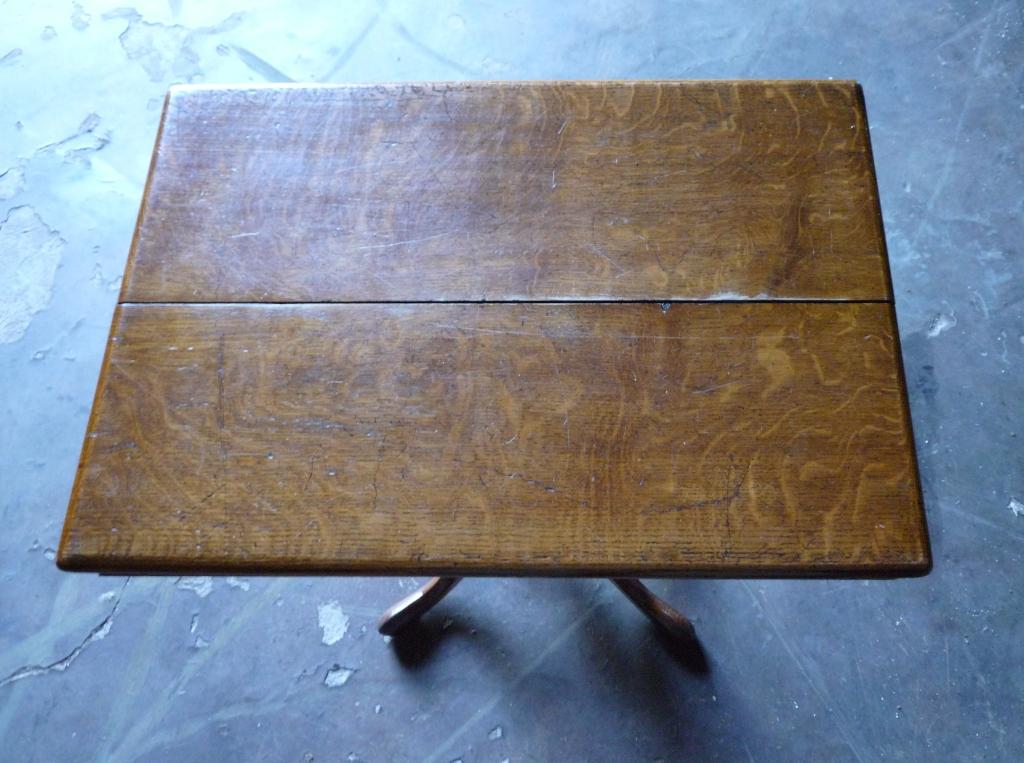
The most interesting piece to work on was the
quadrapod table. The irons were removed and I found that the top join
was perfectly s trong
without them. The top was on a very slight tilt but I decided to leave
it as it seemed perfectly in keeping with the piece's aged charm. The
top frame was removed, the crack was closed and the frame re-sized to
accommodate the slightly smaller dimensions. The leg crack was disguised
such that it wa trong
without them. The top was on a very slight tilt but I decided to leave
it as it seemed perfectly in keeping with the piece's aged charm. The
top frame was removed, the crack was closed and the frame re-sized to
accommodate the slightly smaller dimensions. The leg crack was disguised
such that it wa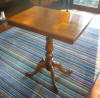 s
no longer a glaring scar. The top's patina and age acquired marks were
deemed worth preserving and so the new wood that had been exposed in
order to close and level the crack was treated in order to match the old
wood surface that remained. Once again the top was treated to several
coats of French Polish and two wax coats after the finish rested for six
weeks. The resultant lustre of the quarter sawn oak with its Medullary
rays is set off perfectly in the client's home where it sits on the
staircase, lit by the gentle light of a table lamp. s
no longer a glaring scar. The top's patina and age acquired marks were
deemed worth preserving and so the new wood that had been exposed in
order to close and level the crack was treated in order to match the old
wood surface that remained. Once again the top was treated to several
coats of French Polish and two wax coats after the finish rested for six
weeks. The resultant lustre of the quarter sawn oak with its Medullary
rays is set off perfectly in the client's home where it sits on the
staircase, lit by the gentle light of a table lamp.
The Walnut Twin Stool
I pr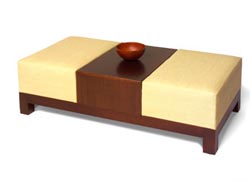 oduced
this for a furniture making colleague who was a bit shy of his normal
resources. A chunky pedestal base with a woode oduced
this for a furniture making colleague who was a bit shy of his normal
resources. A chunky pedestal base with a woode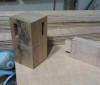 n
cube separating the cushions at either end. This was going to have to be
made in veneer. Plywood would be used for the pedestal as it would have
sufficient strength. Oak would be used as the base wood for the legs as
this would give it a bit of weight. The central cube would be plywood. n
cube separating the cushions at either end. This was going to have to be
made in veneer. Plywood would be used for the pedestal as it would have
sufficient strength. Oak would be used as the base wood for the legs as
this would give it a bit of weight. The central cube would be plywood.
The pedestal was morticed and ten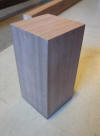 oned.
The legs were veneered and had solid Walnut at their bases to stop the
veneer chipping out. You can just see it in the close-up photograph.
Apart from protecting the veneer I think it always looks better anyway.
The Walnut veneer is continuous grain from the front of the cube to the
back. oned.
The legs were veneered and had solid Walnut at their bases to stop the
veneer chipping out. You can just see it in the close-up photograph.
Apart from protecting the veneer I think it always looks better anyway.
The Walnut veneer is continuous grain from the front of the cube to the
back.
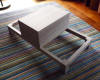 The
veneer was not quite wide enough to cover the width so two leaves were
bookmatched. It always gives a nice pattern. The
veneer was not quite wide enough to cover the width so two leaves were
bookmatched. It always gives a nice pattern.
The lacquering and upholstery was to be
completed by my colleague, so I don't have photos of the piece in its
finished state but I am hoping for one soon.
A Cluster of Chunky Scottish Oak stools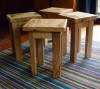
More stools for a fishing bothy. These are made with character grade Oak. I
choose pieces of Oak that may have slight flaws in them, feather cracks
in the surface for instance, as it is less important to strive for
perfection on a stool for one's bottom I think. It makes excellent use
of the wood and provides stools at a pleasant price for the client. The
stools are sized according to the available wood and are flatted on each
side and contoured to eliminate snags, flaws and to increase comfort.
They are finished with oil and wax. They are substantial with very good
weight and stability.
stools for a fishing bothy. These are made with character grade Oak. I
choose pieces of Oak that may have slight flaws in them, feather cracks
in the surface for instance, as it is less important to strive for
perfection on a stool for one's bottom I think. It makes excellent use
of the wood and provides stools at a pleasant price for the client. The
stools are sized according to the available wood and are flatted on each
side and contoured to eliminate snags, flaws and to increase comfort.
They are finished with oil and wax. They are substantial with very good
weight and stability.
And more boards...
A couple of departures from my more
traditional approach to the quirky boards.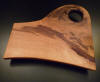
I had a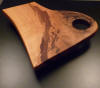 lovely piece of Oak with a rotten knot. It was spalted and the resultant
colour and figure were just too tempting. The board is basically a bit
of tree. More a bit of tree than usual. The knot area became the handle
and, whilst you can't see it well in the picture, the handle area is
raised at an angle from the surface so that it is easier to get your
fingers underneath. There is also a dipped area which is designed to
gather any juices or water that are part of the chopping process.
lovely piece of Oak with a rotten knot. It was spalted and the resultant
colour and figure were just too tempting. The board is basically a bit
of tree. More a bit of tree than usual. The knot area became the handle
and, whilst you can't see it well in the picture, the handle area is
raised at an angle from the surface so that it is easier to get your
fingers underneath. There is also a dipped area which is designed to
gather any juices or water that are part of the chopping process.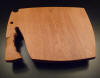
I had another request for a big board. Its
made from Oak and at 12" by 17" is about as big as you can get without
needing two hands to hold it. Simple design and very practical I think.
Moving m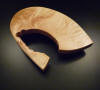 ore
into the line of cheeseboards, less messy boards as it were. I have
produced this Rippled Sycamore cheeseboard. Sycamore is a lot lighter
than Oak and is therefore more easy to handle of a size. It also
occasionally produces the most enchanting patterns in the grain. Some
people call them ripples, some people call them flames. It is an unusual
wood to use for this purpose but I believe that the aesthetic effect is
wonderful. With an oil finish the board is iridescent. As with a lot of
figure and grain effects it looks better in the wood than in the
photograph. ore
into the line of cheeseboards, less messy boards as it were. I have
produced this Rippled Sycamore cheeseboard. Sycamore is a lot lighter
than Oak and is therefore more easy to handle of a size. It also
occasionally produces the most enchanting patterns in the grain. Some
people call them ripples, some people call them flames. It is an unusual
wood to use for this purpose but I believe that the aesthetic effect is
wonderful. With an oil finish the board is iridescent. As with a lot of
figure and grain effects it looks better in the wood than in the
photograph.
An Oak Low Table
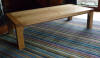 This
piece is in solid Oak with a Walnut inlay. The remit was to have
something This
piece is in solid Oak with a Walnut inlay. The remit was to have
something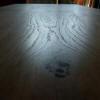 with a contemporary Arts and Crafts feel. The piece doesn't actually
look quite the same as in the photographs. When the piece was delivered
the client decided that they were not happy with the curved leg
supports. And so the piece was modified at their home over a period of a
couple of days. Fortunately I often use hide glue for such fixings and
on this occasion I was able remove the pieces with as little damage as
possible. The small amount of damage was repaired and a plate of Walnut
was dropped from each Walnut valance under the top and we all agree it
looks better for it. Only thing is, of course, I forgot to take a
photograph. I shall see to this on a special visit.
with a contemporary Arts and Crafts feel. The piece doesn't actually
look quite the same as in the photographs. When the piece was delivered
the client decided that they were not happy with the curved leg
supports. And so the piece was modified at their home over a period of a
couple of days. Fortunately I often use hide glue for such fixings and
on this occasion I was able remove the pieces with as little damage as
possible. The small amount of damage was repaired and a plate of Walnut
was dropped from each Walnut valance under the top and we all agree it
looks better for it. Only thing is, of course, I forgot to take a
photograph. I shall see to this on a special visit.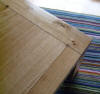
 The
top is made from consecutive boards of Scottish Oak. In this way I was
able to "bookmatch" as you see in the photographs. Since the boards are
thick I couldn't quite get a perfect bookmatch but I am very happy with
it all the same. The Walnut inlay extended to diamonds on the surface at
the capped ends and pegs on the ends themselves. The wood of the
end caps is very pretty. All joins had a Walnut inlay as a highlight.
Blocks of Walnut were also set i The
top is made from consecutive boards of Scottish Oak. In this way I was
able to "bookmatch" as you see in the photographs. Since the boards are
thick I couldn't quite get a perfect bookmatch but I am very happy with
it all the same. The Walnut inlay extended to diamonds on the surface at
the capped ends and pegs on the ends themselves. The wood of the
end caps is very pretty. All joins had a Walnut inlay as a highlight.
Blocks of Walnut were also set i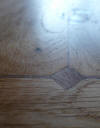 nto
the legs and into the sides of the top to add a little more decoration.
A thin line of Walnut inlay was laid into the legs but such was the
grain you can barely see it. All of the Walnut was hand laid. That is,
with a chisel, saw and knife. This is quite laborious but the net effect
is of inlays that I feel are a little more natural looking. More like in nto
the legs and into the sides of the top to add a little more decoration.
A thin line of Walnut inlay was laid into the legs but such was the
grain you can barely see it. All of the Walnut was hand laid. That is,
with a chisel, saw and knife. This is quite laborious but the net effect
is of inlays that I feel are a little more natural looking. More like in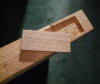 lay
that you would see on a classical piece of furniture. They do not look,
I hope, machine routed and have the blessing of occasional imperfections
that hand making enjoys. The Arts and Crafts movement was all about
moving away from an industrial nature of furniture production and so I
felt that the table should be made in just that way. Art for arts sake
as they like to say. lay
that you would see on a classical piece of furniture. They do not look,
I hope, machine routed and have the blessing of occasional imperfections
that hand making enjoys. The Arts and Crafts movement was all about
moving away from an industrial nature of furniture production and so I
felt that the table should be made in just that way. Art for arts sake
as they like to say.
An Oak Bench
A bench for the family in solid Oak. Based on
my learnings when I was instructed in Sant Julia in the
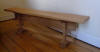 making
of such Catalan furniture. The whole thing is held together with
friction and wedges. The top/seat should be held in place using sliding
dovetails but at the price I was charging for this piece I couldn't
justify the extra work involved. The broad board under the seat is a bit
of wild quarter sawn Oak that I had in the workshop. The setting for the
bench is sufficiently informal that I could get away with using a bit of
mad wood to make sure the seat doesn't bow. Once the bench has settled
into its home and acclimatises to the house's heating arrangements I
replace the plain wedges with more ornamental ones. making
of such Catalan furniture. The whole thing is held together with
friction and wedges. The top/seat should be held in place using sliding
dovetails but at the price I was charging for this piece I couldn't
justify the extra work involved. The broad board under the seat is a bit
of wild quarter sawn Oak that I had in the workshop. The setting for the
bench is sufficiently informal that I could get away with using a bit of
mad wood to make sure the seat doesn't bow. Once the bench has settled
into its home and acclimatises to the house's heating arrangements I
replace the plain wedges with more ornamental ones.
A Victorian English Bagatelle Table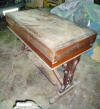
This was a family heirloom which had seen
some pretty bad treatment over the years and had end ed
up spending its life as a workbench and had lain in a wet shed. The
damage was extensive to the table and the base. I have a suspicion that
the table started out as simply the folding top. Many tables of the
period were of that nature. I think that the table was married to the
base in later life as some of the work to the base was a little r ed
up spending its life as a workbench and had lain in a wet shed. The
damage was extensive to the table and the base. I have a suspicion that
the table started out as simply the folding top. Many tables of the
period were of that nature. I think that the table was married to the
base in later life as some of the work to the base was a little r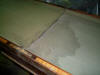 ough,
especially where the base let the tabl ough,
especially where the base let the tabl e
slide back and forth. there were also quite distinct differences in
colour and finish on parts of the base compared to that on the top. e
slide back and forth. there were also quite distinct differences in
colour and finish on parts of the base compared to that on the top.
The base had been beaten up, kicked and had
been treated to some form of oil or grease staining over the years. The
table had an enormous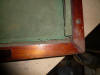 shrinkage crack that had been attempted to be filled previously. The
Rosewood veneer was cracked and lifting, the baize had been ripped and
had been soaked with water and the cushions were rotten rubber and
decaying timber. The pictures speak for themselves.
shrinkage crack that had been attempted to be filled previously. The
Rosewood veneer was cracked and lifting, the baize had been ripped and
had been soaked with water and the cushions were rotten rubber and
decaying timber. The pictures speak for themselves.
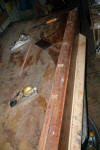
The base was stripped with the most
outrageous damage repaired. The piece d eserved
to still show some good age, a sympathetic restoration, so not all
damage was put back to new, much was softened and made less obvious to
the eye. eserved
to still show some good age, a sympathetic restoration, so not all
damage was put back to new, much was softened and made less obvious to
the eye.
The table top was stripped of finish. The
baize, cushions and scoring cups were removed. The original bone marker
spots were dug out of the timber where they had been impact ed
and polished and re-set. One whole side of veneer was removed so that
the crack could be repaired. The crack was cleaned and closed slightly.
Walnut strengthening keys were set in to the top so that the crack could
never open again. ed
and polished and re-set. One whole side of veneer was removed so that
the crack could be repaired. The crack was cleaned and closed slightly.
Walnut strengthening keys were set in to the top so that the crack could
never open again.
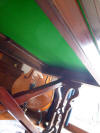 The
crack was filled The
crack was filled
 with
fillets of woo with
fillets of woo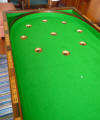 d
and planed flat. The veneer was re-laid and repaired all around the
table top. New baize was laid a d
and planed flat. The veneer was re-laid and repaired all around the
table top. New baize was laid a nd
the scoring cups were touched up and re-lacquered. New cushions were
constructed using billiard tables rubber. A replacement key was found.
New balls, cues and scoring pegs were procured from a variety of
suppliers. The exterior of the table was coloured up to try to attain a
more even colour across the piece. A light French polish and a thorough
beeswax polish were applied. nd
the scoring cups were touched up and re-lacquered. New cushions were
constructed using billiard tables rubber. A replacement key was found.
New balls, cues and scoring pegs were procured from a variety of
suppliers. The exterior of the table was coloured up to try to attain a
more even colour across the piece. A light French polish and a thorough
beeswax polish were applied.
A Scottish Walnut Music Stand

The husband of a couple who had purch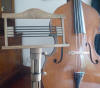 ased
a simple little Elm table from me some years ago approached me and asked
me to make a music stand for his wife's birthday. A very important
birthday. I am fortunate to have some very rare and pretty Scottish
Walnut seasoning in my store and I suggested that this would be the
ideal ased
a simple little Elm table from me some years ago approached me and asked
me to make a music stand for his wife's birthday. A very important
birthday. I am fortunate to have some very rare and pretty Scottish
Walnut seasoning in my store and I suggested that this would be the
ideal
 wood
for the project. Combined with Ebony the pairing would be very
classically pretty. His wife has very esoteric taste and it was decided
to make something simple and contemporary. Everything on this piece was
hand craf wood
for the project. Combined with Ebony the pairing would be very
classically pretty. His wife has very esoteric taste and it was decided
to make something simple and contemporary. Everything on this piece was
hand craf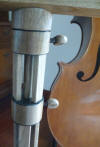 ted
and as a result very unique. The tightening pegs were threaded using
African Ebony and set into the chunky Walnut handles. The Ebony was used
to provide most of the highlights and Japanese pegs were used to secure
a number of the joints. The front of the manuscript holder will be faced
at either side of the stave with marquetry panels that will personalise
what will be, I hope, a family heirloom. ted
and as a result very unique. The tightening pegs were threaded using
African Ebony and set into the chunky Walnut handles. The Ebony was used
to provide most of the highlights and Japanese pegs were used to secure
a number of the joints. The front of the manuscript holder will be faced
at either side of the stave with marquetry panels that will personalise
what will be, I hope, a family heirloom.
|